How to Create a Java Service Installer (MSI or EXE)
The following article uses options that are available starting with the Professional edition and project type.
Let's say that we want to create a Windows Installer package for the included Java Service example. This tutorial will present in detail how we can create and build an MSI package for our application. To replicate it on your machine, you need to have a (latest) Sun JDK installed.
To start the tutorial, you must first download and unzip the Java Service Example. It contains all the files necessary to accomplish this tutorial, including a sample Advanced Installer project.
- 1. Prepare a Java application for running as a service
- 2. Create project
- 3. Enter Product Details
- 4. Set Install Parameters
- 5. Add Installation Files
- 6. Define Java Products
- 7. Define the Service
- 8. Java Development Kit Prerequisite
- 9. Build the Java Service MSI Installer
- 10. Run, test, and remove
- 11. Video Tutorial
- 12. Related page to check
1. Prepare a Java application for running as a service
You have the choice of using the supplied example application or making your own. For a Java application to work correctly as a service you must implement two methods in its main class:
public static void main(String argv[])
{
  // implementation goes here
}

public static void stop()
{
  // implementation goes here
} The main() method will be called when the service starts and, the stop() method will be called when service must stop, or the computer is shutting down. If you don't provide the stop() method which we recommend, Advanced Installer's native Java launcher will call the System.exit method instead.
2. Create project
Start Advanced Installer and choose “Java” > “Java Application” as the project type.

![]() A good idea is to save and name the project at this point. Use the “Save” menu
item under the “File” menu or the Ctrl+S keyboard shortcut
and let's name it javaserviceexample.aip.
A good idea is to save and name the project at this point. Use the “Save” menu
item under the “File” menu or the Ctrl+S keyboard shortcut
and let's name it javaserviceexample.aip.
4. Set Install Parameters
![]() Get to the Install Parameters page by clicking “Install
Parameters” in the left pane. We won't change anything here, leaving everything
to their default values.
Get to the Install Parameters page by clicking “Install
Parameters” in the left pane. We won't change anything here, leaving everything
to their default values.
5. Add Installation Files
![]() Go to the Files and Folders page by clicking in “Files and
Folders” on the left pane.
Go to the Files and Folders page by clicking in “Files and
Folders” on the left pane.
![]() Right click “Application Folder” and select “Add
Files”. Browse to where you unzipped the Java Service example then go to the lib
folder and select the Java Services example jar archive "javaservice.jar". Click
OK.
Right click “Application Folder” and select “Add
Files”. Browse to where you unzipped the Java Service example then go to the lib
folder and select the Java Services example jar archive "javaservice.jar". Click
OK.

6. Define Java Products
![]() Go to the Java Products page by clicking on “Java Products” on the left
side page menu.
Go to the Java Products page by clicking on “Java Products” on the left
side page menu.
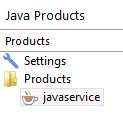
![]() Create a new by clicking on the New Product
toolbar button. Let's call it javaservice.
Create a new by clicking on the New Product
toolbar button. Let's call it javaservice.

Click on the button and browse to and select the javaservice.jar file. Click OK.
Edit the Main class to com.caphyon.service.JavaService.
At the application type select “Win32 Service”.

Now a new file has appeared in the Files and Folders Page: javaservice.exe.
If the service terminates unexpectedly from time to time, or when the user logs off, the
Java Virtual Machine may receive incorrect signals. This can be fixed by using the
Reduced usage of operating-system signals (-Xrs) option in the Edit JVM Parameters dialog (it can be launched
from the Virtual Machine tab).
7. Define the Service
![]() Select “Services” from “Resources” menu on the left pane.
Select “Services” from “Resources” menu on the left pane.
7.1 Install a new service
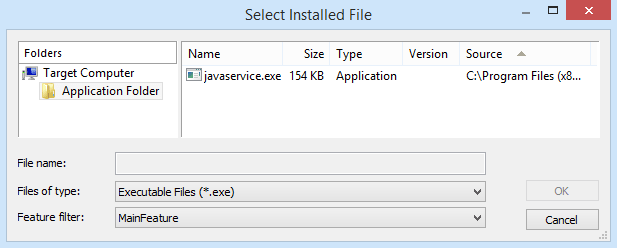
![]() Right click on “Services to Install” and select
“New Service Installation”. In the “Select Installed File
Dialog” click on “Application Folder” and select
"javaservice.exe".
Right click on “Services to Install” and select
“New Service Installation”. In the “Select Installed File
Dialog” click on “Application Folder” and select
"javaservice.exe".

8. Java Development Kit Prerequisite
Make sure you have the Java Development Kit(JDK) on the machine you want to deploy your Java service. The best way to do this is to add the JDK as a prerequisite to your package by going to the Prerequisite Page in Advanced Installer as selecting the Java Runtime Environment latest version.
If you plan only to test the Java service on your local machine and, you already have
the JDK installed, this step is optional.
10. Run, test, and remove
Click on the toolbar button to run and test the MSI you created. After installation, you should have a new service installed.
To test the application open console and enter the following command: telnet localhost 4444. You should see:
Java Service is running

Connection to host lost
You also can build Java Service Example MSI package using ant. Open a console window and change current directory to the directory where you unzipped the Java Service example archive. Execute the following command: ant msi
To remove the installed package, simply press Run again and select Remove.


