Creating a setup package for a Tomcat web application
The following article uses options that are available starting
with the Professional edition and project
type.
Let's say you have a web application (exported as a WAR file) that you want to deploy it alongside an Apache Tomcat 9 web server. This tutorial will present in detail how to achieve this goal.
- 1. Get the Tomcat 9 binary distribution resources
- 2. Create project
- 3. Add Tomcat 9 files and folders to your project
- 4. Add Tomcat 9 install folder to CATALINA_HOME environment variable
- 5. Add Java Runtime Environment prerequisite
- 6. Configure launch conditions
- 7. Configure Tomcat 9 service
- 8. Launch the web application at the end of the installation
1. Get the Tomcat 9 binary distribution resources
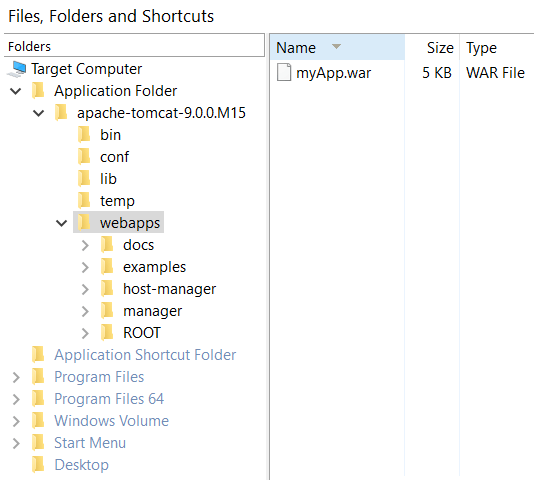
To deploy within your setup package the Tomcat 9 web server, you must first download locally the Tomcat binary distribution resources for Windows from Apache web site. For instance, you can download the 32-bit Windows zip package of Tomcat and extract it on your local disk. After extracting the Tomcat web server resources just add your web application WAR file under "webapps" folder of Tomcat.
2. Create project
After launching Advanced Installer, you will be presented with a dialog where you can choose the type of the project you want to create.

Select Professional and press the Create Project button. The new project has been created and from now on you will edit it.
![]() Save the project and give it an
appropriate name - let's say "Tutorial" for this example.
Save the project and give it an
appropriate name - let's say "Tutorial" for this example.
English is the default project language, but you can change it to any of the languages known by Advanced Installer.
3. Add Tomcat 9 files and folders to your project
![]() Select “Files and
Folders” page from the “Resources” menu on
the left pane.
Select “Files and
Folders” page from the “Resources” menu on
the left pane.
![]() Use the toolbar button and add the Tomcat 9 distribution
folder to your project.
Use the toolbar button and add the Tomcat 9 distribution
folder to your project.
4. Add Tomcat 9 install folder to CATALINA_HOME environment variable
![]() Go to
“Environment” page.
Go to
“Environment” page.
![]() Use the toolbar button
to add the "CATALINA_HOME" system variable. Right click on the
"Value" field of the "New Environment Variable"
dialog and choose the "Folder..." context menu option. Next
choose the Tomcat 9 folder added in “Files and Folders”
page and click the button.
Use the toolbar button
to add the "CATALINA_HOME" system variable. Right click on the
"Value" field of the "New Environment Variable"
dialog and choose the "Folder..." context menu option. Next
choose the Tomcat 9 folder added in “Files and Folders”
page and click the button.

5. Add Java Runtime Environment prerequisite
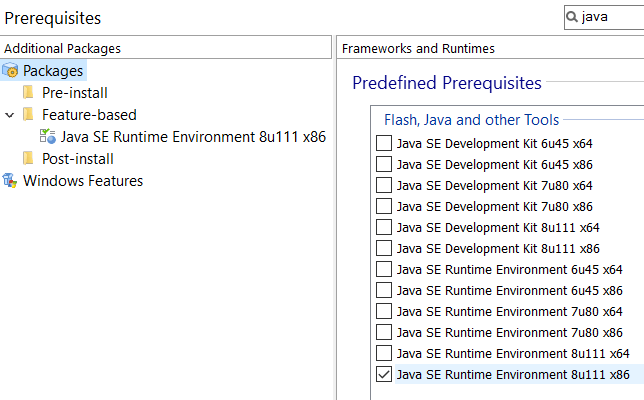
![]() Go to
“Prerequisites” page and add our "Java SE
Runtime Environment 8u111 x86" predefined prerequisite to your
project.
Go to
“Prerequisites” page and add our "Java SE
Runtime Environment 8u111 x86" predefined prerequisite to your
project.
6. Configure launch conditions
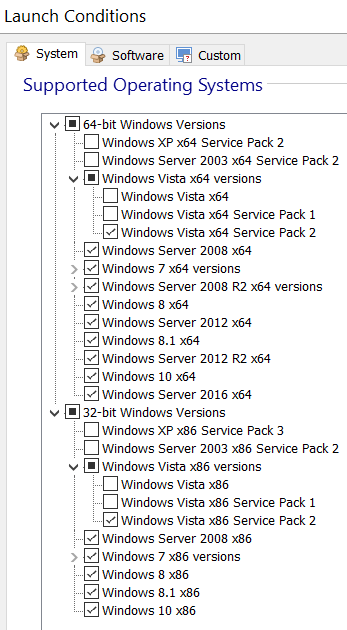
"Java SE Runtime Environment 8u111 x86" prerequisite can be deployed only on Windows Vista SP2 and newer operating systems, thus you should add these launch conditions to your setup project.
![]() Go to “Launch Conditions” page and
uncheck the unsupported operating systems of your setup project.
Go to “Launch Conditions” page and
uncheck the unsupported operating systems of your setup project.
7. Configure Tomcat 9 service
Tomcat 9 can be installed and configured as a service using its "tomcat9.exe" and "service.bat" installation files. For more details go through Configure Tomcat as a service article.
![]() Go to “Custom
Actions” page and use several "Launch file" custom
actions configured to install and start the Tomcat service during
installation, respectively to delete the Tomcat service on
uninstall.
Go to “Custom
Actions” page and use several "Launch file" custom
actions configured to install and start the Tomcat service during
installation, respectively to delete the Tomcat service on
uninstall.
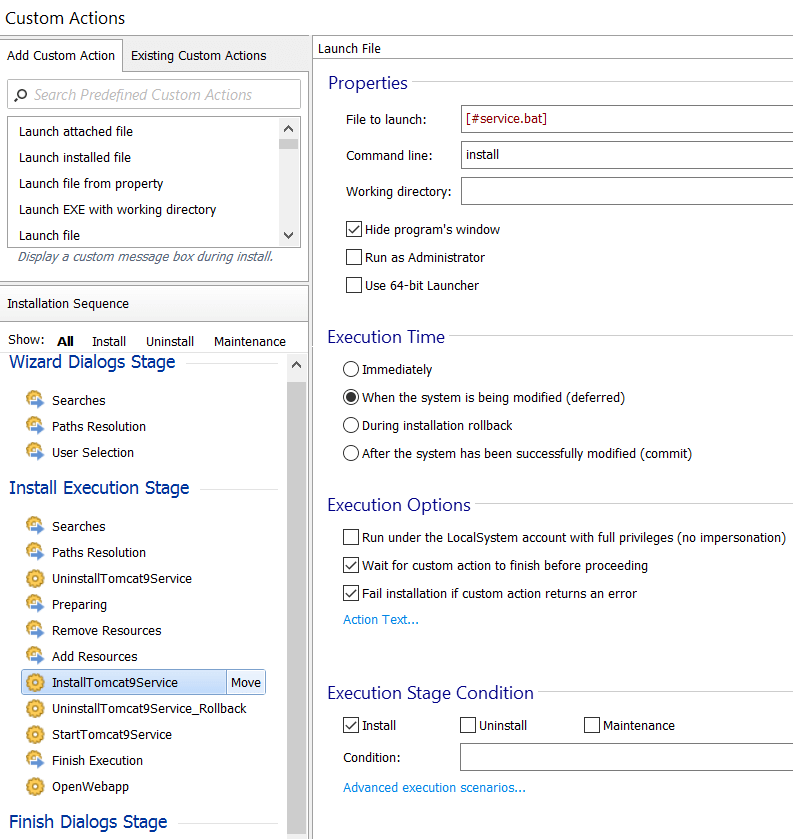
7.1 Add install service custom action on install
Add a "Launch file" custom action with sequence which will launch the "service.bat" installation file with the install command.
7.2 Add uninstall service custom action on rollback
Add a "Launch file" custom action with sequence which will launch the "tomcat9.exe" installation file with the //DS//Tomcat9 command. This custom action uninstalls the installed service at install time when something goes wrong and the installation is rolled back.

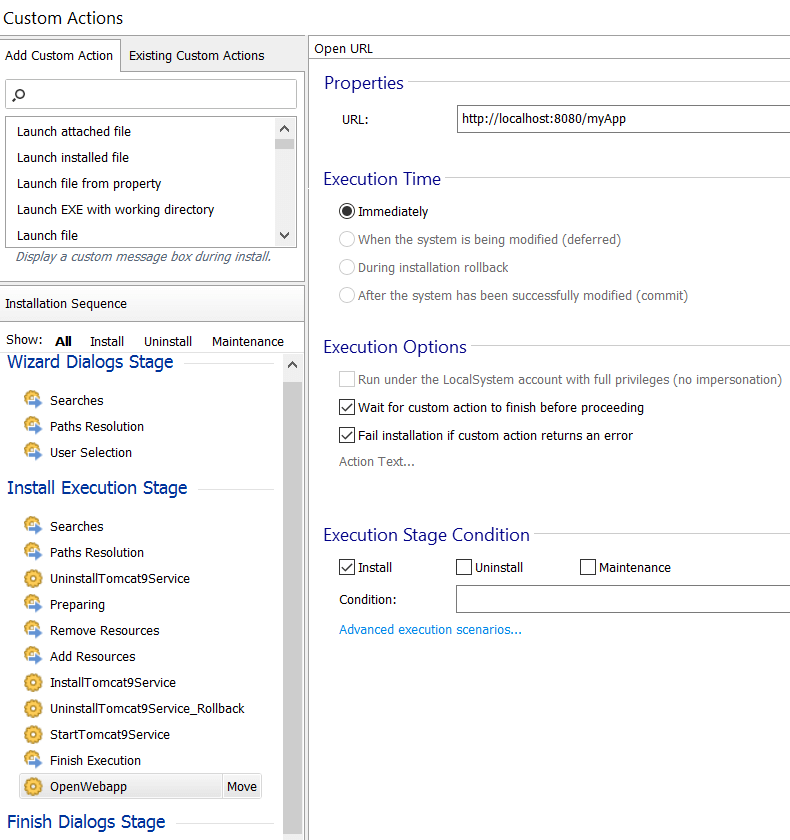
8. Launch the web application at the end of the installation
You may want to automatically launch the installed web application when the installation finishes. To do so you can use an "Open URL" custom action with sequence scheduled after the "Finish Execution" action group.
