


Hi,
I have add a drivers in my installer ( driver => CP210)
So I put all files needed in [APPDIR] and add my Driver in Drivers Component.
So it works but i would like remove the folder CP210 containing my driver after installation.
But I don't konw how to do that.
I tried to add my driver folder as temporary folder but in this case I can't add driver in Drivers componant (page).
Thanks for help me.
Suggested Articles
Re: Remove Folder after Install
Hello,
I am not quite sure I understand your scenario here. Could you please give me some more details (maybe exemplify through some screenshots) about what you want to achieve?
All the best,
Catalin
I am not quite sure I understand your scenario here. Could you please give me some more details (maybe exemplify through some screenshots) about what you want to achieve?
Did you add this folder (CP210) under the "Application Folder" in "Files and Folders" page? If yes, why do you need to delete it after installation?So it works but i would like remove the folder CP210 containing my driver after installation.
All the best,
Catalin
Re: Remove Folder after Install
I have the correct behavior in this configuration :
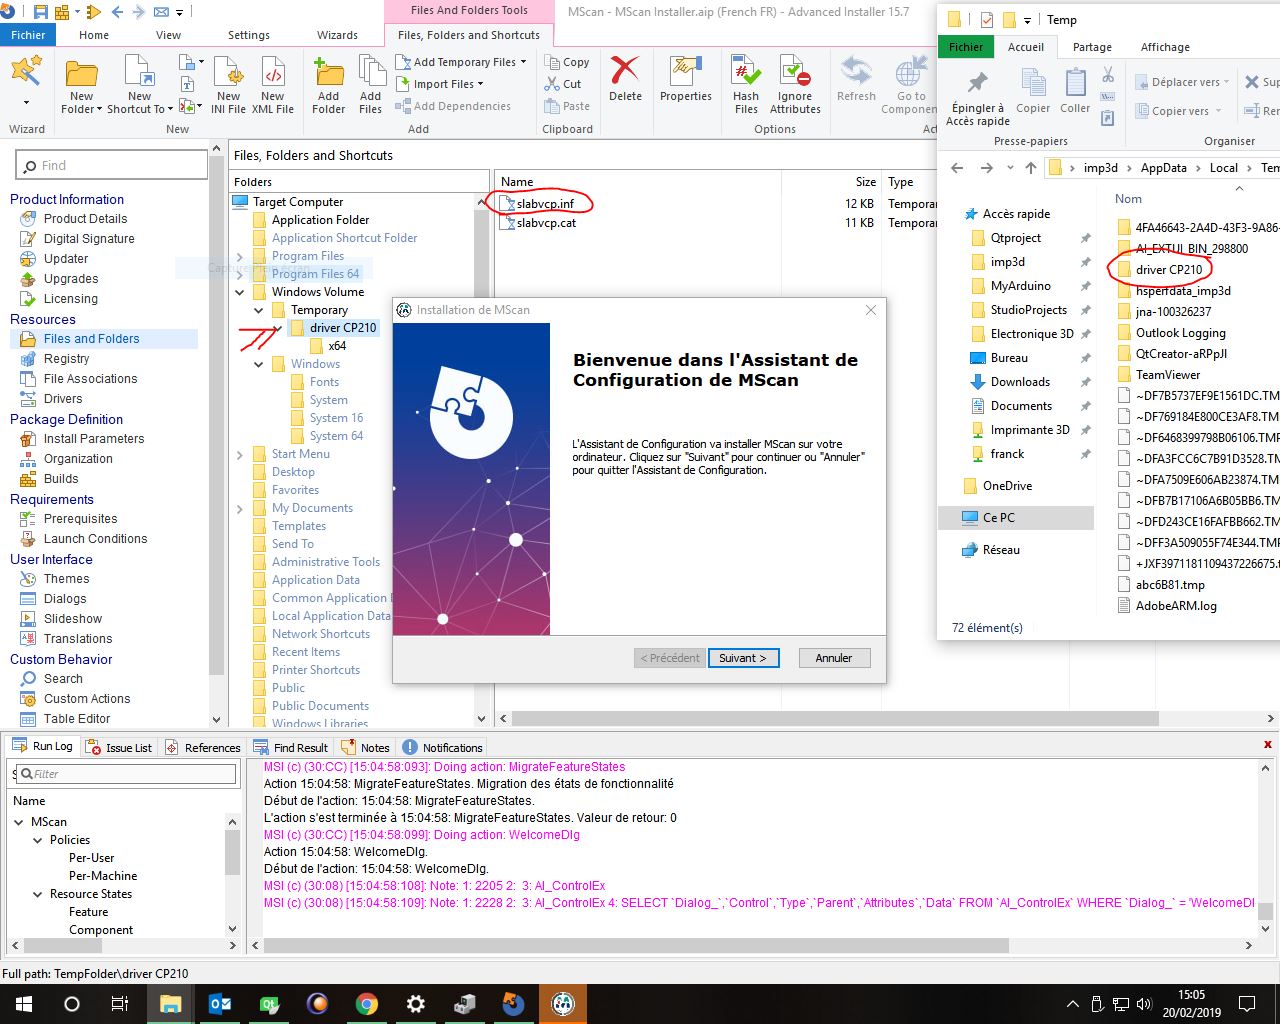
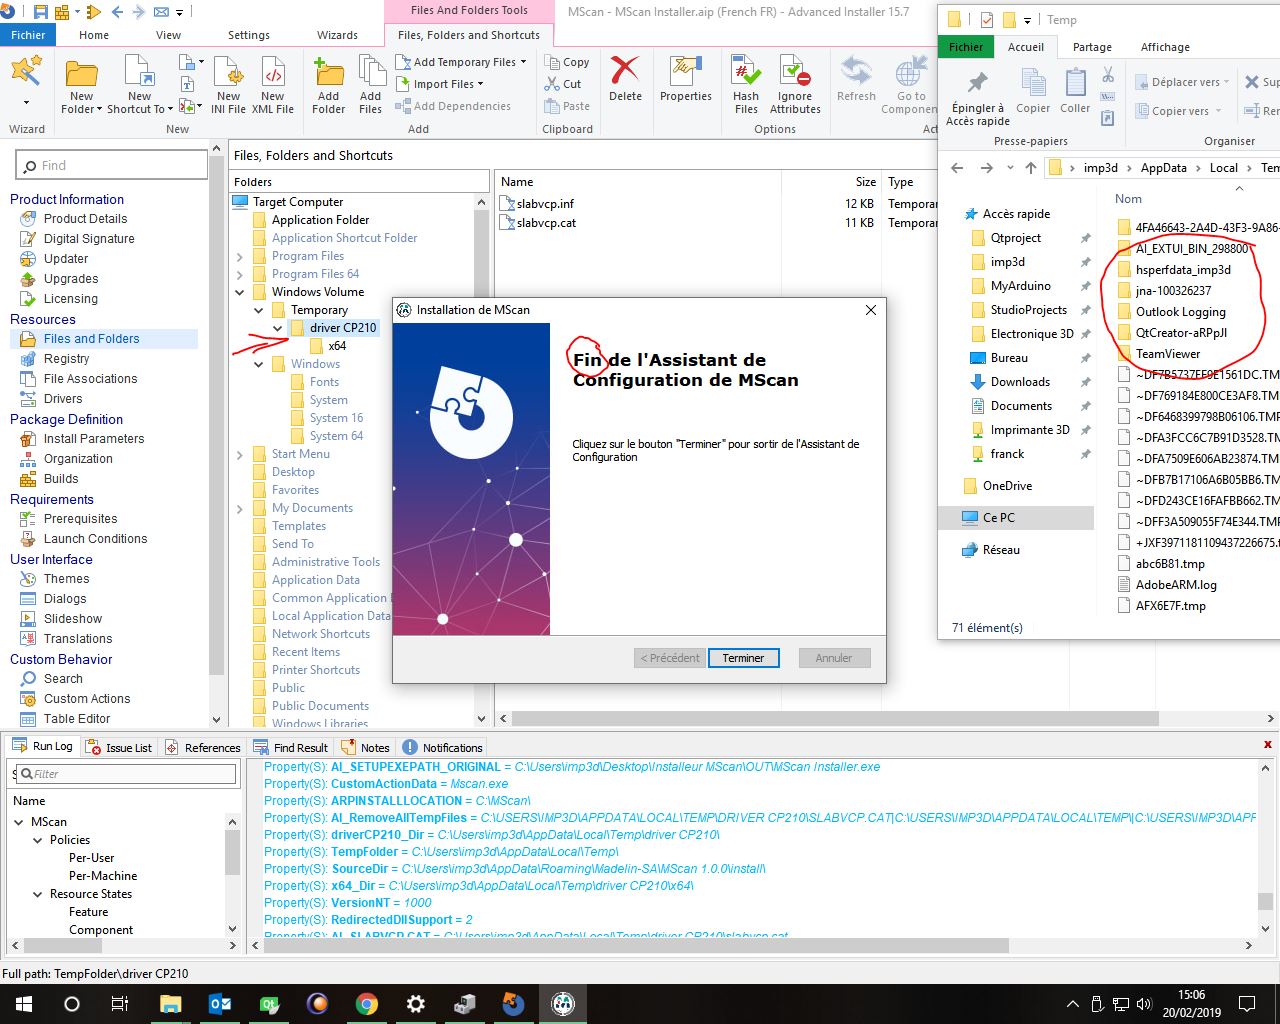
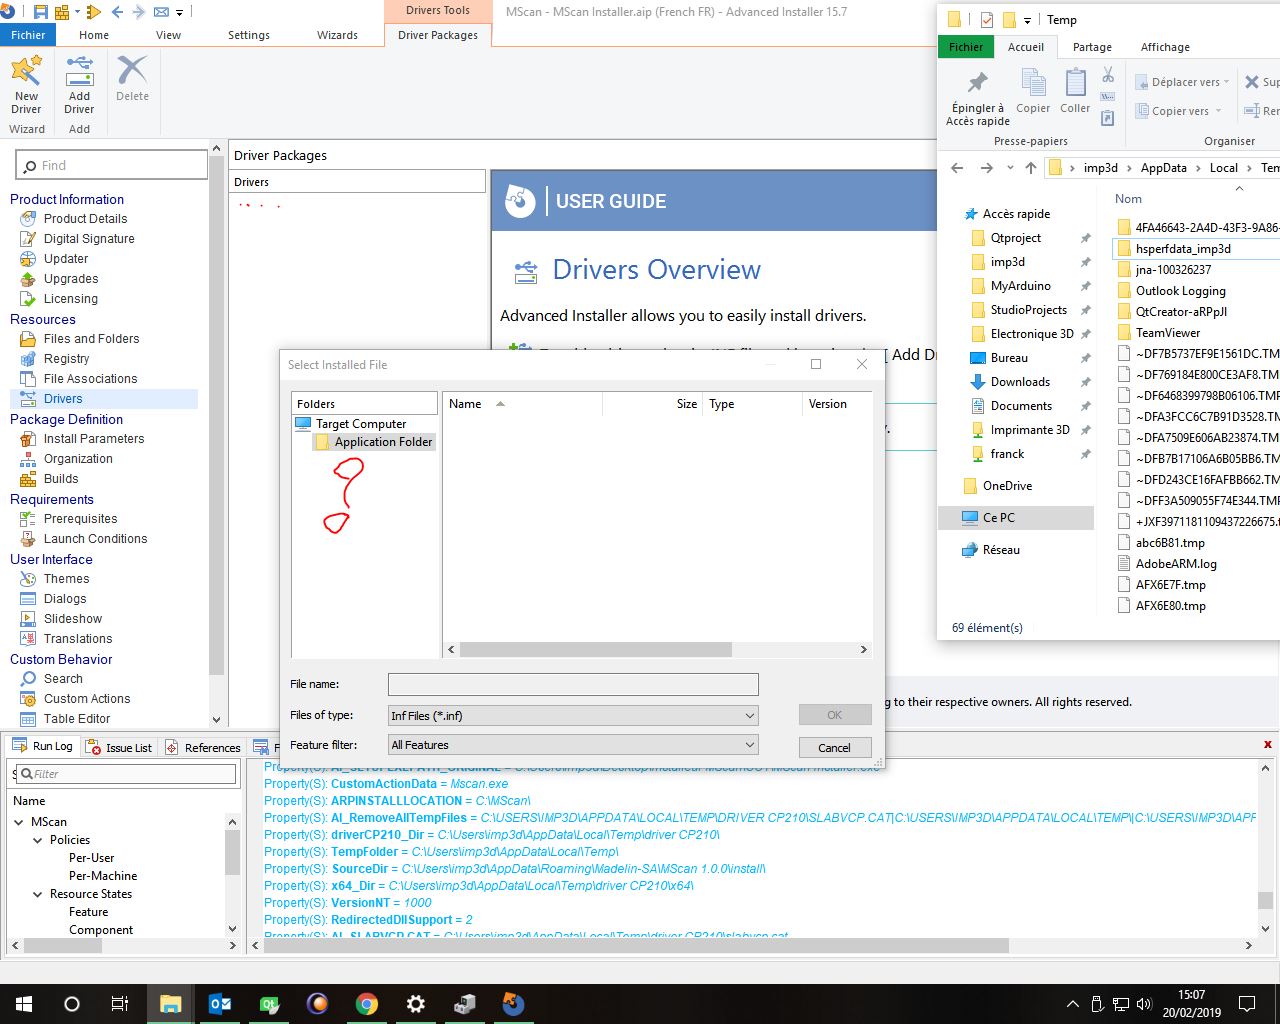
But with temporary folder I can't find my driver here =>
I try to put the folder in my APPDIR and try to use remove folder even if empty but it doesn't work.
The folder is removed after uninstall, but
I want remove this folder just after install is finished.
But with temporary folder I can't find my driver here =>
I try to put the folder in my APPDIR and try to use remove folder even if empty but it doesn't work.
The folder is removed after uninstall, but
I want remove this folder just after install is finished.
Re: Remove Folder after Install
Nobody can help me ?
Re: Remove Folder after Install
Hello,
First of all, I apologize for the delayed reply.
We can try to achieve this through a custom action that will delete your folder after the installation successfully ended. Here is how you can achieve this:
- Instead of adding your files as temporary files, you can create a new folder under "Application Folder" and add them there. To do so, please go to "Files and Folders" page --> right click on "Application Folder" --> "New folder" --> "Regular". Now rename your folder as per your needs (e.g. "driver CP210")
- Now that you have created your folder, it is time to create the custom action that will delete it after the installation. To do so, please go to "Cusotm Actions" page and add a "Run PowerShell inline script" custom action without sequence so we can trigger it from our exit dialog. In order to add a custom action without sequence, simply press the "Add custom action without sequence" button which is placed to the right side of the custom action's name.
- Here is the code that will delete the earlier created folder after the installation successfully ended:
You can copy-paste it under the "Your code goes here." comment. All you have to do is to replace "New Folder" with the name of your folder.
A little explanation: The full path to our folder is made up of two components and those are:
- the "Application Folder" which is stored in the "APPDIR" property.
- your folder.
The first line gets the value of the APPDIR property and stores it in the $appDIR variable. In the next line, we append our folder name to the $appDIR variable in order to obtain the full path to our folder. In the last line, we remove the folder using the "Remove-Item" cmdlet.
- The last step is to trigger the custom action from a dialog control. To do so, please go to "Dialogs" page --> click on "ExitDialog" --> click on the "Finish" button --> click on the "Published Events" tab --> click on "New..." --> select "Execute Custom Action" and as argument select the earlier created custom action. Leave the "Condition" field unchanged. After doing so, please schedule the event before the "Close the current dialog" event by selecting it and pressing the "Up" button.
Important: If the folder location is on C drive, you may need privileges in order to delete it. To do so, please go to "Install Parameters" page and tick the "Run as administrator" option from under the "Installation Options" section.
Hope this helps.
All the best,
Catalin
First of all, I apologize for the delayed reply.
We can try to achieve this through a custom action that will delete your folder after the installation successfully ended. Here is how you can achieve this:
- Instead of adding your files as temporary files, you can create a new folder under "Application Folder" and add them there. To do so, please go to "Files and Folders" page --> right click on "Application Folder" --> "New folder" --> "Regular". Now rename your folder as per your needs (e.g. "driver CP210")
- Now that you have created your folder, it is time to create the custom action that will delete it after the installation. To do so, please go to "Cusotm Actions" page and add a "Run PowerShell inline script" custom action without sequence so we can trigger it from our exit dialog. In order to add a custom action without sequence, simply press the "Add custom action without sequence" button which is placed to the right side of the custom action's name.
- Here is the code that will delete the earlier created folder after the installation successfully ended:
Code: Select all
$appDIR = AI_GetMsiProperty APPDIR
$path = $appDIR + "New Folder"
Remove-Item -path "$path" -recurseA little explanation: The full path to our folder is made up of two components and those are:
- the "Application Folder" which is stored in the "APPDIR" property.
- your folder.
The first line gets the value of the APPDIR property and stores it in the $appDIR variable. In the next line, we append our folder name to the $appDIR variable in order to obtain the full path to our folder. In the last line, we remove the folder using the "Remove-Item" cmdlet.
- The last step is to trigger the custom action from a dialog control. To do so, please go to "Dialogs" page --> click on "ExitDialog" --> click on the "Finish" button --> click on the "Published Events" tab --> click on "New..." --> select "Execute Custom Action" and as argument select the earlier created custom action. Leave the "Condition" field unchanged. After doing so, please schedule the event before the "Close the current dialog" event by selecting it and pressing the "Up" button.
Important: If the folder location is on C drive, you may need privileges in order to delete it. To do so, please go to "Install Parameters" page and tick the "Run as administrator" option from under the "Installation Options" section.
Hope this helps.
All the best,
Catalin


FOLLOW US
Get the latest news in Application Packaging