Using the dialog editor to customize your Windows app installer
Let’s say you have an application that has multiple features, and you want to give the end user the option to select which one to get installed.
You might also want to display custom text messages during the install wizard.
In this article, I am going to show you how to customize your installer using the Advanced Installer Dialog Editor.
 Important: Dialog Editor is available starting with Advanced Installer Enterprise Edition!
Scenario

For this demonstration, we have the following requirements:
- Company branding logo inside dialogs
- Custom EULA message agreement message with web link
- Three individual feature selections
- Custom text message at the end based on feature selection and condition
 Note: For this scenario, let’s say you already have the base Advanced Installer project created, including all necessary files and features.
Now, let’s take them one by one and see how the Advanced Installer Dialog Editor can help.
1. Company Branding Logo Inside Dialogs
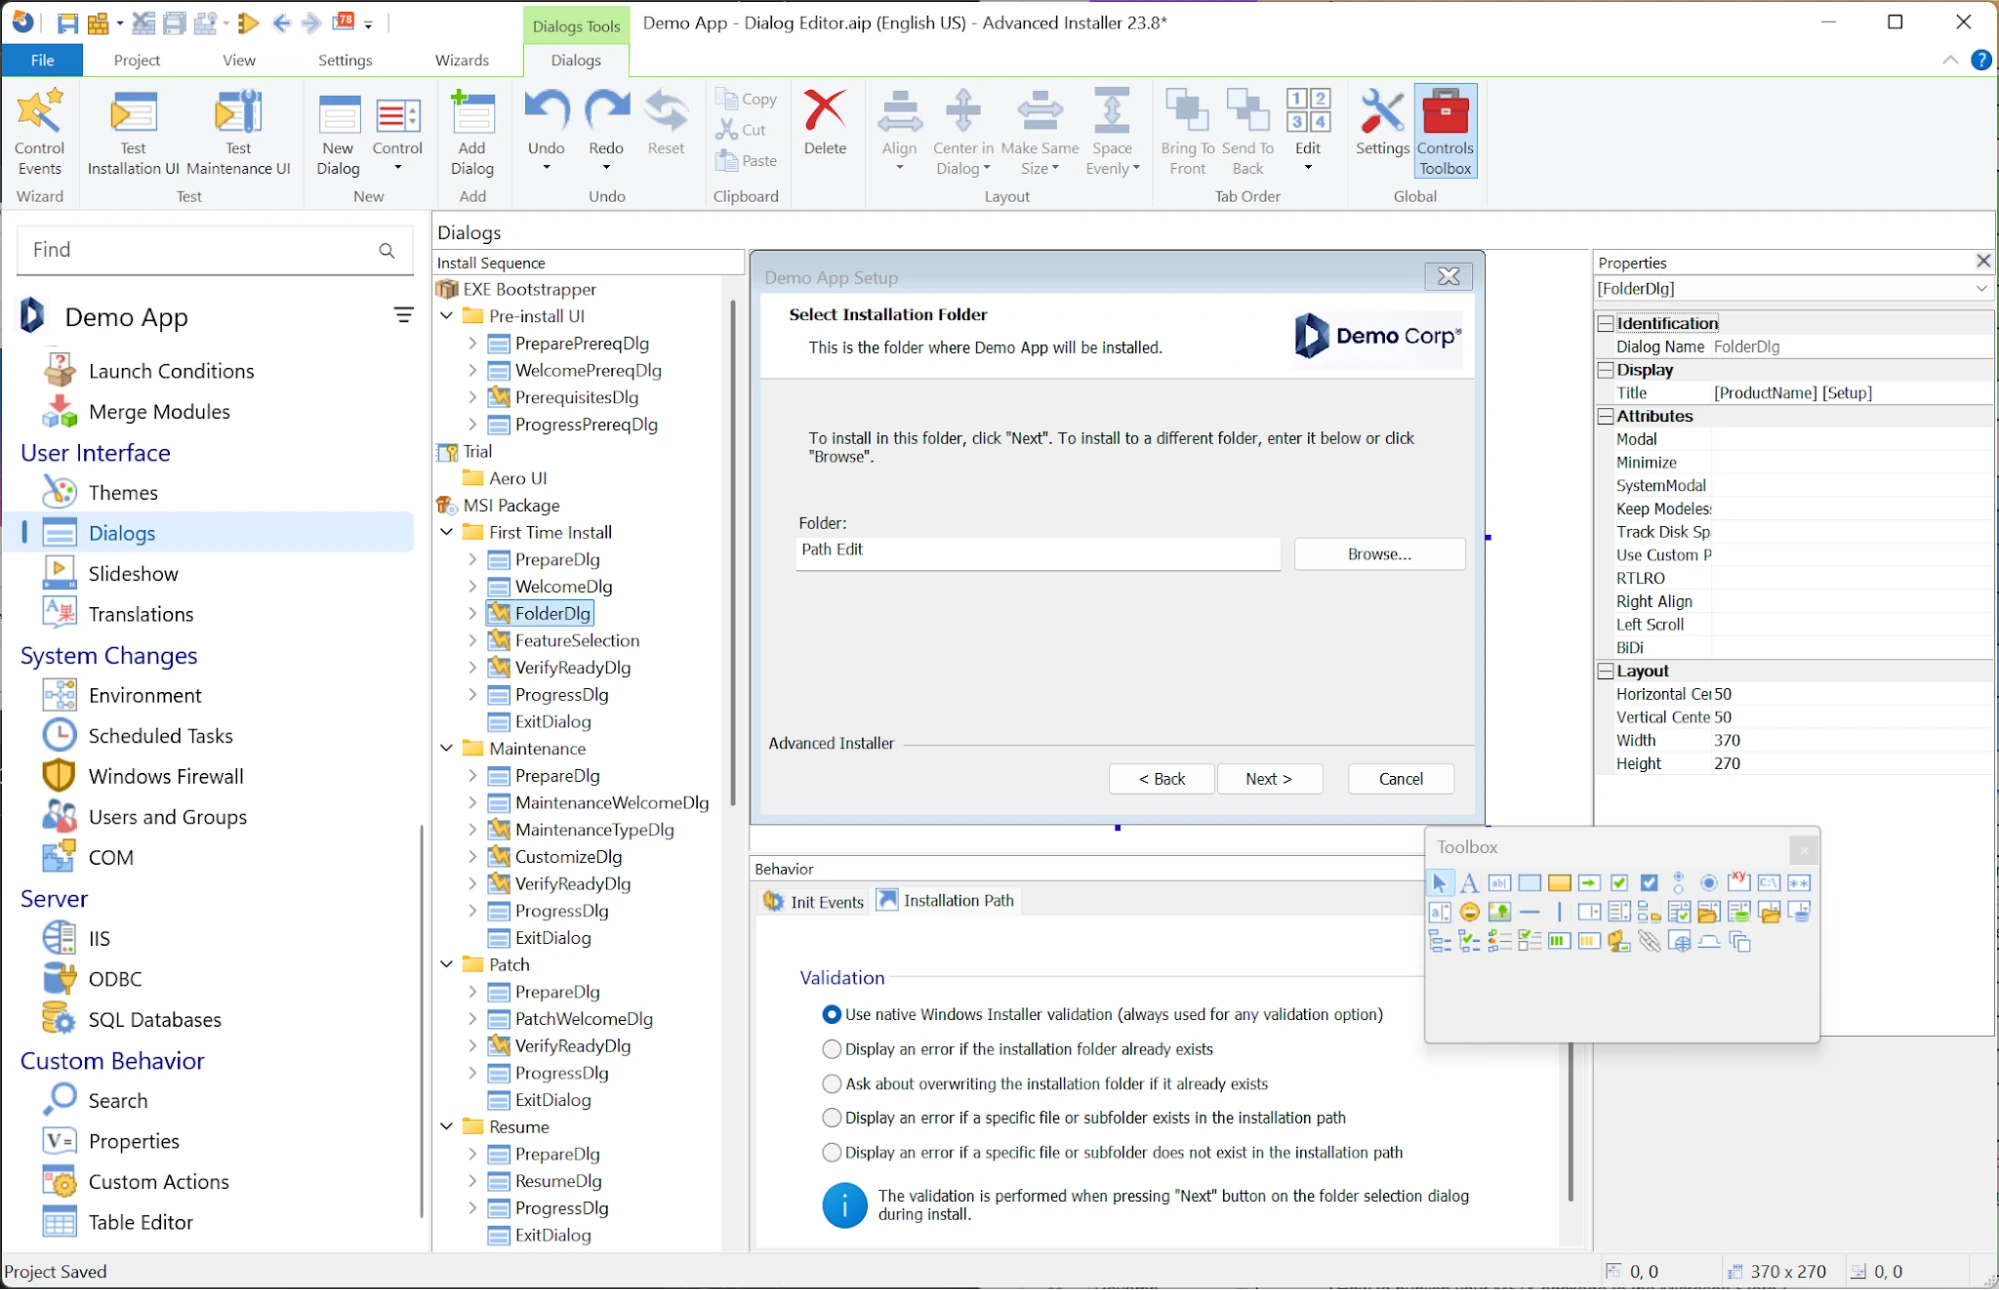
If you go to the User Interface -> Dialogs page and click on the Banners you want to customize, you will not find any options.
Instead, for this part, you actually need to go to the Themes page.

Here on the right side, you need to browse to the Dialog and Banner bitmap JPG files you have custom-designed previously.
Some “designer” work might need to be done to nail the exact spacing.
Once you are done, if you go back to the Dialogs page, you can see the changes reflected here.
2. Custom EULA Message Agreement Message with Web Link
Now, let’s add a custom text to inform the user that by clicking Next on the install wizard, they agree to the terms of use listed in a link.
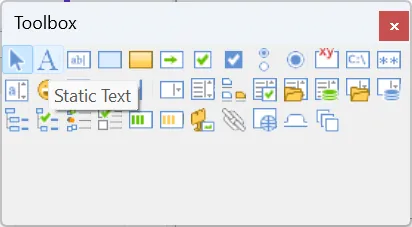
First, on the Dialogs page, select the WelcomeDlg, located under the First Time Install folder. Next, from the ToolBox, choose Static Text and click on the desired area of the wizard.
Note: If the Toolbox window disappears during the dialog editing, you can always bring it back by clicking on the ControlToolbox icon on the top panel.
After you adjust the text location, make sure the added text is selected, and then on the right side under Properties, you should see the Display tab with the Text entry.
Modify the value with the custom EULA message we have discussed and click Enter after you add the text.
Now, from the toolbar, select Hyperlink (the third option before last).
Follow the same principle and modify the Text value as well as the URL link under Display. In the end, you will have something like this:

If you prefer and have an .rtf document, instead of editing the WelcomeDlg and adding an EULA link here, you can add a templated ReadMe Dialog by right-clicking on WelcomeDlg and selecting ReadmeDlg dialog. This will place the ReadmeDlg right next in sequence.
Following the same procedure, you are free to customize any text, and each time you have a new EULA in a .rtf format, you can replace it.

3. Three Individual Feature Selections
For this part, we need to create a new dialog right after the default FolderDlg.
Right-click on FolderDlg and select New dialog. For better identification in sequence, rename the Dialog Name from the right-side Property tab, section Identification.

Back to the toolbox, select Checkbox.
Add three of them for each feature and rename the Identification Name, edit Display Text, and also the Property name. This is important for the feature selection.

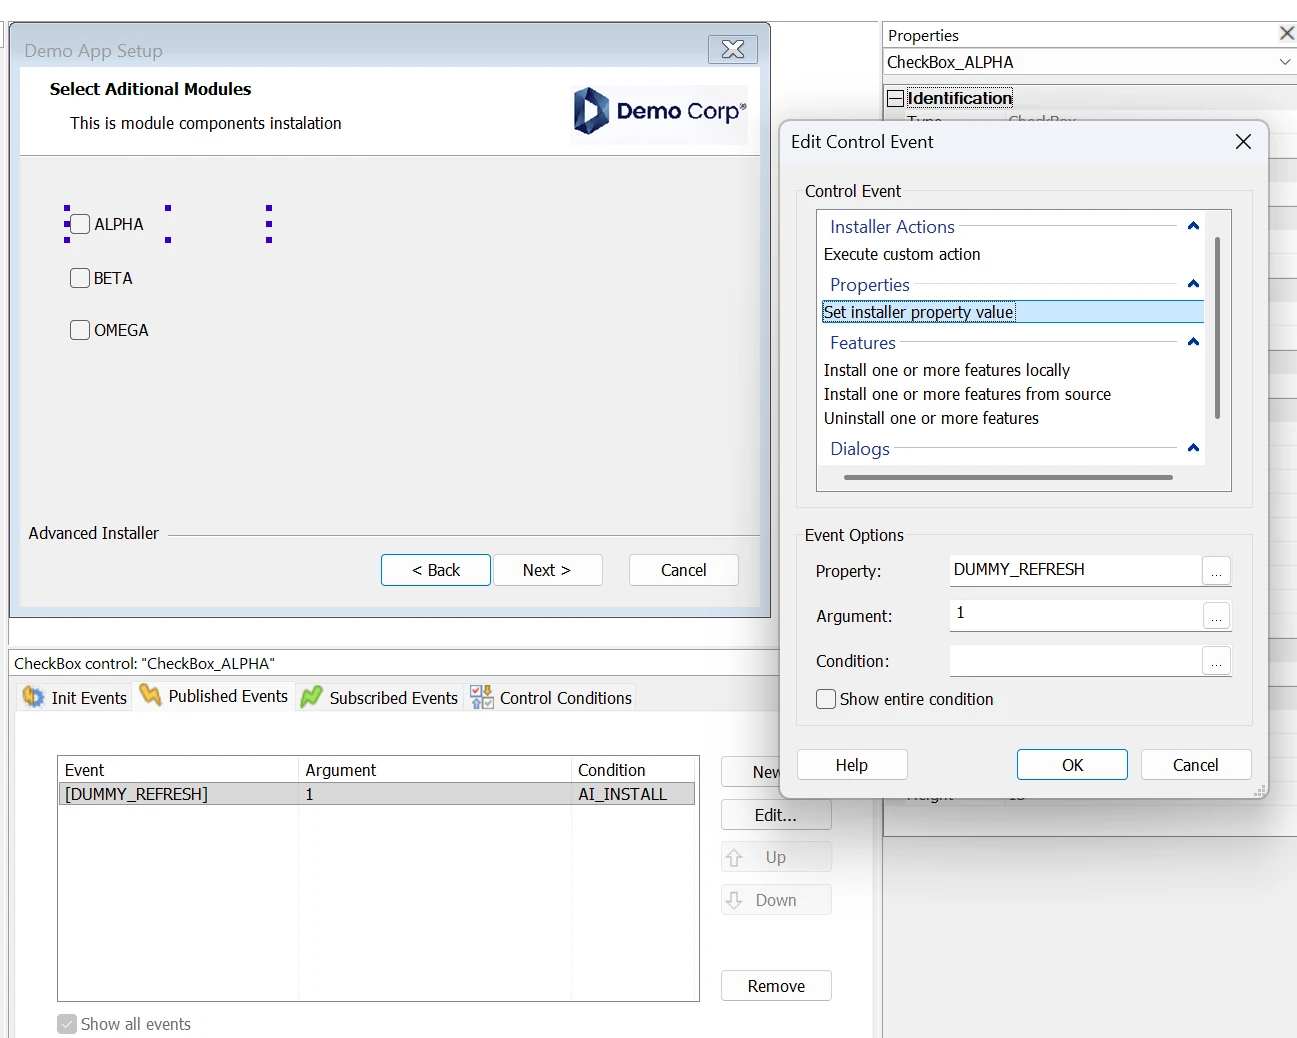
Next, when you click on each checkbox, add a new event in Published Events as Set installerproperty Value with Property: DUMMY_REFRESH and Argument 1.
This will refresh the dialog in real time when any checkbox is selected.
Now it’s time to link each Checkbox to the corresponding Feature Installation by adding a condition.
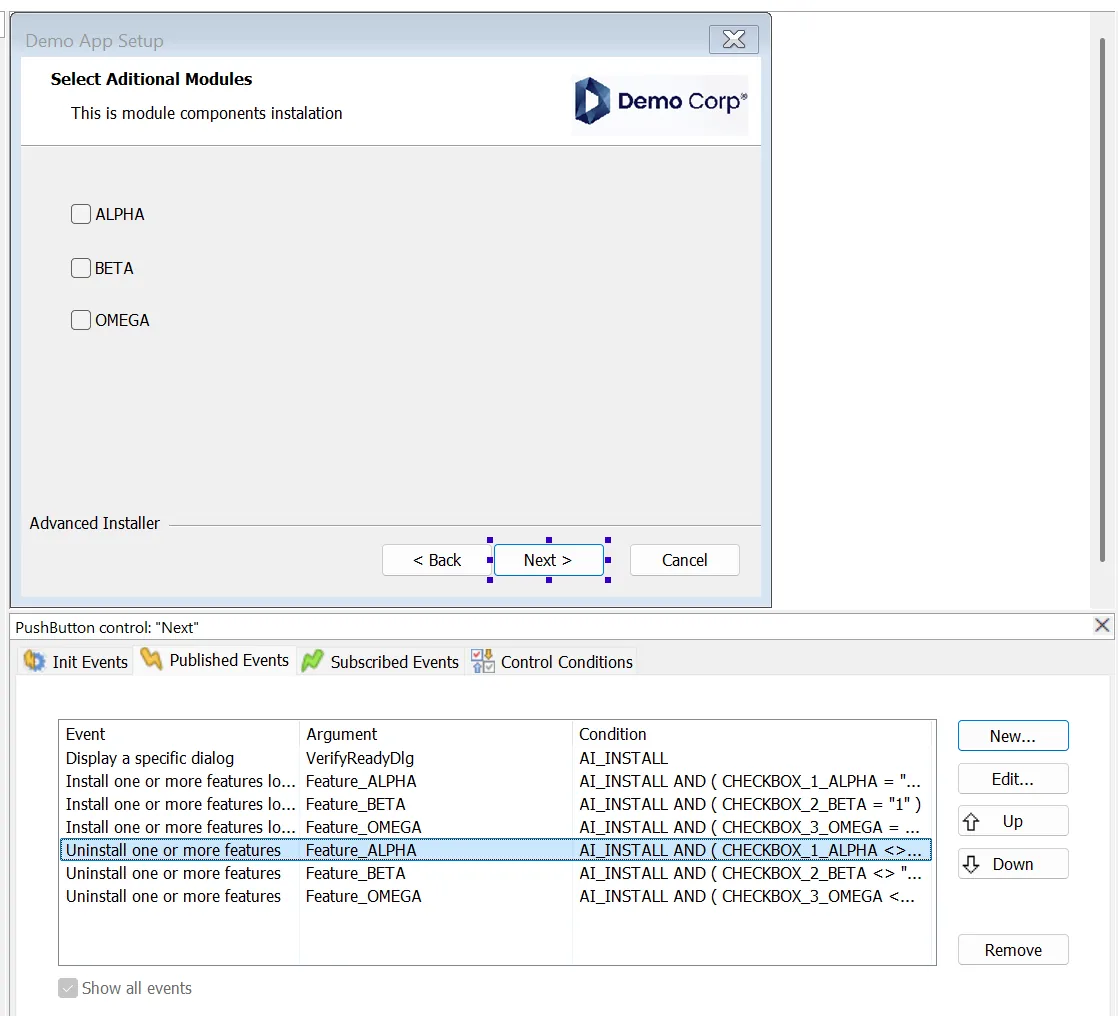
To do so, we need to create more events in the Published Events tab, but this time it needs to be targeted under the Next button.
We have to create two types of events for each feature (six in total).
1. Install one or more features locally with the following:
Argument: select the feature from the dropdown list
Condition: CHECKBOX_1_ALPHA = "1", where Checkbox_1_ALPHA is the exact property name of the previously created checkbox. In an install wizard, when the checkbox is selected, it turns its value to 1.
2. Uninstall one or more features
Argument: select the feature from the dropdown list
Condition: CHECKBOX_1_ALPHA <> "1". Since the checkbox will be unselected, its value will not be 1.
4. Custom Text Message at the End Based on Feature Selection and Condition
Last requirement in our demonstration: setting a custom message at the exit dialog. Start by creating a text from the control box as we did previously.
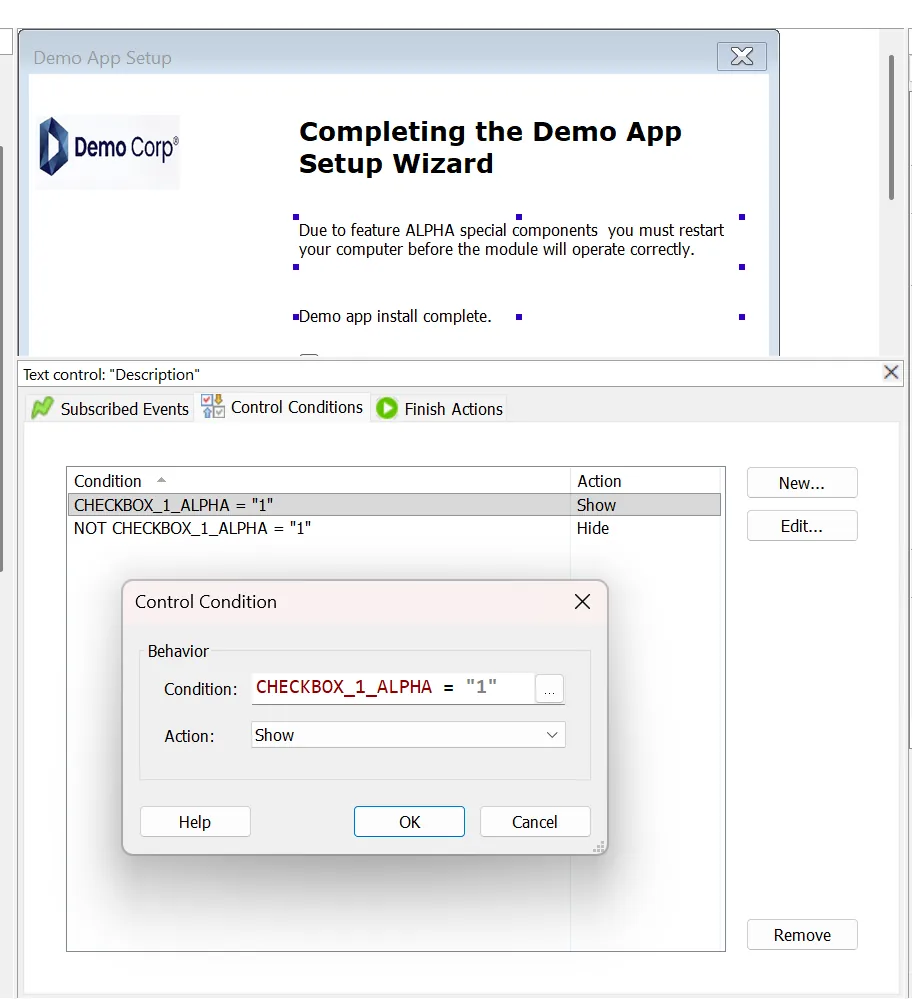
While the text is selected, go to Control Conditions. Here we need to create two conditions, Show and Hide, as follows:
- Condition: CHECKBOX_1_ALPHA = "1" - Action Show
- Condition: NOT CHECKBOX_1_ALPHA = "1" - Action Hide
It’s the same principle: we get the value of the property corresponding to the checkbox. In the end, if the Feature ALPHA is selected, the message is displayed; otherwise, it’s hidden.
Conclusion
Now you have an idea of how to use Advanced Installer’s Dialogs Editor.
This is just a glimpse of it.
You can have many more customizations, also for Uninstall windows or Repair. You can create complex logic, link custom action executions, and so on. You can also go and explore more themes and start customizing from there.
Remember, if you run into any issues when you customize your installer, you can leave a comment or contact the support team.
Written by

Radu Popescu
Technical Writer at Advanced Installer, Technical Engineer on various enterprise client projects. Experienced in Software Packaging, SCCM infrastructure and System Administrating. Tech enthusiast and music producer in his spare time.