How to Create a Windows Installer for Flutter Apps
Flutter has rapidly become a popular framework for building cross-platform applications.
While many developers associate Flutter with mobile development, it also provides mature support for desktop platforms, including Windows.
In this article, let’s understand what Flutter is, how to build a simple application, and how to package it into a professional installer.
What is Flutter?

Google created Flutter, an open-source UI framework that allows developers to build applications for Android, iOS, Web, Windows, macOS, and Linux from a single codebase.
This framework isn’t the first of its kind. Back in the day, we had Cordova, which offered similar functionality, but with slightly less platform support.
However, unlike other cross-platform solutions, Flutter does not rely on native UI components, and instead it renders everything with its own high-performance graphics engine called Skia. This gives developers full control over the UI and ensures consistent visuals across platforms.
In terms of language, Flutter apps are written in Dart, a modern language optimized for UI development and compiled to native machine code. On Windows, Flutter produces a native C++ executable along with all the required libraries.
This means that the final application is self-contained and does not require external runtimes such as Python, Node.js, or .NET. So, Fluffer produces a full solution, as opposed to Python executables or Electron solutions, which are essentially web applications wrapped in Chromium.
Building a Flutter Demo Application for Windows
Let's build a simple demo application to show and understand how Flutter works on Windows. The goal is clarity, not complexity.
To begin, we must understand what is needed to develop anything.
Technically, to build Windows apps, you don’t need that much. We need to make sure that Git is installed, and then install the Flutter SDK.
Git can be easily downloaded and installed from here, and we are going to make it easier for Flutter.
First, install Visual Studio Code and follow the quick start guide provided on the Flutter website.
It’s quite easy: once Visual Studio Code is open, navigate to the extensions tab and install Flutter. At some point it will ask you to install the SDK, and you obviously click “Install”:
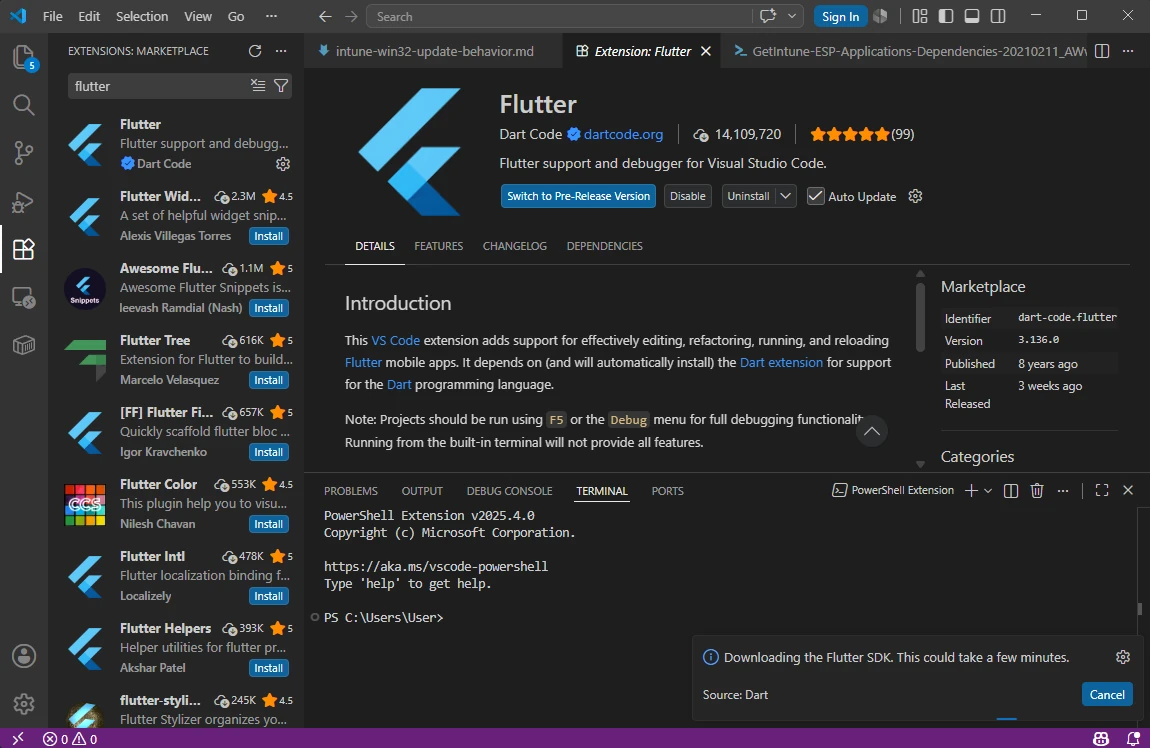
When that’s done, it will ask you to add it in your PATH environment variable. This gives you the possibility to use Flutter outside of the Visual Studio environment, basically anywhere. Of course, we click on “Yes” and restart Visual Studio Code.

To be safe, before starting any Flutter projects, open up a command prompt and type:
flutter doctor -v
This will basically tell you if everything is ok or if there are any issues that need to be fixed before starting to work.
Now that we have Flutter up and running, let’s create a project. In the command prompt, navigate to an empty folder and type:
flutter create demo_app
cd demo_app
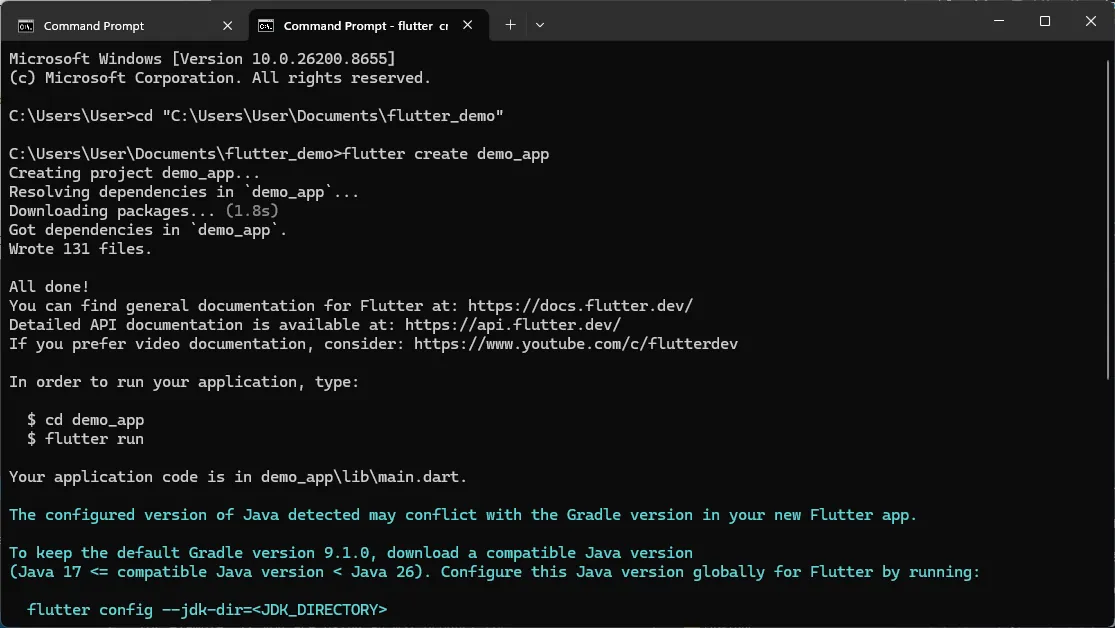
This will create the complete structure of the project, including the Windows support.
Now that we’ve created the project, let’s open it in Visual Studio Code and open the lib/main.dart. This is the main file, which we modified only to display a simple button for demo purposes:
import 'package:flutter/material.dart';
void main() {
  runApp(const DemoApp());
}
class DemoApp extends StatelessWidget {
  const DemoApp({super.key});
  @override
  Widget build(BuildContext context) {
    return MaterialApp(
      title: 'Flutter Windows Demo',
      home: Scaffold(
        appBar: AppBar(
          title: const Text('Flutter Windows Demo'),
        ),
        body: Center(
          child: ElevatedButton(
            onPressed: () {},
            child: const Text('Hello from Flutter!'),
          ),
        ),
      ),
    );
  }
}
After that, you can run the project first to see if everything is in order. You can do this using:
flutter run -d windows
Or you can directly build the application for distribution with:
flutter build windows
This is what we did, and as you can see from the screenshot above, Flutter started building it.
This will create the folder build/windows/runner/Release, where you will find the executable, Flutter DLLs, configuration files, and app resources (if any).
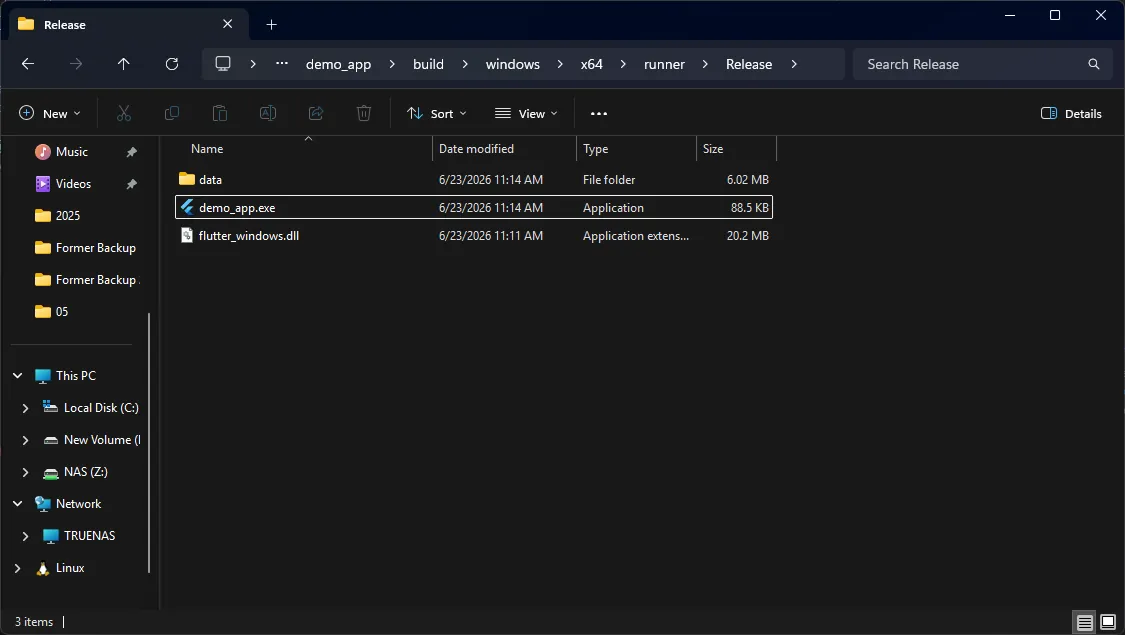
If we open it, this is what our demo application looks like:

This is the folder in which the MSI/EXE/MSIX package will be created.
Creating an Installer with Advanced Installer
When the Windows build is ready, the next step is to package it into a professional installer.
Advanced Installer is a powerful tool for creating MSI, EXE, and MSIX installers.
The best part is that you don’t need separate projects for each installer technology. Within the same project, you can have three outputs configured for each installer technology.
First, create a new Installer project and navigate to the Files and Folders page.
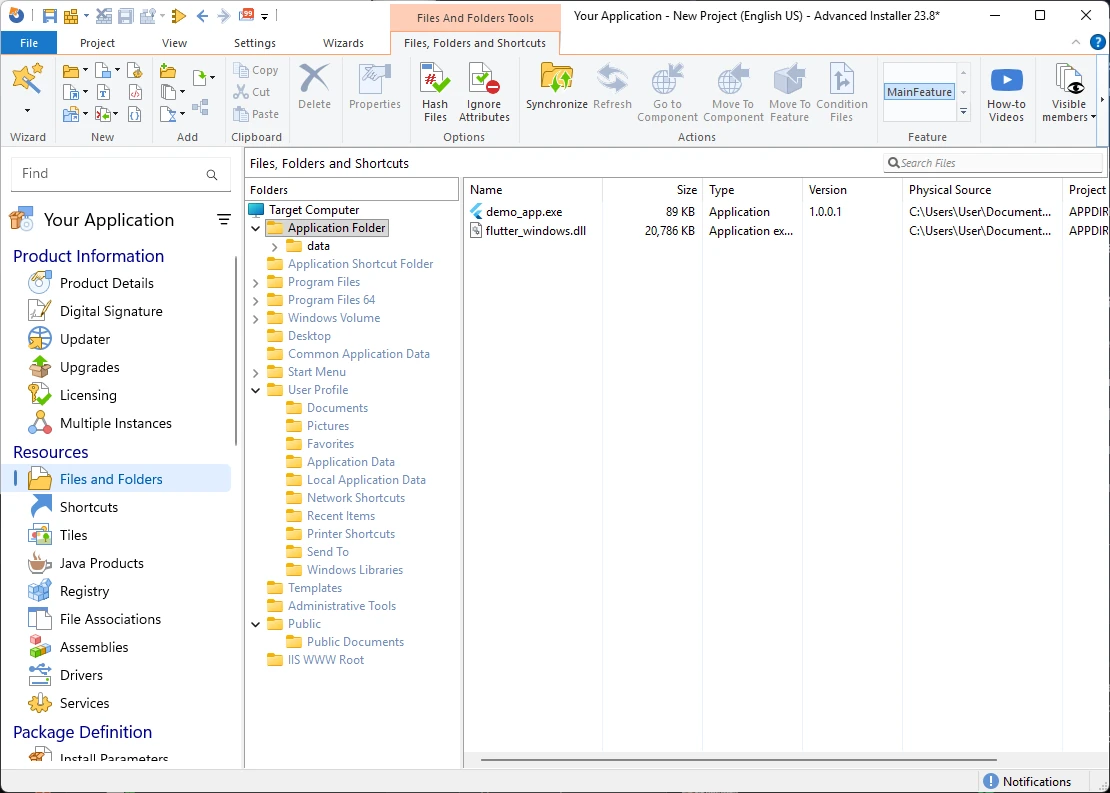
Drag the resulting Flutter files into the Application Folder.
If you want to create a shortcut for the application, right click the demo_app.exe > New Shortcut To > Installed File.
Because the executable is included in the package, it is considered best practice to select Advertised Shortcut, and Advanced Installer will use the EXE icon, or you can choose a different one.

You can also change the product name or icons on the Product Details page, as well as any other types of customizations that you desire for the package.
Once everything is set, just click on Build in the upper left corner, and Advanced Installer will generate the MSI, EXE, or MSIX package.
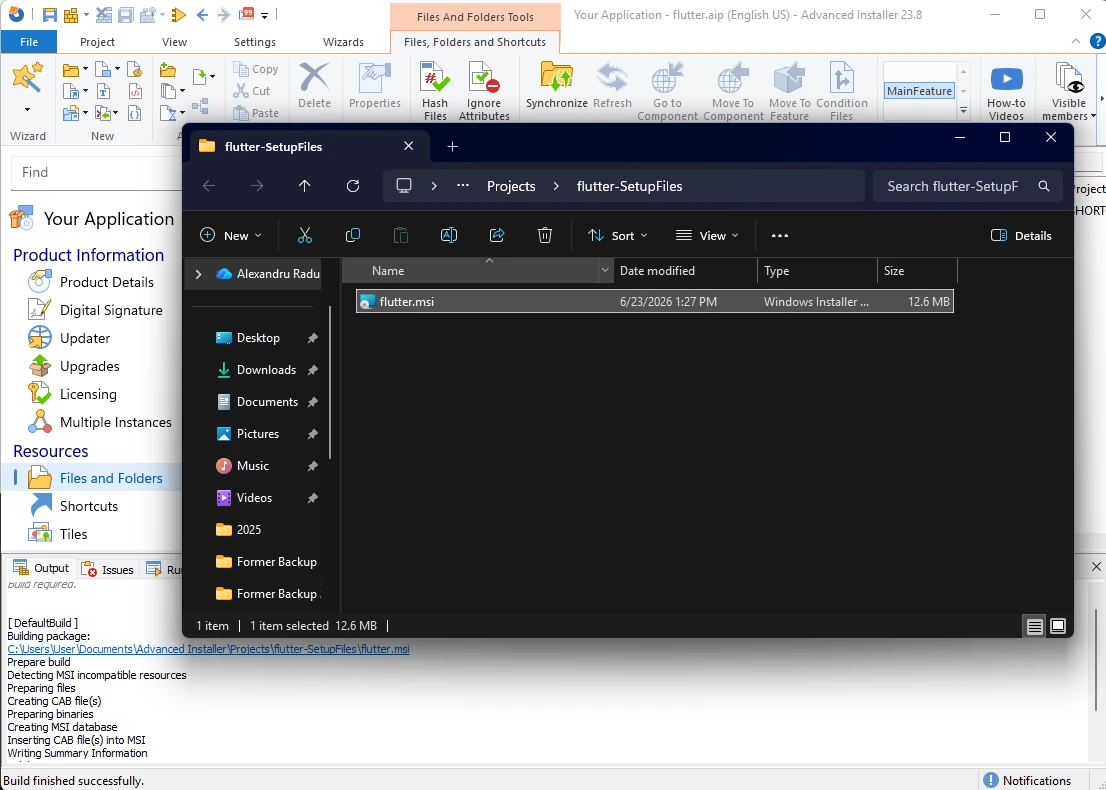
Advanced Installer also offers CLI support for automation purposes and Continuous Integration of the installer build process within a CI/CD environment.
We also provide native extensions for Azure DevOps services to complete your CI/CD pipelines, as well as GitHub Actions integration, which streamlines the automation of your software workflow by allowing you to develop, test, and deploy your pipeline.
If you are a developer who is not an expert in the software packaging area, Advanced Installer incorporates best practices, so you only need to focus on the files and the installer’s customization, and Advanced Installer will handle the rest. This is applicable to all project types, including MSIX.
If you are an enterprise that develops and hosts its own in-house applications and you manage your enterprise environment with Intune or SCCM, you should also consider PacKit, which is a “continuation” of the packaging process.
PacKit is essentially the last step to be considered for an in-house developed software:

Here are some of PacKit’s capabilities you could try:
- It automates the packaging lifecycle and helps teams by ensuring consistency across all deployments, regardless of who built the package
- It integrates directly with Intune or SCCM, allowing you to publish updates or new versions with minimal effort
- Reduces human error, especially in environments where multiple applications or frequent updates need to be distributed
- Most importantly, it speeds up the release cycles by making it easier to push internal tools or line-of-business apps to your managed devices
In short, PacKit serves as the missing link between development and deployment.
Conclusion
Flutter provides a fast, modern, and efficient way to build cross-platform applications, with mature Windows support suitable for real‑world distribution.
By combining Flutter with Advanced Installer, you can easily transform a desktop application into a polished MSI, EXE, or MSIX installer suitable for enterprise deployment or commercial distribution.
This workflow shows how straightforward it is to build and ship Flutter applications on Windows without external dependencies or complicated setup steps.
For developers, it’s a clean and powerful solution that simplifies both development and deployment.
 If you’d like to see how Advanced Installer works in practice, you can try the full-featured version free for 30 days.
You can also learn more about PacKit’s capabilities here.
Written by

Alex Marin
Application Packaging and SCCM Deployments specialist, solutions finder, Technical Writer at Advanced Installer.