How Microsoft Simplifies MSIX Packaging through WinApp CLI
Packaging a Windows app the “proper” way usually means creating a manifest file, generating assets, doing a test certificate, and signing the application, all before you can confirm that your application behaves correctly with a package identity.
Microsoft has made a new attempt to smooth that process by releasing a tool called WinApp CLI. After spending an afternoon putting it through its paces on a small demo app, it is worth walking through what it actually does, why it exists, and where it fits next to tools like MSIX Packaging Tool or Advanced Installer.
MSIX is not a new format, and it's been Microsoft’s modern packaging format for a while now, but one of the sticking points, especially for developers rather than IT pros, is the setup overhead required just to get a package identity working during development. That is the gap WinApp CLI is trying to close
In this article, let us understand what WinApp CLI is, have a look over a demo application that has received an identity, and see how to output an MSIX with it.
What is WinApp CLI?

WinApp CLI, which stands for Windows App Development CLI, went into public preview in January 2026 as a single command line interface for managing Windows SDKs, generating manifests and certificates, and packaging applications as MSIX.
It works whether you are building applications with .NET, C++, Electron, or Rust. It is open source, hosted on GitHub under the Microsoft organization.
The reason why it exists is explained in the Microsoft documentation: without the CLI, setting up a project for package identity and MSIX packaging can take a dozen manual steps.
This means downloading SDKs, manually generating manifests, creating certificates, wiring up the build configuration, and so on.
With WinApp CLI, most of that collapses into a handful of commands, and the tool’s real trick is not just automating packaging but also completely decoupling package identity from packaging.
Traditionally, if you wanted to test a feature that requires identity, such as notifications, AI APIs, or shell integrations, you had to fully package your app as MSIX just to try it out.
WinApp CLI introduces a debug identity workflow that lets you attach an identity to a plain executable temporarily so you can iterate and test without repackaging every single time. That single feature is possibly the reason the tool exists at all.
However, I want to clearly mention where WinApp CLI sits relative to tools packaging professionals or developers already know. WinApp CLI IS NOT AIMED at converting existing MSI installers to MSIX, nor is it meant to replace enterprise deployment tooling.
This tool is used earlier in the pipeline, within the developer’s inner loop, before an application is anywhere near ready for IT to deploy it. WinApp CLI should never be compared with other software packaging tools such as MSIX Packaging Tool or Advanced Installer, because this is not its purpose.
Time to Test WinApp CLI
To see what the WinApp CLI changes under the hood, rather than just reading about it, I started to put together a minimal WPF app in C#. Nothing too fancy, just a single window with one button.
The idea was simple: give the button a click handler that checks whether the running process currently has a package identity and reports the result back with a message box.
Without identity, the check throws an exception. With identity, it succeeds and reports back the package name.
If you want to follow the same testing scenario that I did, there aren’t many steps, so I will just explain them here.
First, fire up a CMD and check if you have .NET installed. If you have it, you should receive a version, in my case 9.0.308, which is just fine.
Next, create a folder where you want that project to exist, and then create the actual WPF with:
dotnet new wpf -n WinAppDemo
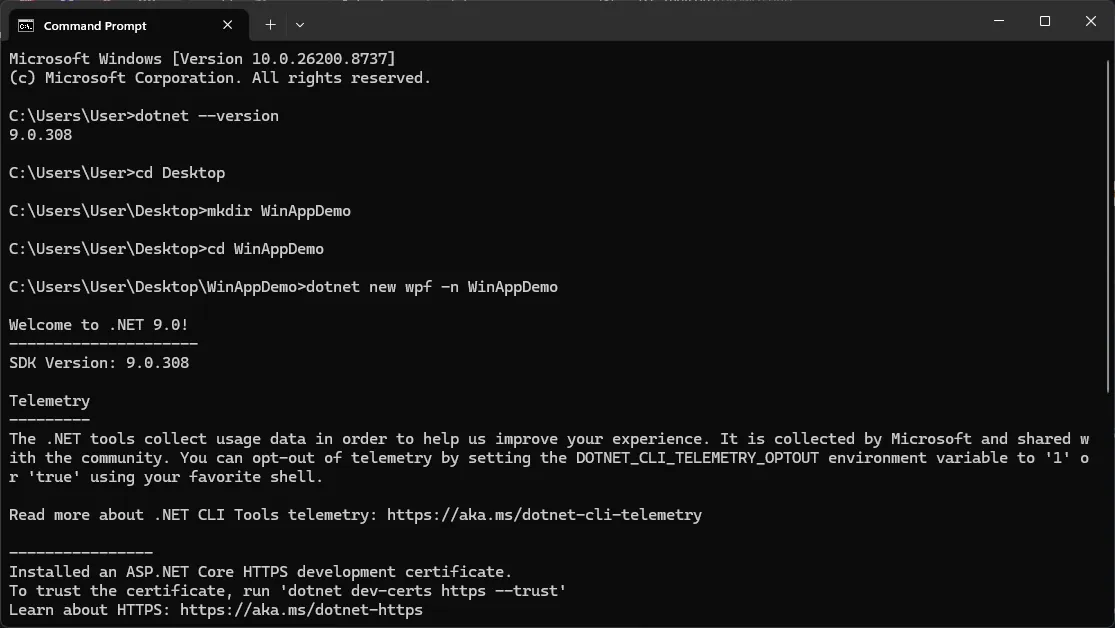
Next, navigate to the newly created folder, and launch it in Visual Studio Code with:
Code .
While this is opened in Visual Studio Code, we can also add the Uwp.Notifications:
dotnet add package Microsoft.Toolkit.Uwp.Notifications
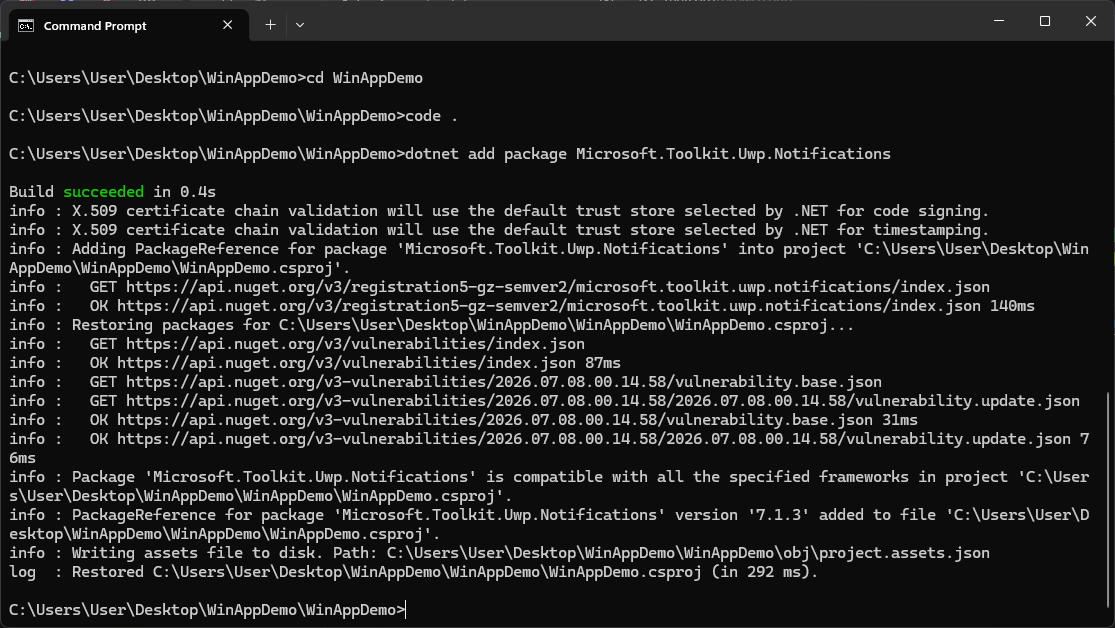
Title: dotnet add package command in CMD
ID: add-package-cmd
Next, in Visual Studio Code, open the WinAppDemo.csproj and change the TargetFramework to:
<TargetFramework>net9.0-windows10.0.19041.0</TargetFramework>
Next, open MainWindow.xaml and look for the <Grid> section. Replace it with:
<Grid>
    <Button Content="Send notification" Width="200" Height="40" Click="SendNotification_Click"/>
</Grid>Open MainWindow.xaml.cs and add the following to the “Using…” section at the top:
using Microsoft.Toolkit.Uwp.Notifications;
Next, we need to add the main method, which will display the message I previously explained. This is done within the same MainWindow.xaml.cs:
private void SendNotification_Click(object sender, RoutedEventArgs e)
{
    try
    {
        var package = Windows.ApplicationModel.Package.Current;
        MessageBox.Show($"Runs with PackageIdentity!\nPackage Name: {package.Id.Name}");
    }
    catch (Exception ex)
    {
        MessageBox.Show($"Does not have package identity.\nError: {ex.Message}");
    }
}
Now that everything is done, go back to the CMD and just type:
dotnet run
This will open the window, and if you click the button, you will receive the error message because you don’t have a package identity set to the executable.

This small test turned out to be a cleaner demonstration that I originally expected.
My first instinct was to wire the button to a toast notification instead, because notifications are the textbook example of an identity-gated API, right?
Well, it turns out the notification library most .NET developers reach for registers its own application ID behind the scenes, so it fires happily even without any package identity at all.
That is a useful thing to know if you are evaluating WinApp CLI and want an honest before and after, because a notification demo would have shown identical behavior in both cases, giving the impression that the tool was doing nothing.
Okay, with that out of the way, let’s turn back to the demo application.
Since we know we have a failing message, it is time to install and test the WinApp CLI. To do this, in the same CMD, type:
winget install microsoft.winappcli --source winget
After this is finished, you can also check if everything is alright by typing:
winapp --version
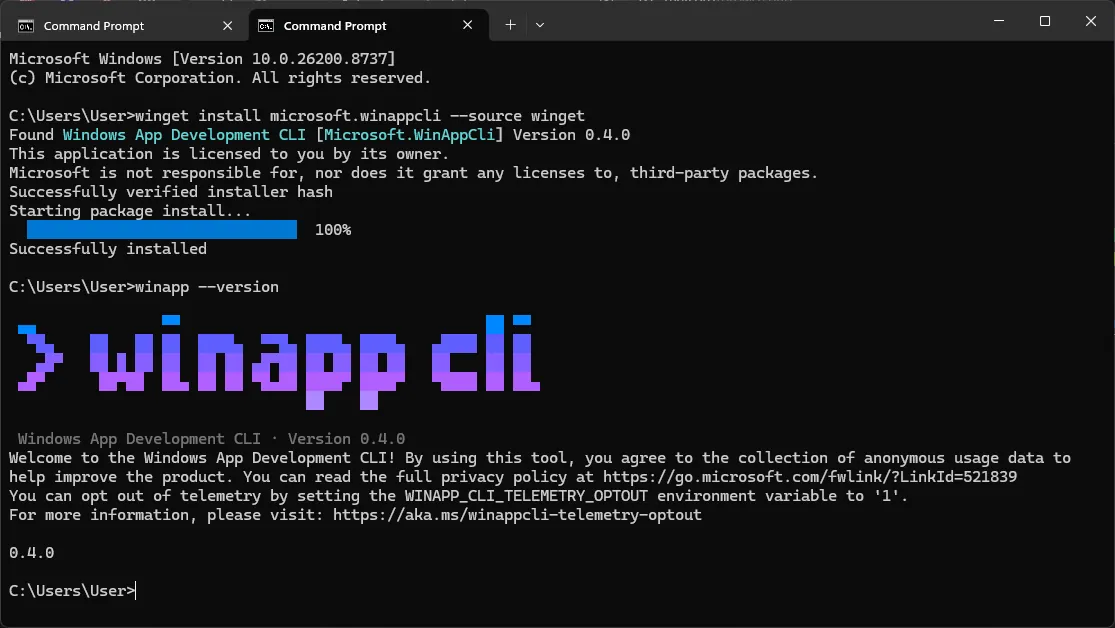
Great! Seems to be installed properly.
Now, let’s add an identity to our little application. In the CMD prompt, in the same folder where we ran “dotnet run," let’s now run:
winapp init
When you run the init command, WinApp will ask you for some things. You will have to provide:
- A Package Name (in our case, AdvancedInstaller.WinAppDemo)
- A Publisher Name (in our case, CN=WinAppDemo)
- A Version (in our case, 1.0.0.0)
- A small description (in our case, Demo App)
- Select the Windows App SDK that you want to include in your package. You can go with stable, preview, and experimental, or you can even choose not to set up a Windows App SDK. In our case, we went with the Stable one.

Once init finishes, the differences in the project folder are easy to spot if you know where to look.
A new Package.appxmanifest file appears at the project root, and this is the actual identity document Windows reads. Along with it, a new Assets folder shows up, populated with the logo files the manifest references (if there are any).
The .csproj file gains a reference to the WinApp NugetPackage, which is the mechanism that ties everything together. That NuGet reference is doing more work than it looks like because it is now part of the build.
The “dotnet run” command no longer just launches a bare executable. It applies the identity described in the manifest before starting the process. This is easy to confirm, as you just run the app again after the init with:
dotnet run
If you click the button again after the application starts, you will receive a success message:
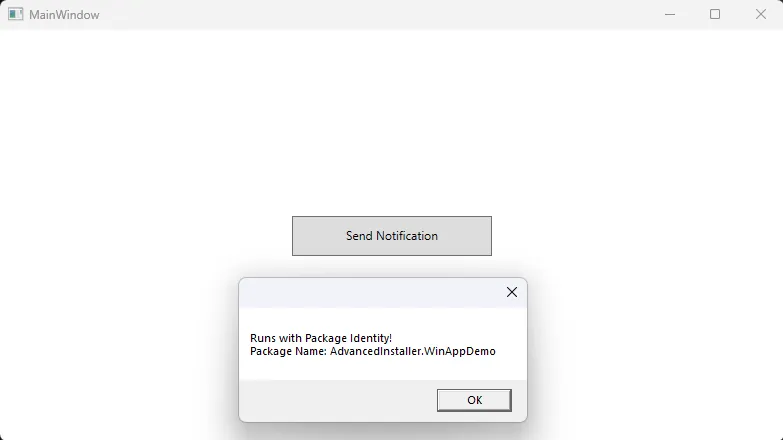
This is why this testing method is quite good: checking Windows.ApplicationModel.Package.Current API offers no fallback path. It either succeeds because the process is running with an identity or it throws an exception.
Running a freshly built app before touching the WinApp CLI confirmed the expected result: clicking the button produced an error. With the identity added, the API gives you a success message.
Generating Your Final MSIX Packages Using WinApp CLI
Getting from this point to an actual MSIX file is just a small stretch.
First, we need to do a release build of the application, and this is done with:
dotnet build -c Release
Next, we generate a certificate:
winapp cert generate
 As a note, this certificate is created with a “default password,” as WinApp confirms in the CLI. The default password is “password”.
After this certificate has been generated, it is also recommended to be installed locally.
Now, the final command is to pack, and this needs to be pointed to the release output folder, which in our case is:
winapp pack .\bin\Release\net9.0-windows10.0.19041.0\win-x64 --cert .\devcert.pfx

This will produce a signed MSIX package ready to be locally installed using Add-AppxPackage or by double-clicking it. You can also distribute it to more official channels such as Winget or Microsoft Store if desired.
Conclusion
WinApp CLI simplifies the previously complex process of giving Windows apps a package identity by reducing dozens of manual steps into just a few commands.
The debug identity workflow allows developers to test identity‑dependent features without fully packaging the app. After applying identity, the tool can also generate certificates and produce a signed MSIX package ready for installation or distribution.
Overall, it fills an early‑pipeline developer need rather than replacing enterprise packaging tools like MSIX Packaging Tool or Advanced Installer.
Written by

Alex Marin
Application Packaging and SCCM Deployments specialist, solutions finder, Technical Writer at Advanced Installer.