How to Automate SAP GUI Silent Installation with AutoPkg and NWSAPSetupAdmin.exe
SAP GUI is the graphical user interface client used to access SAP systems. It’s an essential tool for organizations that rely on SAP applications. Automating and customizing the installation process not only saves time but also ensures consistency across multiple systems.
It’s important to note that SAP packages cannot be converted into MSI or MSIX packages due to their high complexity. Therefore, the steps outlined in this article are intended specifically for silent installations only.
Using AutoPkg for Silent Installation of SAP GUI

AutoPkg is a powerful tool for automating the creation of installer packages. Here’s how you can use it to create a silent installation package for SAP GUI.
You can find the AutoPKG tool here: https://github.com/autopkg/autopkg.
To start, you'll need:
- AutoPkg,
- SAP GUI recipes from the rtrouton-recipes repo,
- The latest SAP GUI installer application disk image,
- (Optional) A templates.jar file for SAP GUI customization.
Step 1: Prepare the SAP GUI Installer
Copy the latest SAP GUI installer disk image to a test Mac or virtual machine. Mount the disk image and launch the SAP GUI for Java Installer on the test Mac or virtual machine. Follow the prompts to complete the installation.
Step 2: Extract Version Information
Once installed, gather the necessary information from the installed application using the `defaults read` command. You’ll need the SAP GUI’s alphanumeric version, numeric version, and bundle identifier information.
Here are the commands you’ll use:
# Get SAP GUI's alphanumeric version
defaults read "/Applications/SAP Clients/SAPGUI $version/SAPGUI $version.app/Contents/Info.plist" NSHumanReadableCopyright | awk '{print $2$3$4}'
# Get SAP GUI's numeric version
defaults read "/Applications/SAP Clients/SAPGUI $version/SAPGUI $version.app/Contents/Info.plist" CFBundleShortVersionString
# Get SAP GUI's bundle identifier
defaults read "/Applications/SAP Clients/SAPGUI $version/SAPGUI $version.app/Contents/Info.plist" CFBundleIdentifierStep 3: Create the com.sapgui.identifier.plist File
Next, create a `com.sapgui.identifier.plist` file using the `defaults write` command:
# Create com.sapgui.identifier.plist file with alphanumeric version
defaults write /path/to/com.sapgui.identifier AlphanumericVersionString version_info_goes_here
# Add numeric version information to com.sapgui.identifier.plist
defaults write /path/to/com.sapgui.identifier CFBundleShortVersionString version_info_goes_here
# Add bundle identifier information to com.sapgui.identifier.plist
defaults write /path/to/com.sapgui.identifier CFBundleIdentifier bundle_identifier_info_goes_here
Step 4: Package the Installer Files
After creating and populating the `com.sapgui.identifier.plist` file with the necessary information, copy it to a convenient location along with the latest SAP GUI installer disk image and the optional templates.jar file.
Next, create a ZIP file containing the `com.sapgui.identifier.plist`, the SAP GUI installer application’s disk image, and the templates.jar file (if applicable). Name the ZIP file something like `latestsapgui.zip`.
Step 5: Run AutoPkg
To create the SAP GUI installer package using AutoPkg, you have two options:
- Post the ZIP file to a web server for AutoPkg to download
- Use AutoPkg’s `-p` option to specify a local file for input.
Here’s an example of running AutoPkg with the `-p` option:
autopkg run local.pkg.SAPGUIWithTemplate -p /path/to/latestsapgui.zip
Using NWSAPSetupAdmin.exe for Silent Installation of SAP GUI

Another method is to use NWSAPSetupAdmin.exe, which provides advanced customization options for SAP GUI installations.
Here’s how to get started:
Step 1: Extract the Installer
Download the SAP GUI installer and extract the contents using a tool like 7-zip. Inside the extracted folder, you'll find a setup folder containing `NWSAPSetupAdmin.exe`. This is applicable to all SAP installers.

Step 2: Launch and Configure the Installer
Run `NWSAPSetupAdmin.exe` to create an installation package. This package will manage the distribution of the SAP GUI components. You’ll add the necessary components you need and specifying which ones to include in your package, and add additional command lines or configurations as needed.

Step 3: Customize the Package
Customize the installation settings as needed, such as setting registry values and configuring installation paths.
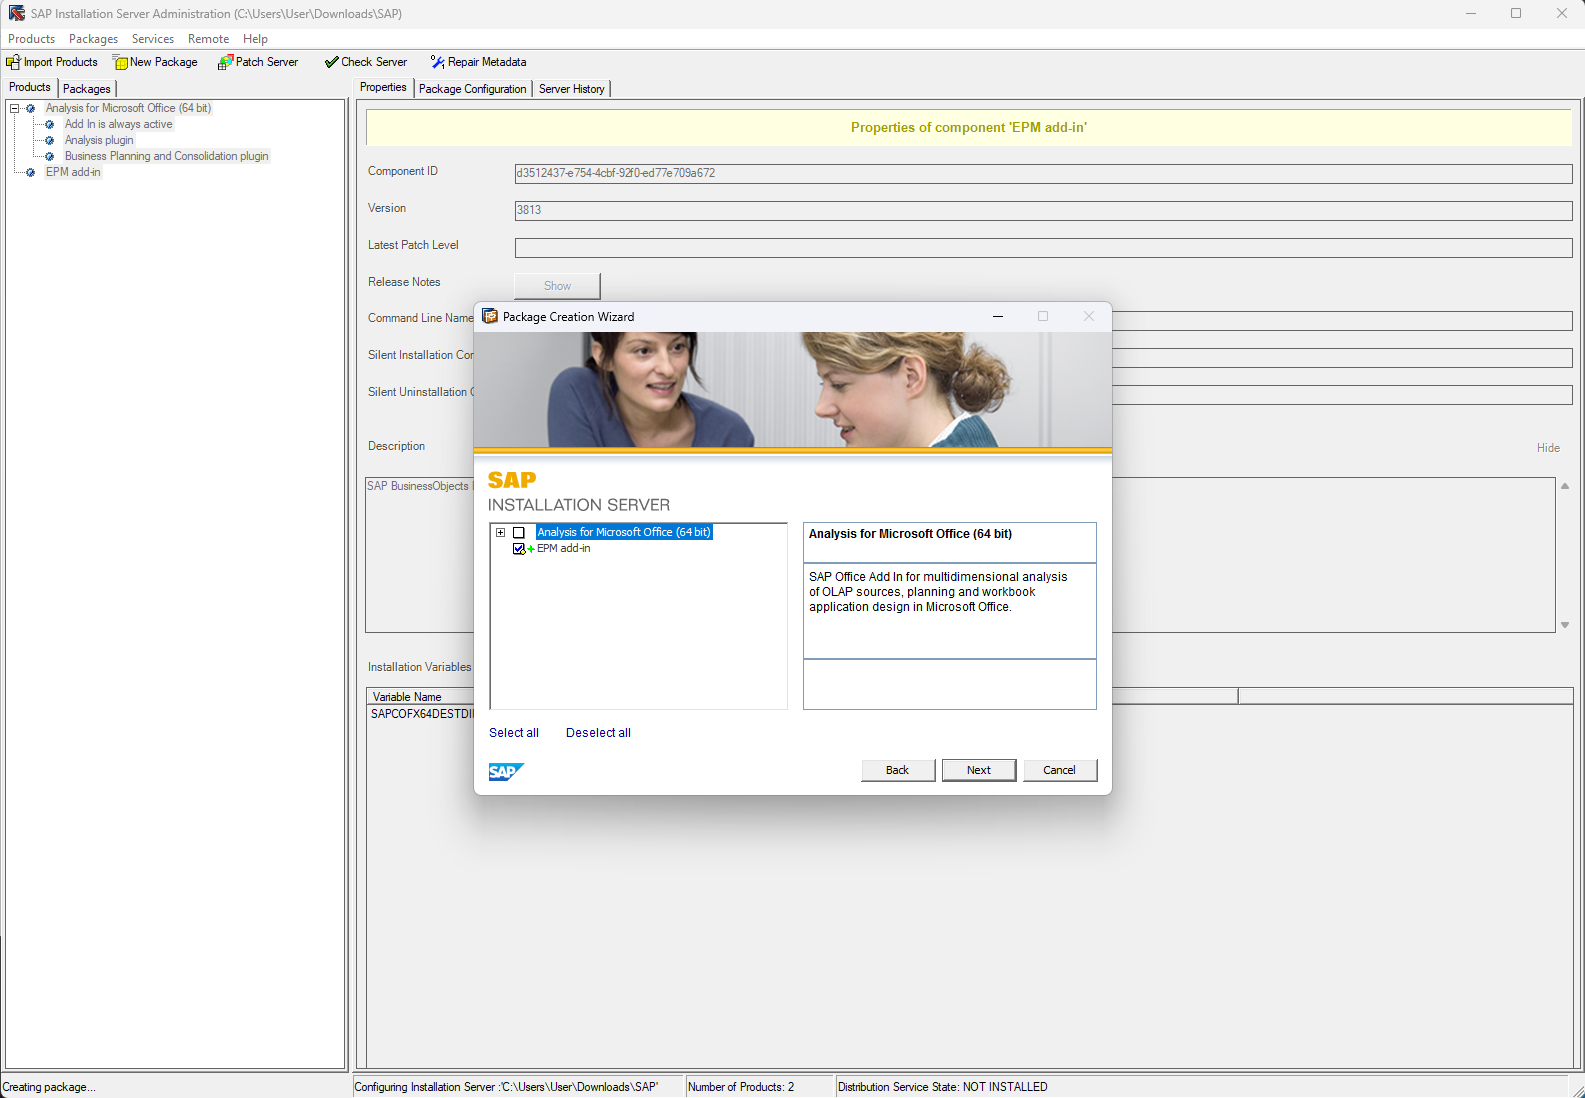
In the example image above, we extracted the SAP Analysis for Microsoft Office package, executed the NwSapSetupAdmin and once the interface was brought up, we clicked on New Package.
Once we selected the desired components of the package, we went to the Properties Tab.

There, you can see the silent installation and uninstallation commands lines and add additional Installation Variables if required.
In the Package Configuration tab you can add different parameters, modify the package name, and also include from an extensive list of Event Scripts. The scripts can be scheduled on the bottom of the GUI and they can run:
- On Installation Start
- On installation End
- On Uninstallation Start
- On Uninstallation End
- On Update Start
- On Update End
Just right click on the white area and select Insert Script. You can select from a variety of built-in scripts.

Or write your own code if necessary:

Step 4: Export the Installer
Once you’ve configured everything, export the package from the installation server.
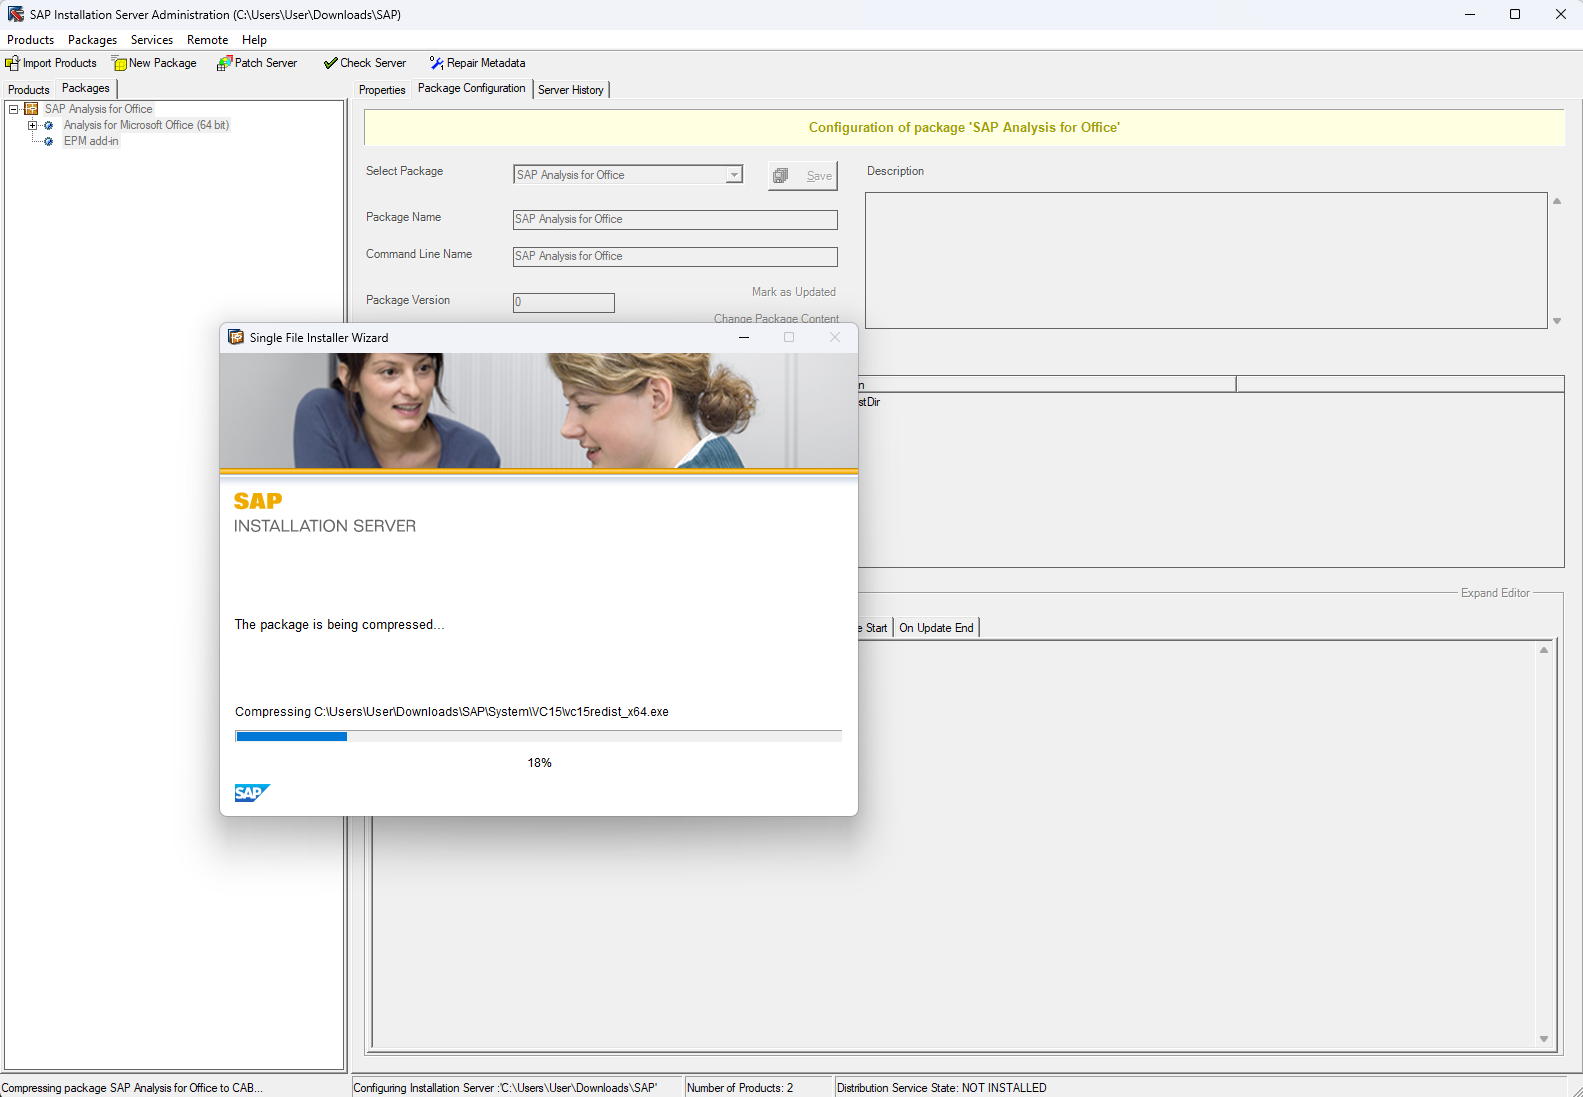
Right click on the left tab on your newly created package and then click on Compress in Single File Installer. This will create an executable file that can be used for silent installation.

Use the exported executable file to deploy SAP GUI silently across your systems.
Mass Deployment and Detection

For mass deployment, you can leverage tools like SCCM (System Center Configuration Manager) or Group Policy.
To check if SAP GUI is installed on your system, go to the Control Panel and check the list of installed programs.
Alternatively, you can use PowerShell commands to query the system:
# Check if SAP GUI is installed
Get-ItemProperty -Path "HKLM:\Software\SAP\SAPGUI Frontend Server" -ErrorAction SilentlyContinue
Conclusion

There you have it—a detailed guide on creating and customizing a silent installation package for SAP GUI using AutoPkg and NWSAPSetupAdmin.exe.
By following these steps, you can streamline your SAP GUI deployments, ensuring consistency and saving time.
Whether you prefer the automation of AutoPkg or the advanced customization of NWSAPSetupAdmin.exe, you’re now equipped with the knowledge to make your SAP GUI installations as smooth as possible.
Happy installing!
