How to create and customize a C# WinUI 3 desktop app
Ensuring your application is well-designed is one of the key methods to keep users engaged. They need to have a positive experience while using your app, therefore a poor design can drive them away.
This key characteristic should be there right from the beginning, starting with the installer – the first interaction of the end user with your product. So, a reliable installer definitely enhances the overall quality of the product.
In this article, we will explore the Windows UI Library and its use in building modern and user-friendly applications. Then, we will go into the topic of customizing the application into a package using Advanced Installer, enabling streamlined deployment and installation.
Now, let's dive right in.
What is WinUI and how can it help you?

Windows desktop applications can now benefit from a native user experience framework, namely the Windows UI Library (WinUI). It provides the latest user interface patterns and allows developers to create responsive and visually stunning applications. There are two generations of WinUI under active development, each of them having different development targets:
- WinUI 2: integrated with Windows 10 and later SDKs.
- WinUI 3: completely decoupled from Windows 10 and later SDKs, ships with Windows App SDK.
WinUI 3 is the latest version of the framework which introduces modern styles and controls for applications on Windows 10 and Windows 11.
With that in mind, we're dividing this tutorial into two parts:
- In the first part of this tutorial, we’ll focus on creating and customizing a simple C# unpacked desktop application with a WinUI 3 user interface using Visual Studio (VS).
- In the second part, we’ll show you how to use the same theme to customize the installation package created with Advanced Installer.
Starting with version 18.8, Advanced Installer also has support for WinUI through the Enhanced UI rendering functionality. So, the installation package can look and feel just like your WinUI application.
Here are some of the implemented features:
- Support for SVG pictures on high-resolution displays
- Modern controls that provide a natural user experience across all Windows devices
- Animated transitions between icons, buttons, and dialogs
- XAML-based support for easier UI customization
Check Advanced Installer WinUI support through its 30-day full feature trial.
How to create a desktop app based on WinUI 3?

Before creating the project in Visual Studio, you have to set up your development computer:
- Install the Windows App SDK tools.
- Download the latest installer for Windows App SDK. By running it, the runtime package dependencies will be installed which are required in order to deploy a non-MSIX-packaged app.
Now, we are ready to create the project.
1. Go to Visual Studio → Files→ New → Project.
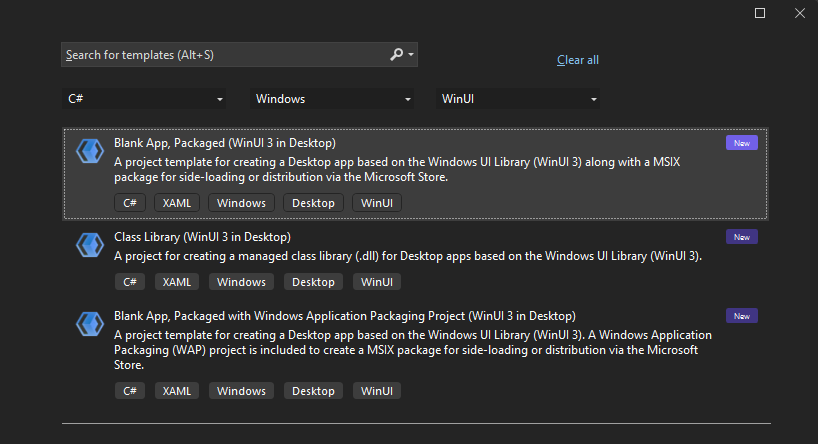
2. In the opened dialog, set the language to C#, set the platform to Windows and the project type to WinUI.
3. From the templates list, select Blank App, Packaged (WinUI 3 in Desktop).
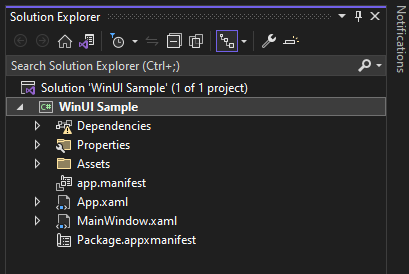
4. Once you create the project, you should see the following files in Solution Explorer.
5. Add the following property to your .csproj.
<PropertyGroup>
		…
		<WindowsPackageType>None</WindowsPackageType>
</PropertyGroup>
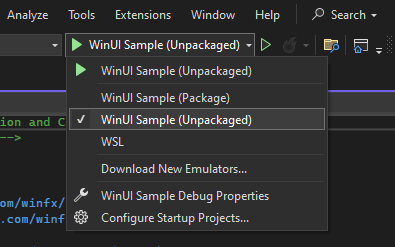
6. Select the Unpackaged launch profile to start the app from Visual Studio. If you're starting the application from Windows File Explorer or the command line, this step is not necessary.
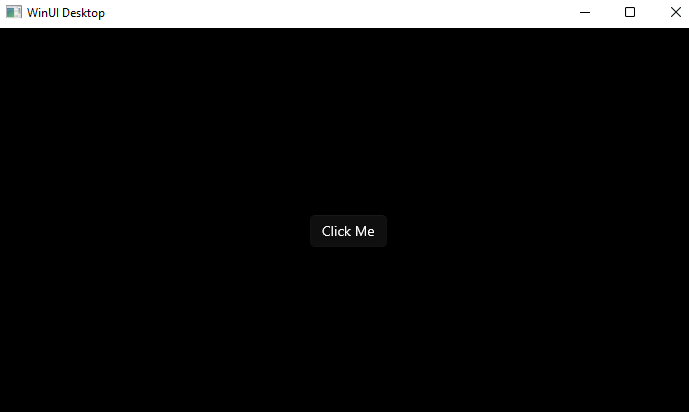
7. Build and run the application. You should see the next window after you run the app.
How to customize the application?

To customize the application, we have to add specific controls to our registration form.
We recommend you take a look at WinUi 3 Galley, which showcases a comprehensive collection of WinUI 3 controls and styles. It turns out to be very helpful as the controls are exemplified and well documented.
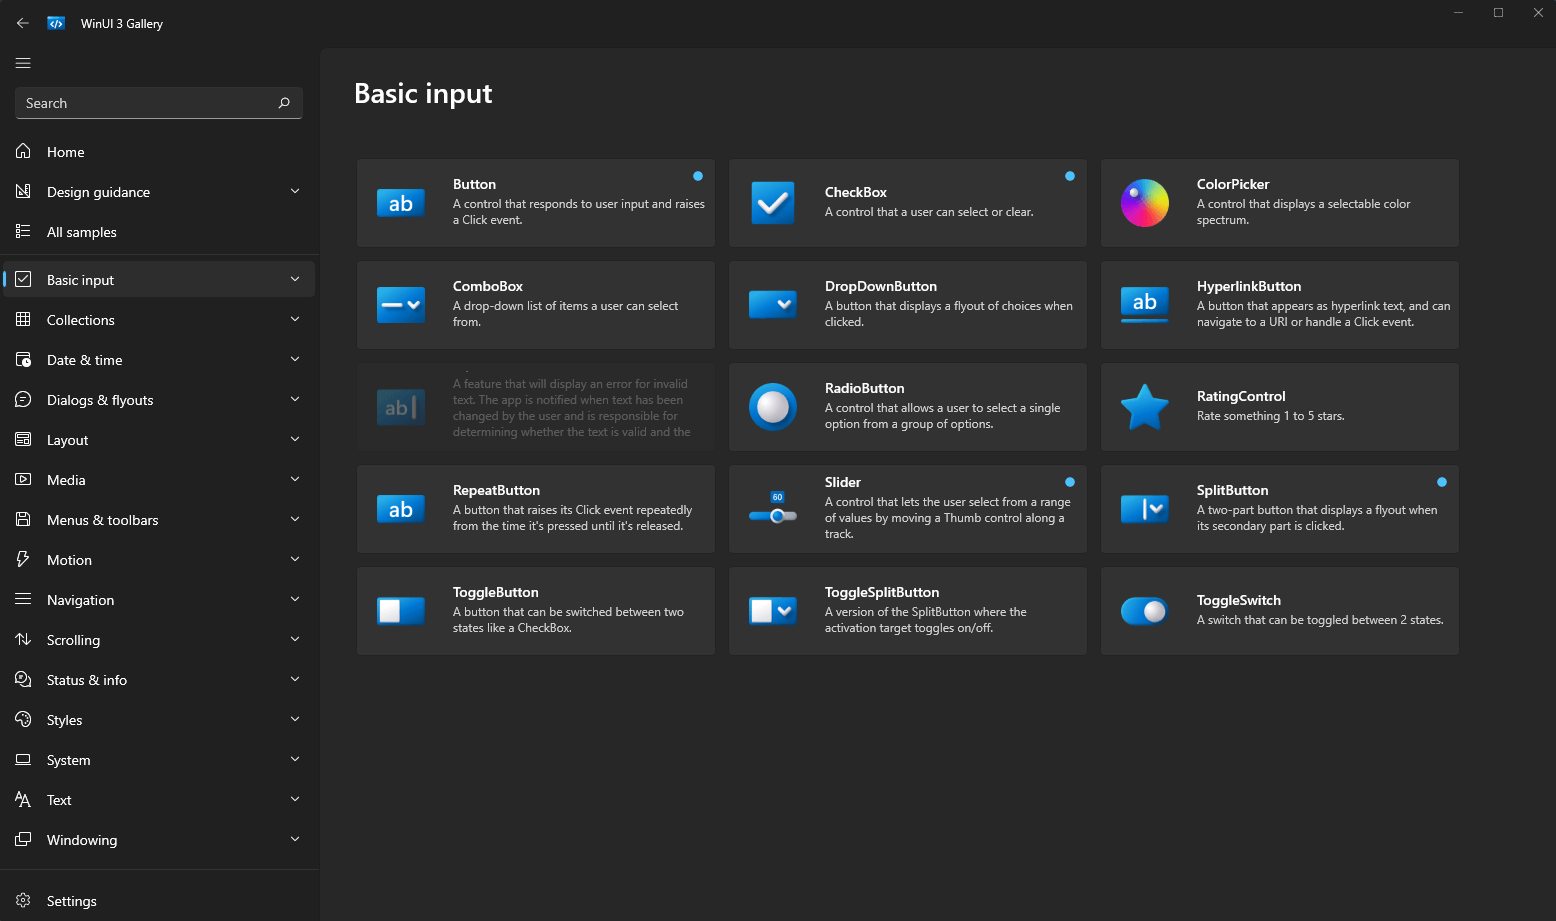
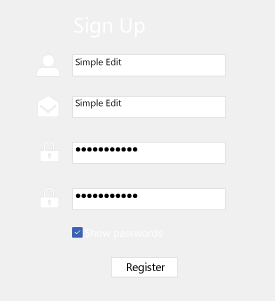
In our registration form, we utilized the following components:
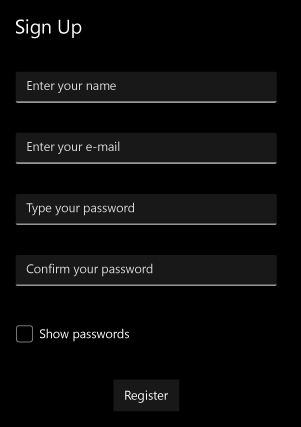
- Two Text Boxes for capturing the user's name and email.
- Two Password Boxes for securely inputting and confirming the password.
- A Check Box enabling the option to display the passwords to the user.
The following image shows the non-customized version of the form.
WinUI 3 integrates the Fluent Design System into its styles and controls, enabling your app to deliver intuitive and consistent user experiences.
To customize your application, you can make edits to the MainWindow.xaml file. However, to simplify a significant portion of this process, the Fluent XAML Theme Editor tool comes to your aid.
This tool allows you to create custom themes for the Windows Universal Platform and export them to a XAML markup resource dictionary.
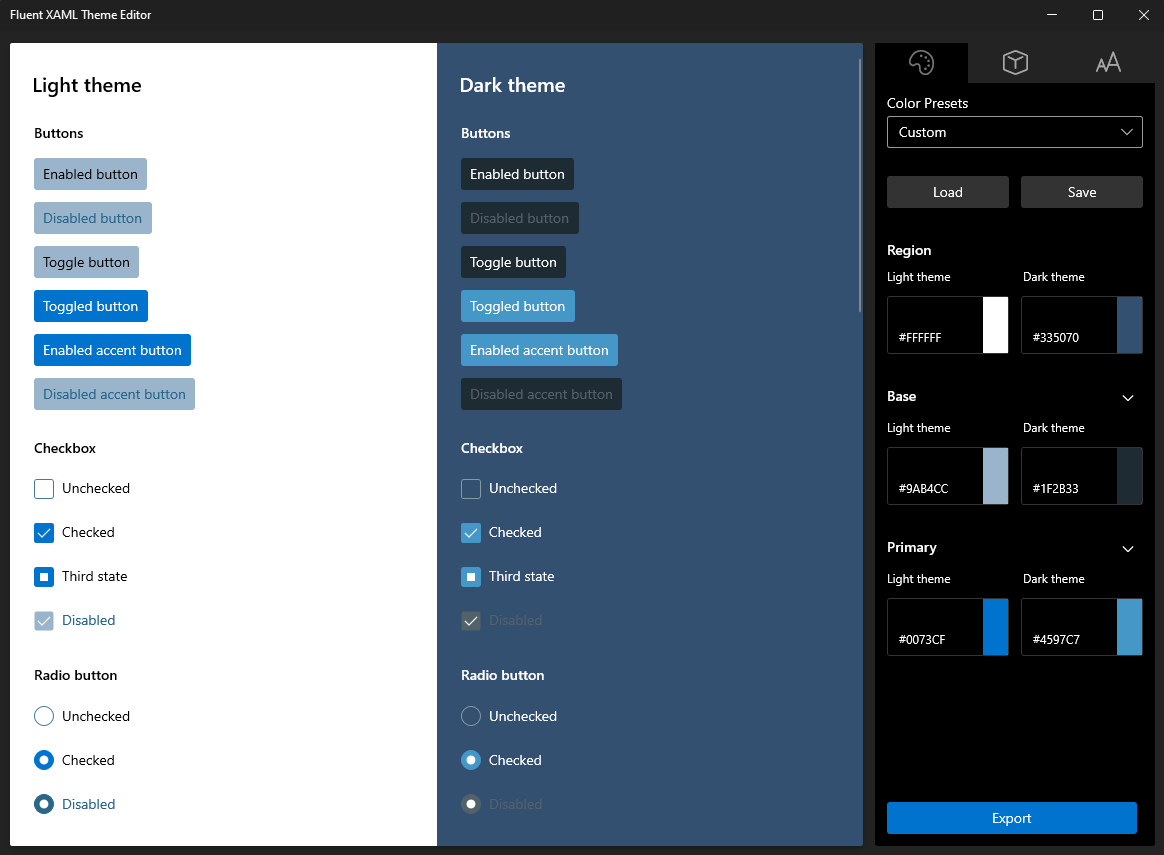
Main features of the Fluent XAML Theme Editor tool

Colors themes
From the right view, labeled Color Dictionary, you can select three major colors for both the Light and Dark themes:
- Region - the background for all the controls.
- Base - controls backplates and temporary state visuals.
- Primary - the Accent color (contrast with mainly white text).
You have the possibility to refine the colors by expanding any of the major colors and choosing from the list of minor colors.
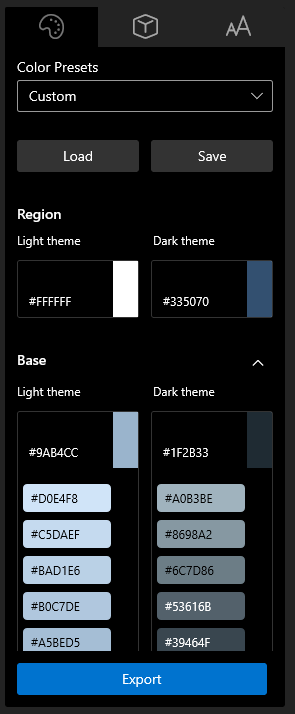
Custom themes
This tool ships some presets for you (Forest, Lavender, Nighttime), but you can develop and save your own custom theme if you want.
After you make the changes, you only have to press the Save button and browse to a location to save the JSON theme file. Thus, you can load the file from the location you saved it if you want to reuse it.
Export themes
To use your theme in the application, follow these steps:
1. Export the theme by clicking the Export button. This will open the ResourceDictionary.
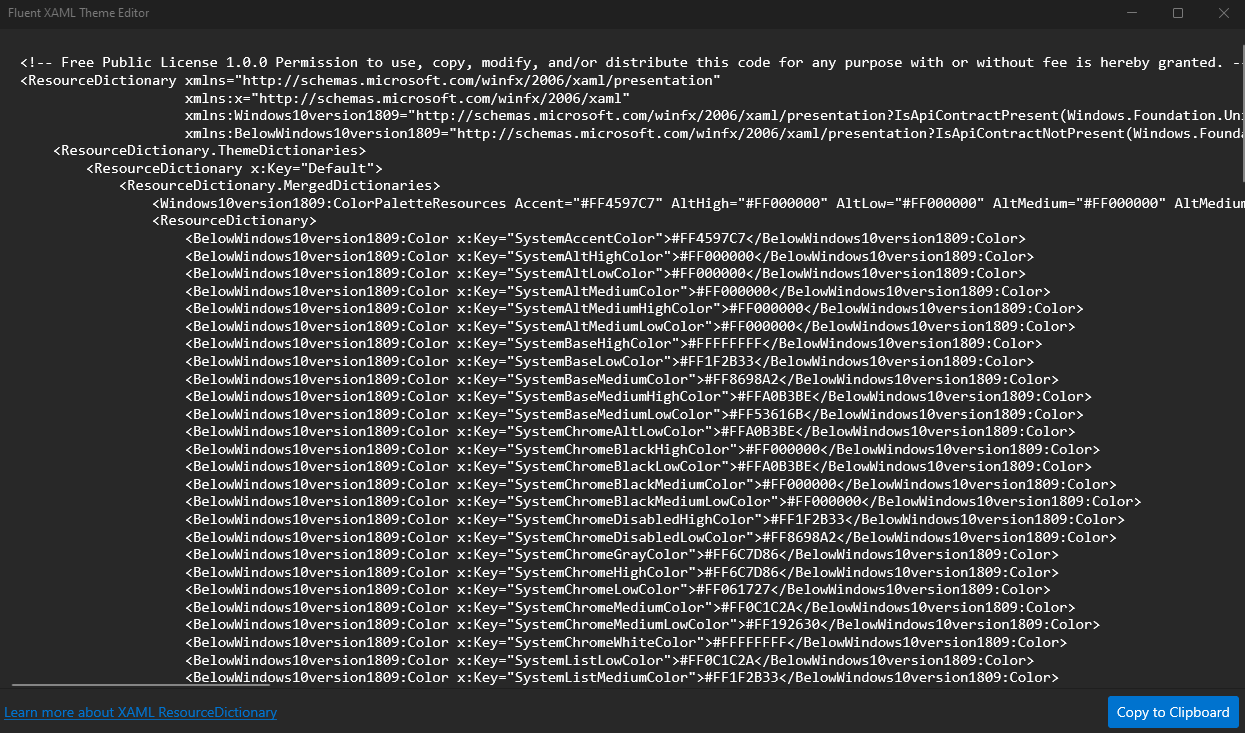
2. Click Copy to Clipboard
3. Go to Visual Studio and add a new item by right-clicking on the project → Add → New Item.
4. Choose ResourceDictionary from the list of items and give it a name (the name of our ResourceDictionary is MyTheme).
5. Paste the copied code into the ResourceDictionary.
6. You may encounter errors in the generated dictionary due to Fluent XAML Theme Editor being designed for WinUI 2, which removed certain properties with the release of WinUI 3.

7. Delete the next lines generating these errors and your app will work fine.
<AcrylicBrush x:Key="SystemControlAcrylicWindowBrush" BackgroundSource="HostBackdrop" … />
<RevealBackgroundBrush x:Key="SystemControlHighlightListLowRevealBackgroundBrush" … />
Integrating your color theme into the application
Now, you can use your color theme to customize your app. For this, go to your App.xaml and merge your dictionary into app resources.
<Application
   …
    <Application.Resources>
        <ResourceDictionary>
            <ResourceDictionary.MergedDictionaries>
                <ResourceDictionary Source="MyTheme.xaml" />
                <!-- Other merged dictionaries here -->
            </ResourceDictionary.MergedDictionaries>
            <!-- Other app resources here -->
        </ResourceDictionary>
    </Application.Resources>
</Application>Don’t forget to set the background color. It’s the only brush that is not set automatically.
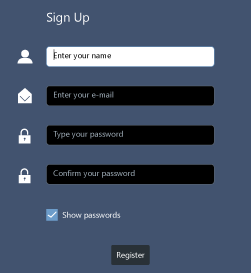
<Grid Width=”600” Height=”600” Background=”{ThemeResource RegionColor}”>We used some icons for customization along with the generated theme from Fluent XAML Theme Editor. Here's how the app design looks:
How to customize the installer theme by using WinUI?

With WinUI, you gain enhanced control over your design and theme implementation.
Advanced Installer provides WinUI support, which allows you to design your installer and optimize user interaction for a seamless experience.
To design your installer using the Advanced Installer WinUI feature, follow the steps:
1. Go to theThemes view and choose one of the predefined themes.
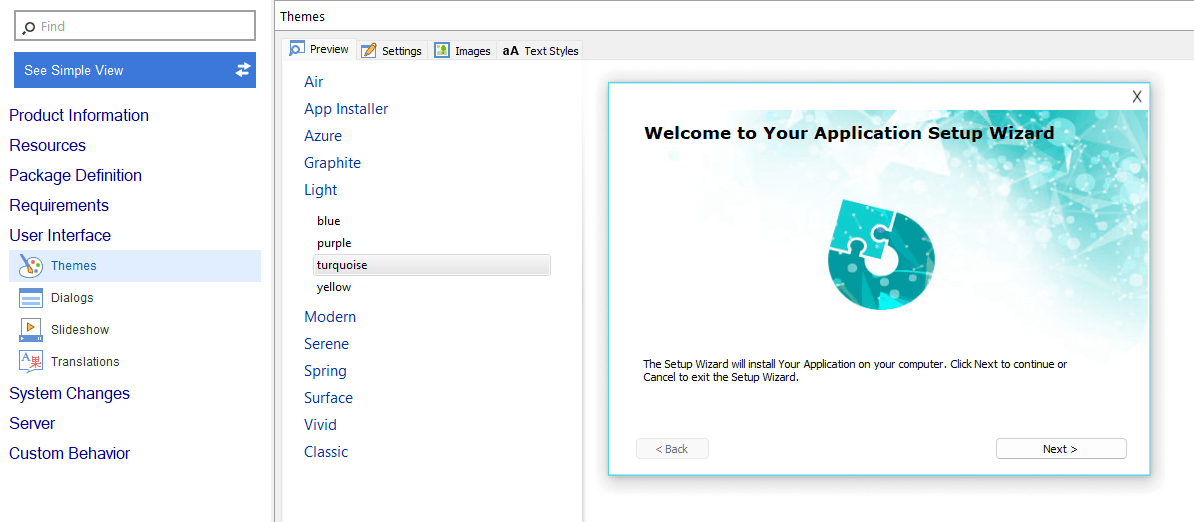
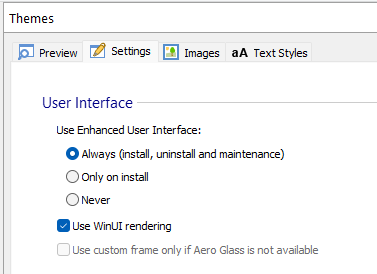
2. Once you've selected the theme, navigate to the Settings tab. From there, enable WinUI by going to the User Interface section.
3. Check the box for "Use Enhanced User Interface" and ensure that "WinUI rendering" is also checked. By doing this, Advanced Installer will render the installation using the modern WinUI controls.
4. Add the controls to your installer dialog. We used the same controls as in our desktop application to ensure that the installer design aligns with the application's design.
4.1 To customize the dialogues, you can utilize a XAML file, similar to our application.
If you wish to generate a custom theme, you can leverage the Fluent XAML Theme Editor tool. However, for this example, we will use the "MyTheme" XAML file generated for the application.
To import the file into your Advanced Installer project, follow these steps:
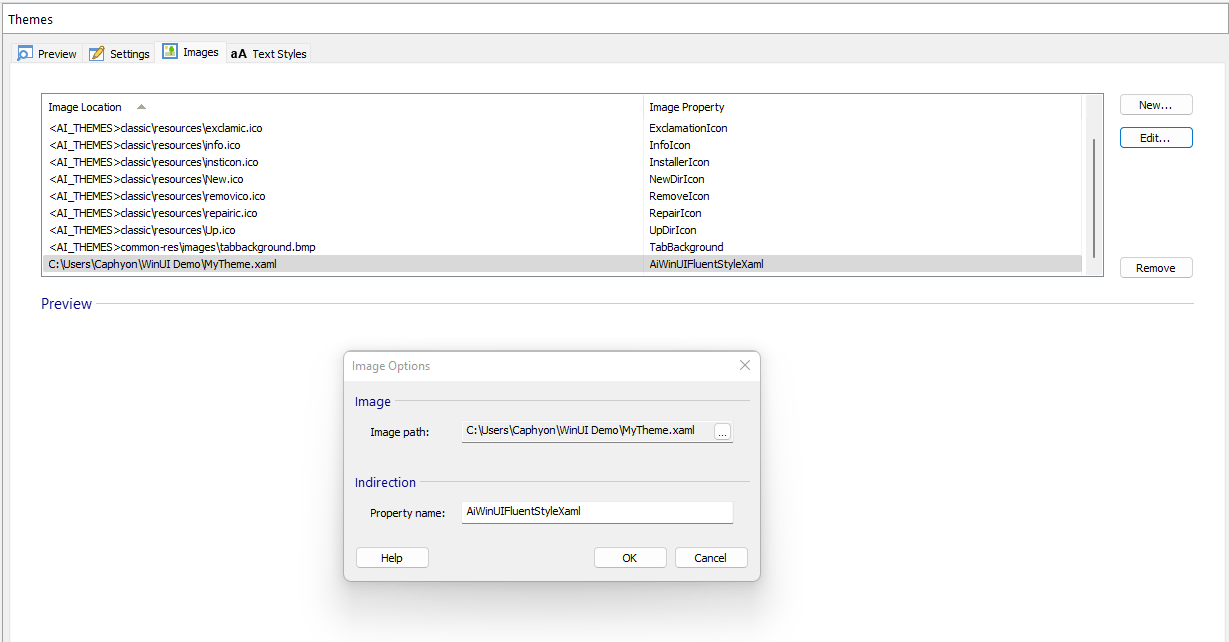
4.1.1 Navigate to the Themes → Images tab.
4.1.2 Click on "New."
4.1.3 Browse and select your XAML file.
4.1.4 Set the property as "AiWinUIFluentStyleXaml."
4.1.5 Your entry should appear at the end of the images list.
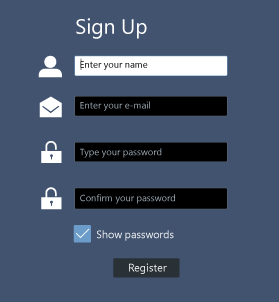
5. Now, we only have to build the project and run the customized installer.
Conclusion

WinUI 3 offers a great perspective on the modern design of desktop applications by introducing new controls and styles to improve the user experience.
You can customize your app element by element, or you can use a faster and easier approach by generating themes as XAML files. In both cases, the result will definitely be impressive.
As a software provider, the last phase of developing an application is creating the installer.
It is the one the user interacts with for the first time, so its design should be at the same level as that of the application.
As a software provider, the final stage of application development is creating the installer. This is the first point of interaction for the user, making it essential for the installer's design to match the quality of the application.
With Advanced Installer, you have WinUI 3 support, allowing you to create an impressive design for your installer. You can leverage modern controls and take advantage of XAML-based support, making UI customization a breeze.
Try Advanced Installer WinUI support through its 30-day full feature trial.
