How to create MSI installers with Visual Studio
Visual Studio is an integrated development environment (IDE) tool made by Microsoft to build code, and publish applications. It is mainly used to develop different types of software—from computer programs to web services.
Visual Studio provides features, like compilers and graphical designers, to enhance application development, probably making it one of the most popular IDEs on the market.
One of the uses of Visual Studio is to create installer packages. In this article, we will be focusing on MSIs, more specifically, guiding you through how to create an MSI package for a Windows Presentation Foundation (WPF) application.
How to add Microsoft Visual Studio Installer Projects Extension

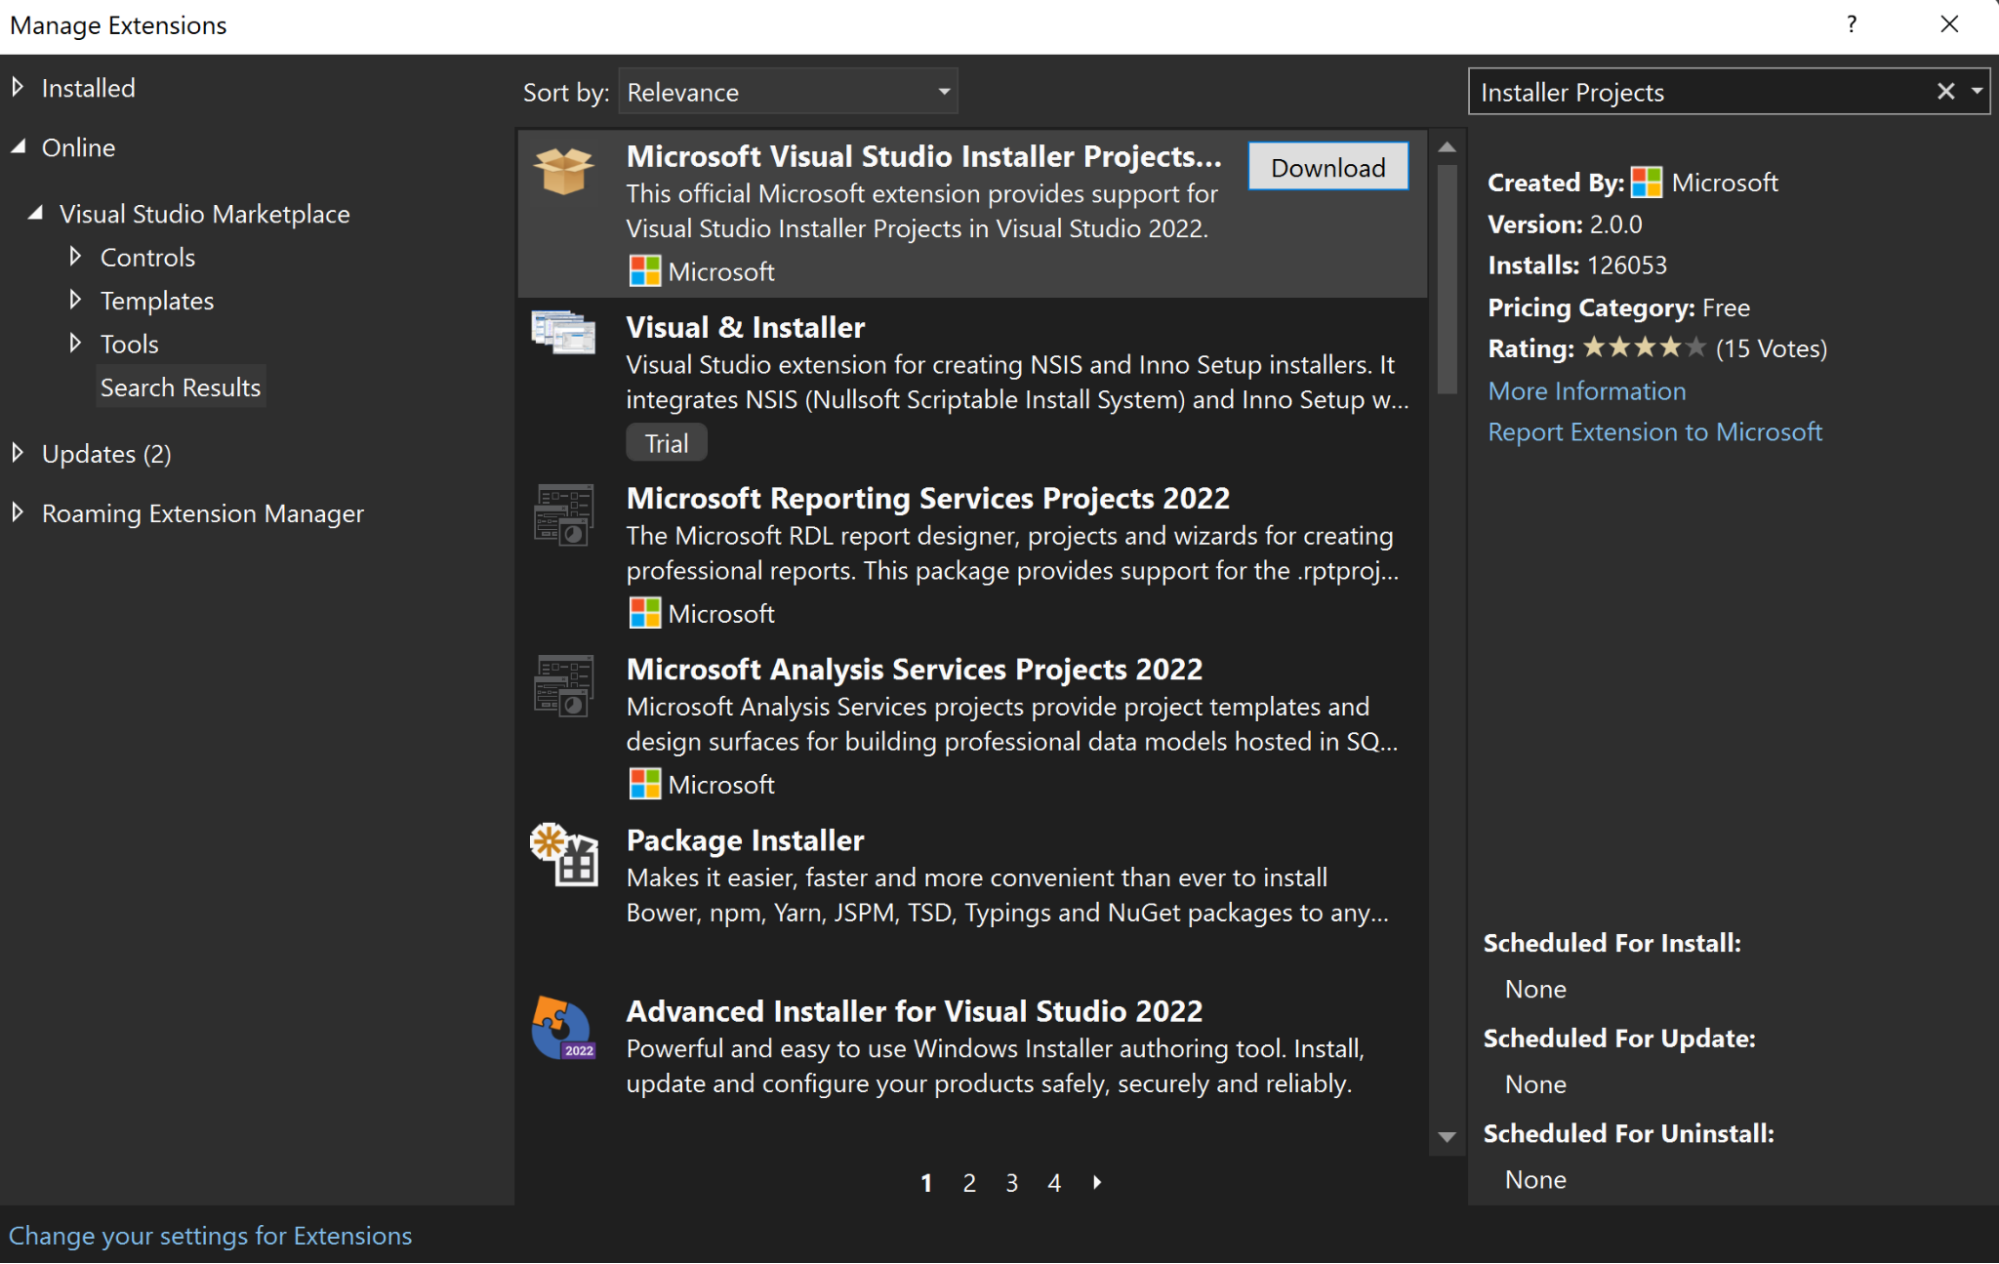
First things first: Before creating the package, we need to add the Microsoft Visual Studio Installer Projects extension to the Visual Studio IDE.
This extension will help us pack the application as an MSI. We have two options to add it:
1. Download the extension from the Visual Studio Marketplace and install it. Once installed, remember to restart Visual Studio before proceeding to the next steps.
Pay attention to the version of the extension you download, as it should work for the version of your Visual Studio. For this tutorial, we used Visual Studio 2022, and for our project, we used this extension.
2. Or go to Extensions -> Manage extensions in Visual Studio. Go to the Online section, look for the extension, and download it. The installation will be scheduled after you close Visual Studio. When you reopen it, the extension will be ready to use.
Once we have the extension, it's time to open the project in Visual Studio.
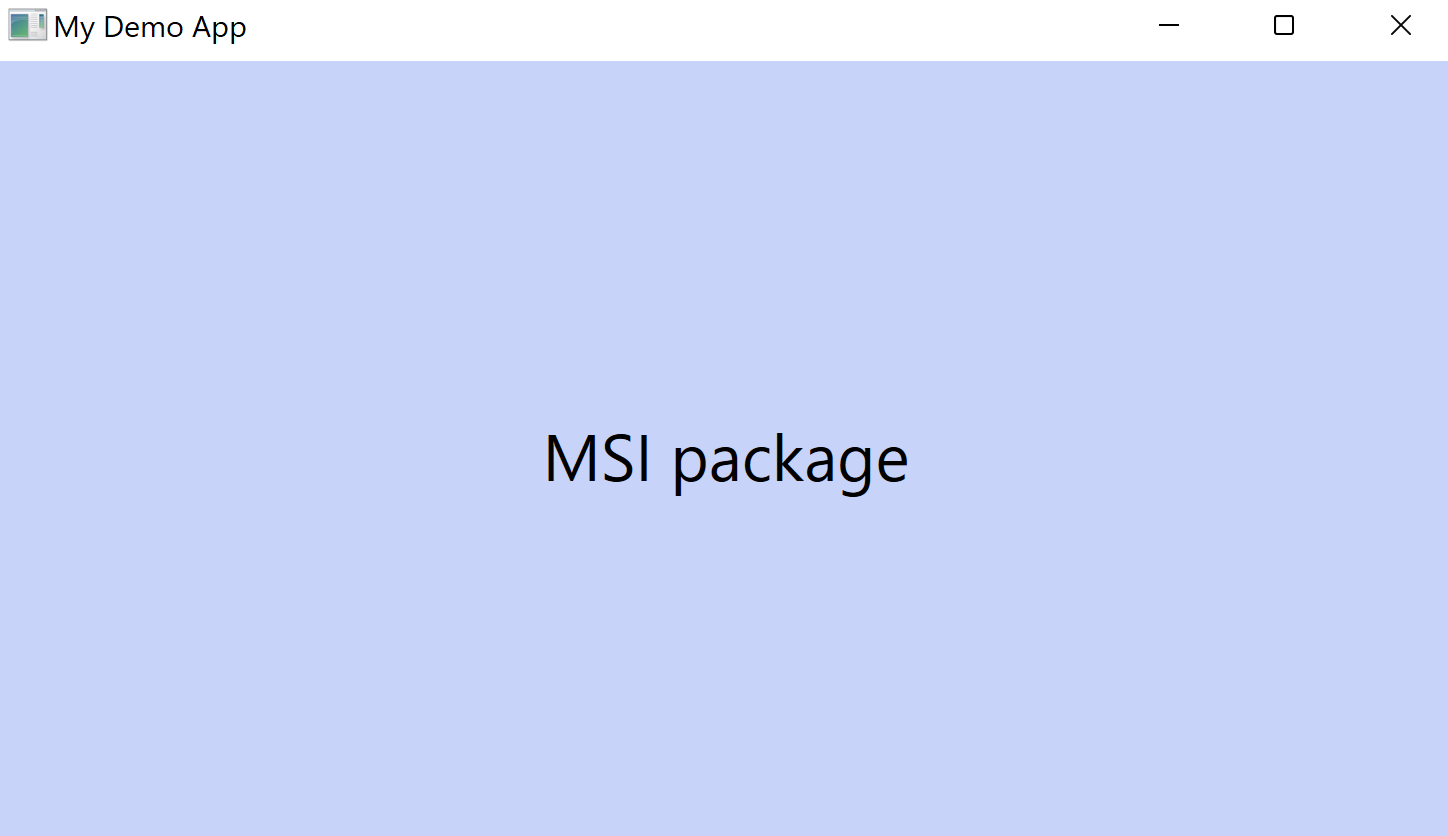
We created a simple WPF application for this tutorial, and now we need to add a setup project to it. Let's see how to do that.
How to add a Setup project to your application

To add a Setup project to an application, follow these steps:
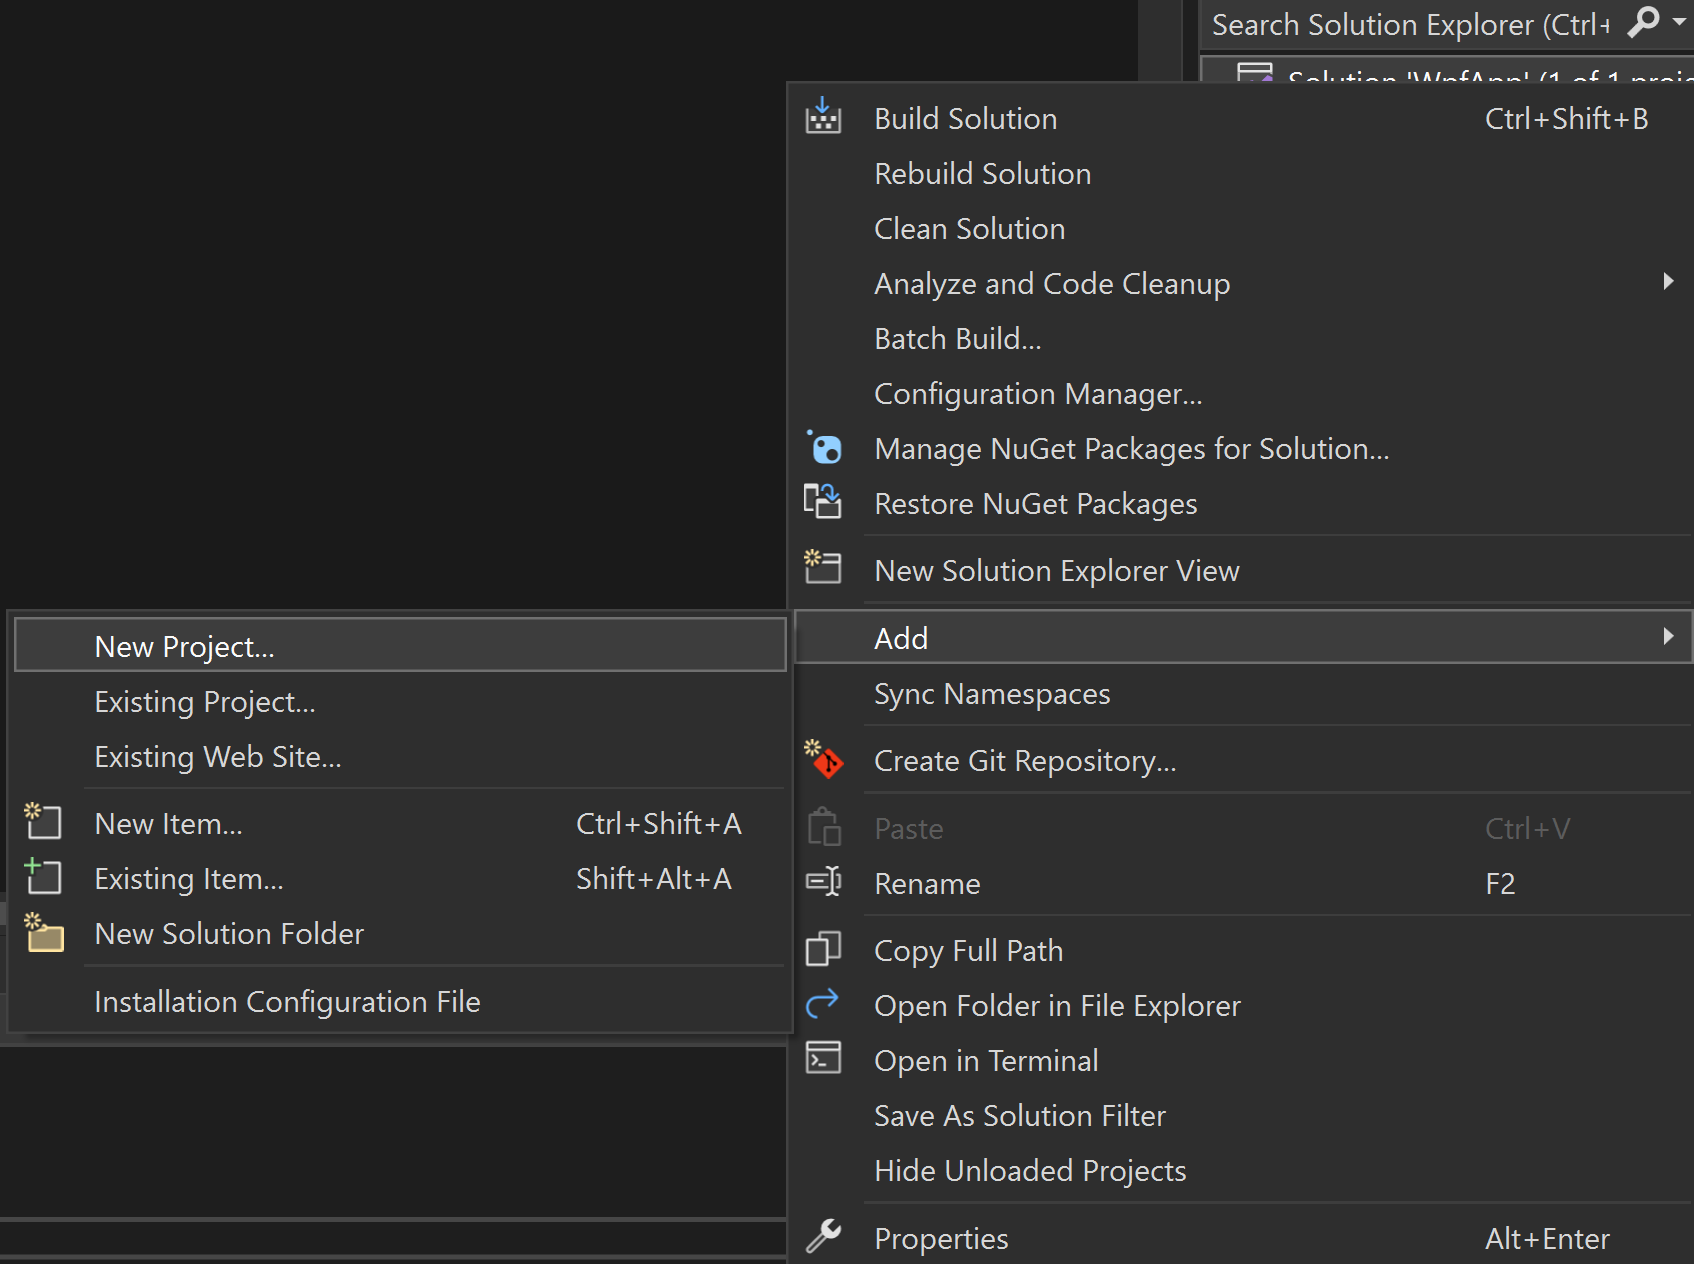
1. Create a new project inside the solution. This project will be a Setup project and will be used to pack the MSI based on our application. To add it, just right-click on the project solution -> Add -> New Project.
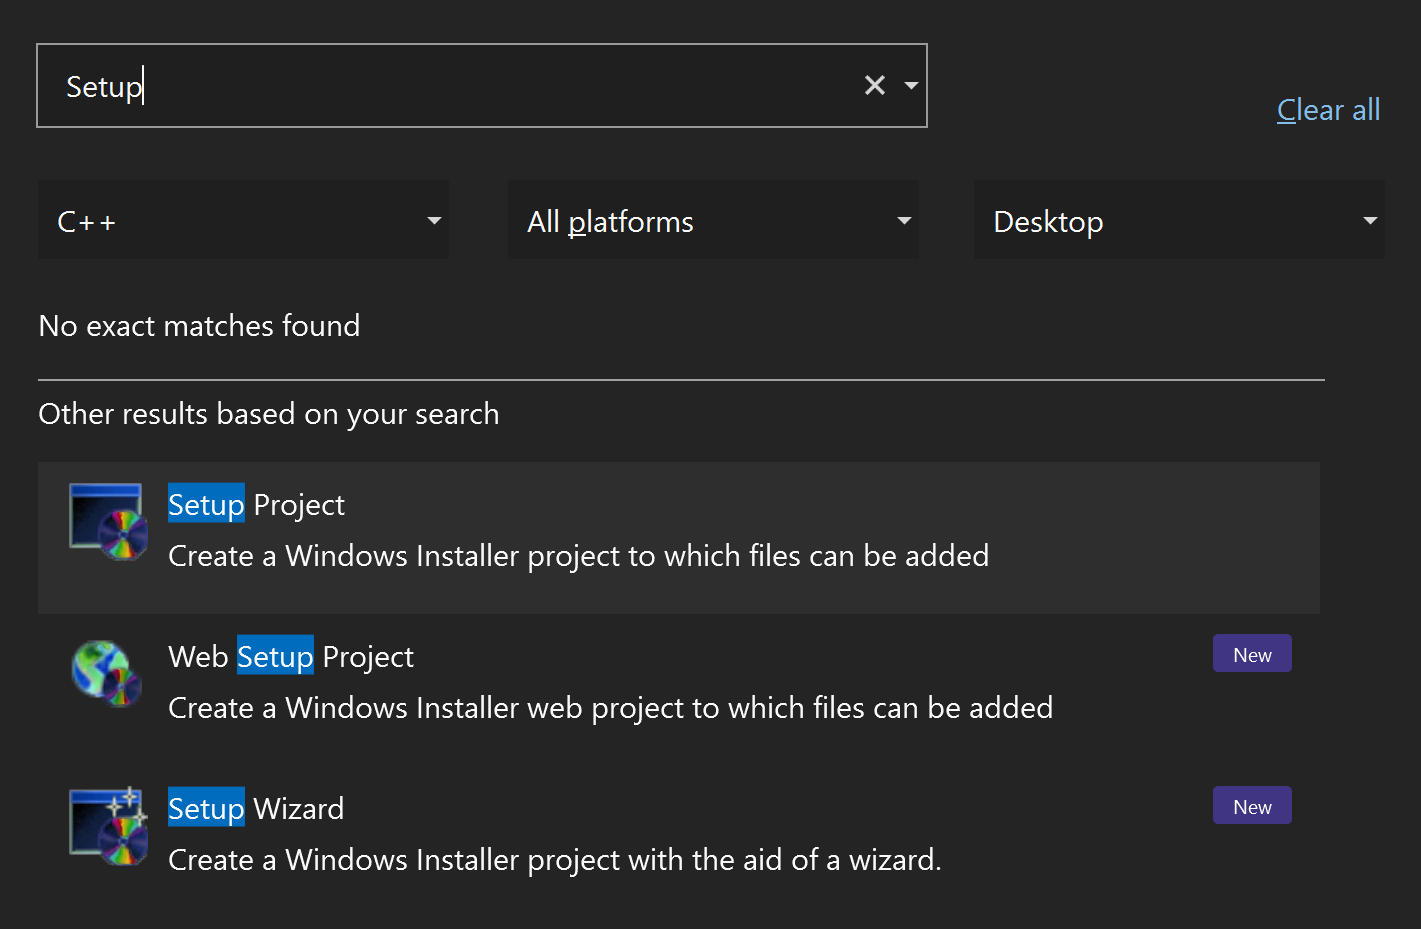
2. From the Add new project dialog, choose the Setup Project and give it a suitable name (e.g. MyMSIpackage) in the Configuration project section.
3. After creating the Setup project, you should be able to see it in the Solution Explorer of your application.
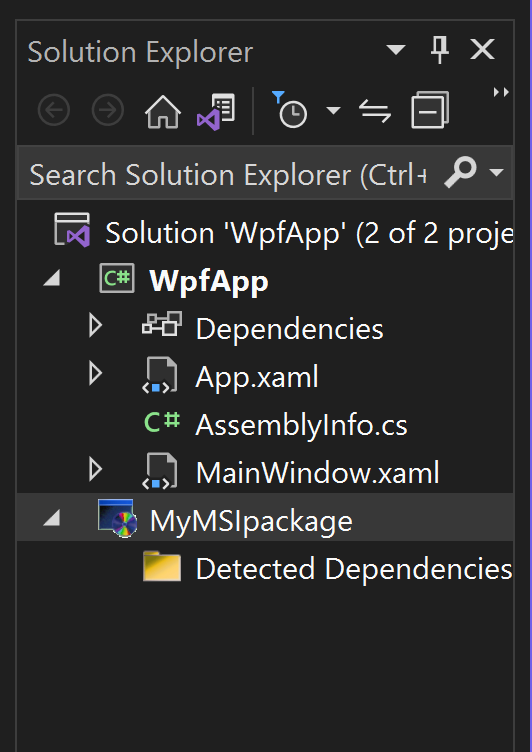
4. Open the file system editor by right-clicking on the Setup project -> View -> File System to see how the Setup project is organized. There, you should find three different folders, like in the picture below:
- Application Folder
- User's Desktop
- User's Programs Menu

How to add the Project output to your Setup Project

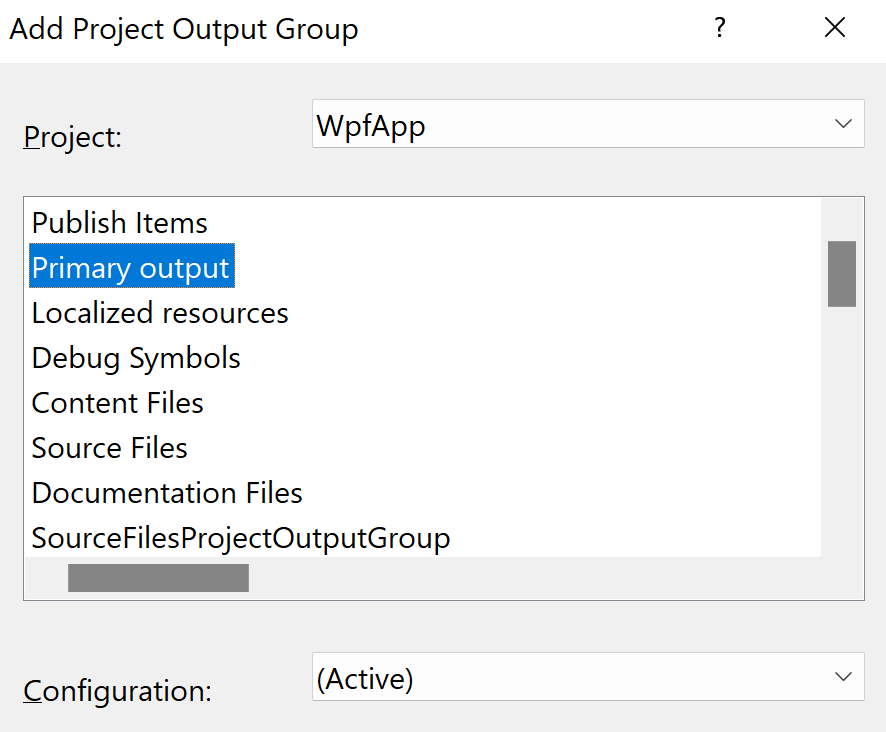
The next step is to add a project output to your application folder, which specifies the project we are creating an installer for – the WPF application in our case. To do this, follow these steps:
1. Right-click on the Application Folder -> Add -> Project Output.
2. Once the dialogue is open, choose the Primary output option, which contains the DLL or EXE built by our project.
How to create Shortcuts for your application

Shortcuts allow users to quickly access and open an application, therefore increasing user productivity.
Here's how you can create a Desktop shortcut:
1.Right-click on the Primary output, generated in the previous step from the Application Folder, and then select Create Shortcut.

2. Once the shortcut is created, you can rename it and place it in the User’s Desktop folder in order for it to be placed on the user’s Desktop after the installation process.
Here’s how you can create a shortcut in Programs Menu:
1. Add a new folder to the User’s Program Menu which will be created at the Programs Menu location after the installation.
2. Create a new shortcut and place it in the new folder located in the User’s Programs Menu.
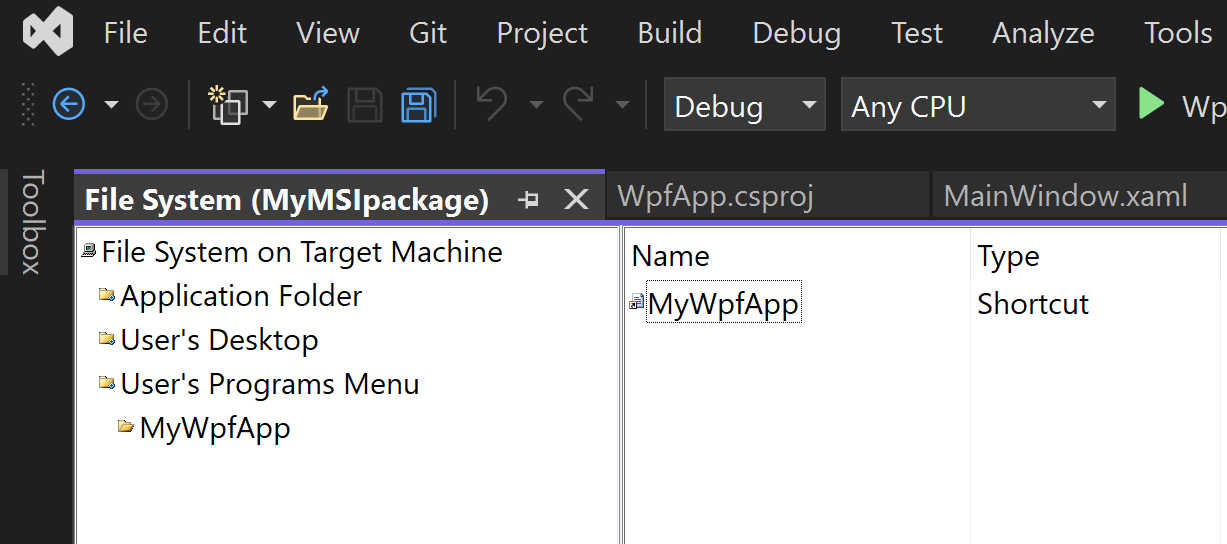
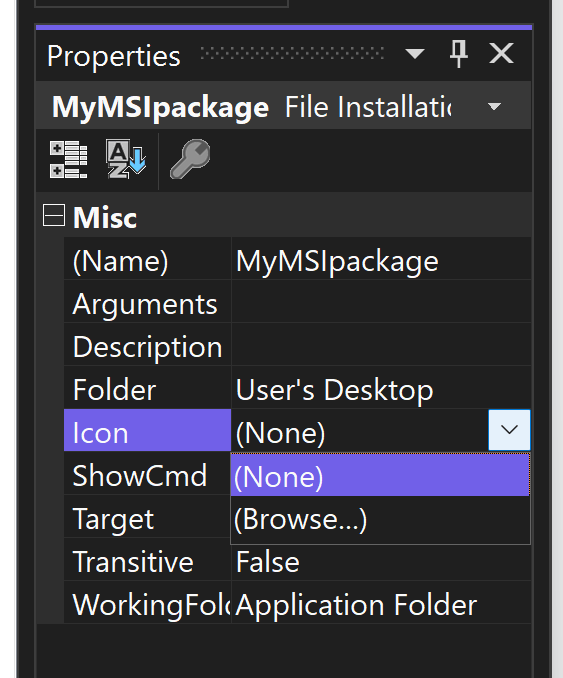
3. To customize your shortcut with an icon, import the icon to the Application Folder from the Setup project by right-clicking on the Application Folder -> Add -> New File. From the opened dialogue, choose the icon to load for your shortcut.
4. Next, to add the icon to the shortcuts, go to every shortcut created and right-click on it, then select Properties Window. From the icon property, browse to the Application Folder and select the icon we uploaded in the previous step.
How to edit product details for your Setup project

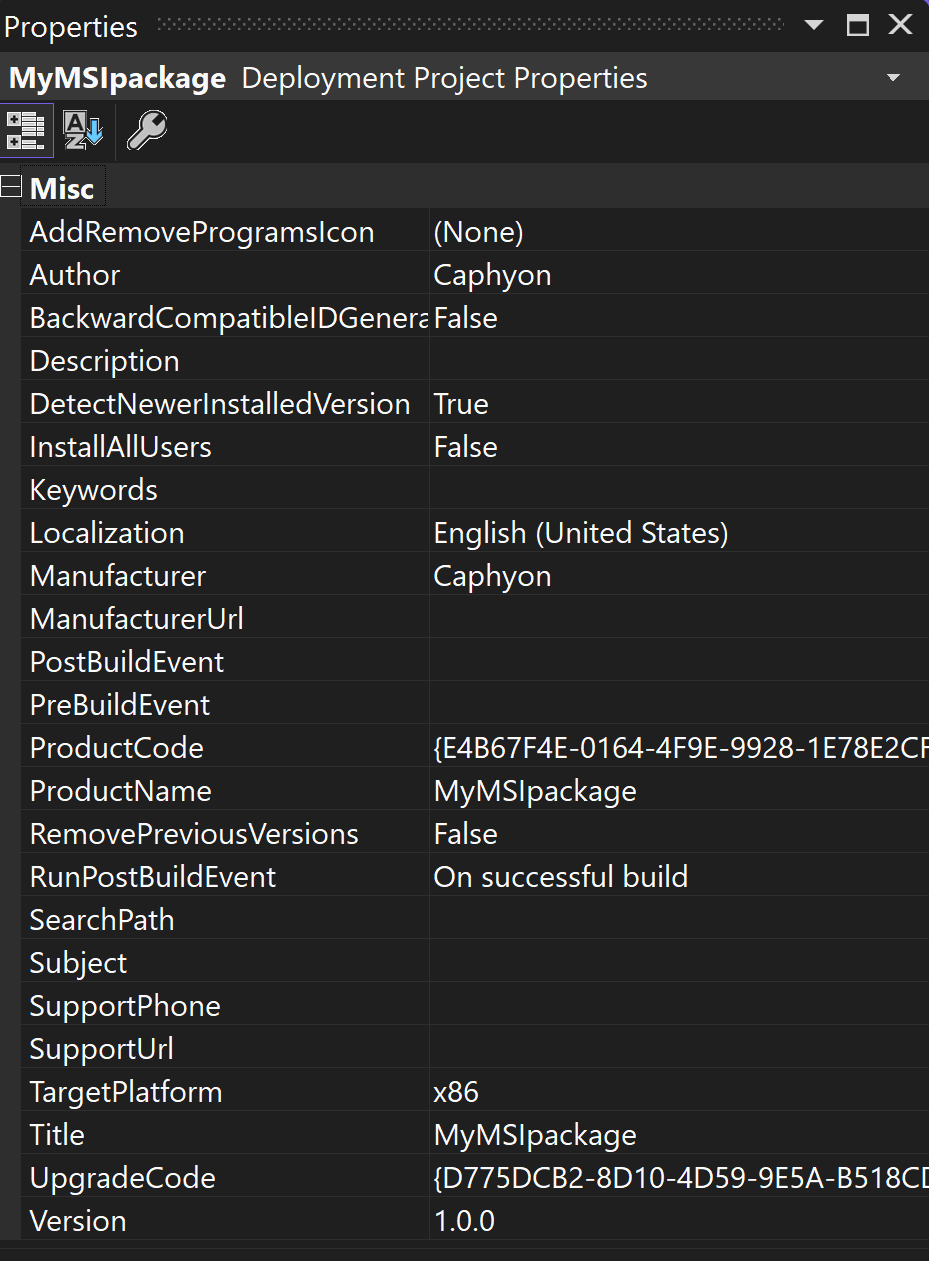
If you need to change some properties for your Setup project, you can go to the Properties page of the Setup project. In our case, we left the Target Platform set to x86 and the Version set to 1.0.0. We changed the Author and Manufacturer.
How to install Prerequisites to your application

To have an application that runs successfully, additional components or prerequisites need to be installed on the destination computer. A common example of these components is the .NET Framework, a requirement for many applications created with Visual Studio to run. In this case, the correct version must be presented on the target computer before installing your application.
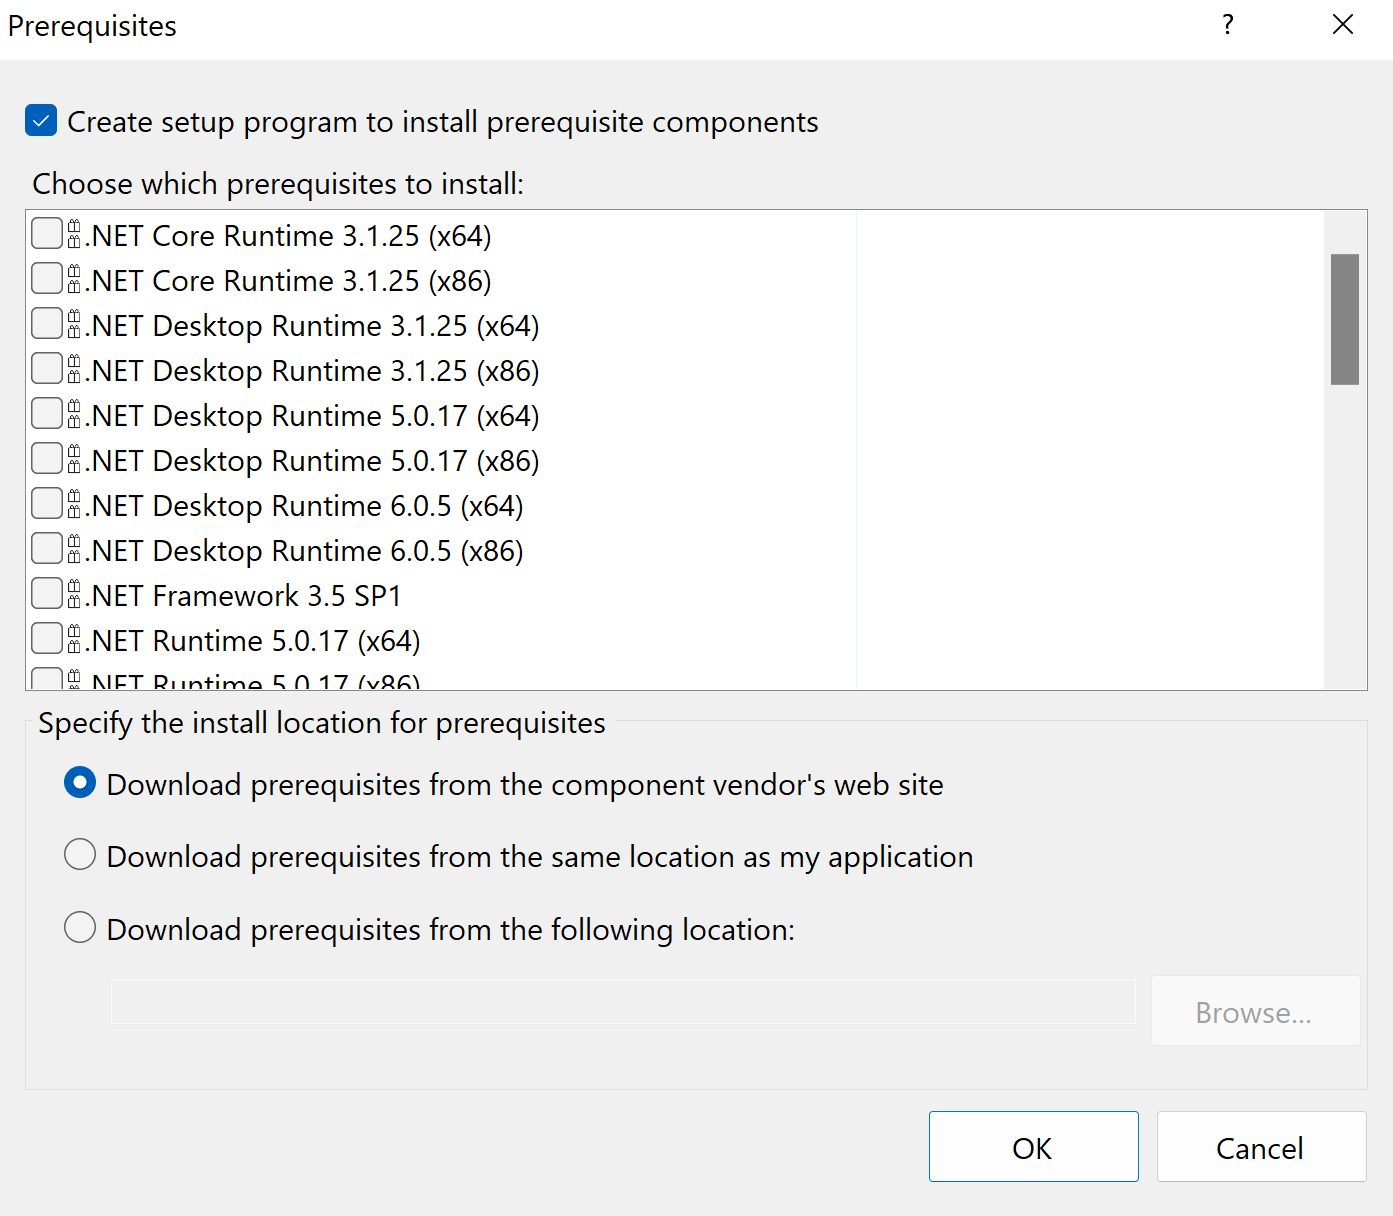
If you want to add Prerequisites to your Setup project, right-click on Setup project -> Properties -> Prerequisites. From the opened dialog, you can choose which prerequisites to install (as seen in the image below) or you can specify an install location for your prerequisites.
How to add launch conditions to your MSI

Launching an installation package can require some predefined conditions for an application to be installed. For example, if your application only runs on a specific type of Windows, you should use a launch condition to prevent a user from installing it on an unsupported system.
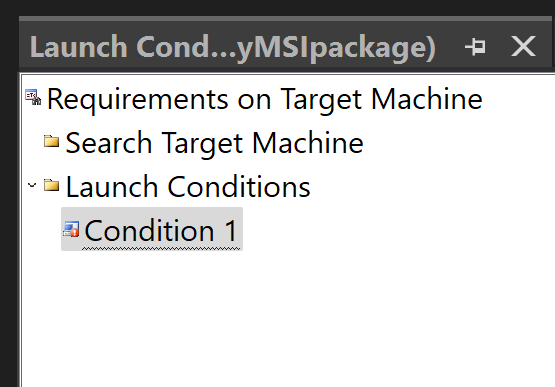
- To manage launch conditions, right-click on the Setup project - > View -> Launch conditions.
- To add a new Launch condition, right-click on the Launch conditions folder - > Add New Launch Condition.
How to install your application 

Once we complete all the steps above, we are ready to build the Setup project to create the MSI based on our application. After the build, we have to browse to the Debug folder (as we are using Debug mode) of the Setup project to run the MSI file and start the installation.
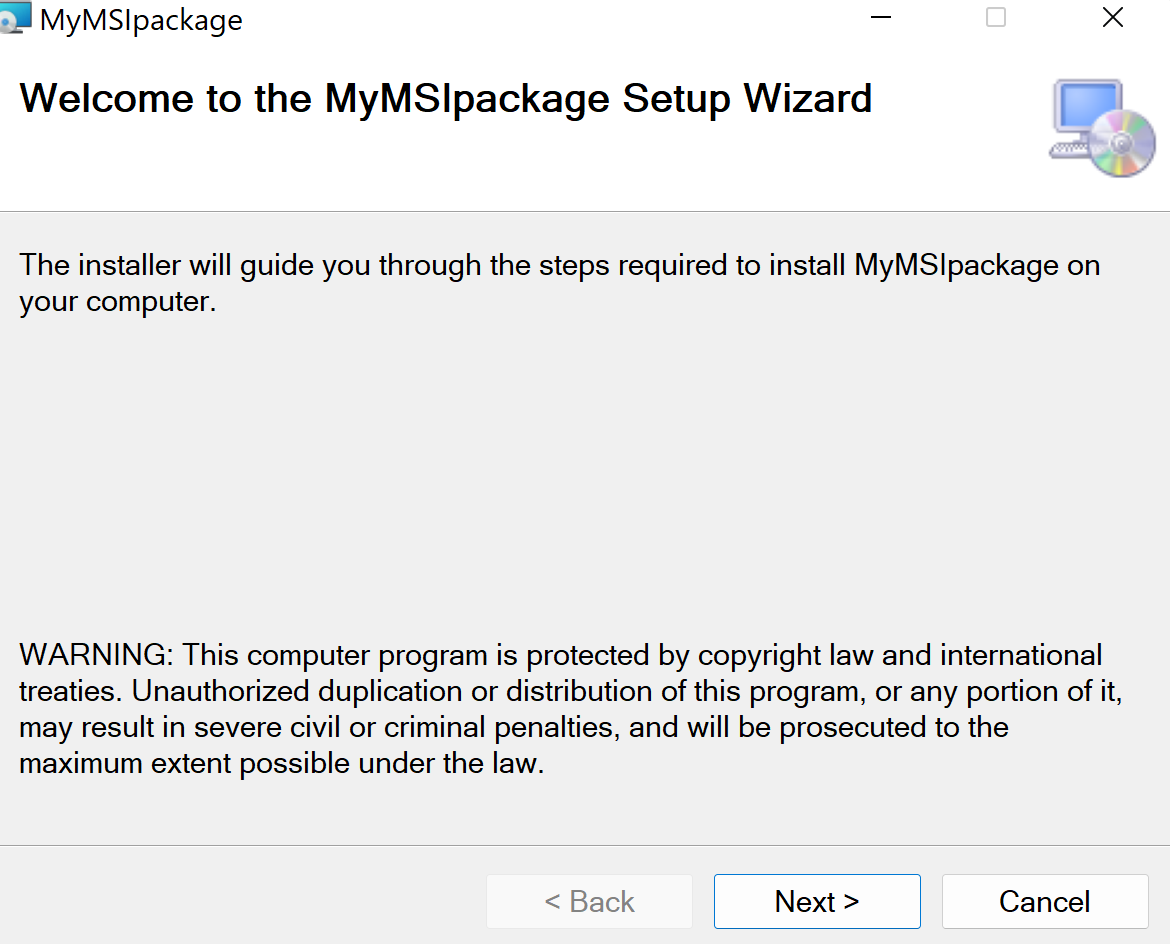
After the installation process is finished, we can find the shortcut on the desktop and run the application.
Video Tutorial

How does Advanced Installer enhance the power of Visual Studio?

Let’s explore how you can create an MSI installer in Visual Studio using the Advanced Installer extension.
This extension allows you to create and manage your installer directly within Visual Studio.
Before going through the steps to create the installer, let’s first install the extension.
Installing the Advanced Installer Extension

1. In Visual Studio, navigate to Extensions → Manage Extensions.
2. Search for Advanced Installer for Visual Studio extension.

3. Click ‘Install’ and then close Visual Studio to complete the installation process.
Adding a Setup Project

Once the extension is installed, follow these steps to add the setup project:
- Right-click on the project solution in Solution Explorer → Add → New Project.
- From the list of templates, select Advanced Installer Project.
- Set a name for the setup project and click ‘Create’.
After the setup project is created, select the .aip file to access the Advanced Installer viewer.

The Advanced Installer viewer allows you to quickly modify basic installer settings, such as product details or launch conditions.
You can also add the project output directly from the viewer:
- Navigate to the Files and Folders tab.
- Click the Add Project Output.
- In the opened dialog, select your project and click OK.
For advanced configuration options, you need to open the project directly in Advanced Installer by using the ‘Edit in Advanced Installer’ button from the bottom left of the viewer.
By default, you can create installers for Visual Studio solutions using the Freeware license of Advanced Installer. However, if you have a Professional, Enterprise, or Architect license for Advanced Installer, you can convert your installer project to the desired project type via the Edit Project Settings dialog.

Key Advanced Installer Features for Professional Installers

When working directly in Advanced Installer, you have access to a wide range of features depending on your license type:
- Custom Actions: Create or use built-in custom actions to handle common installation tasks. Advanced Installer supports all custom action types and allows you to define new ones as needed.
- Install Prerequisites: Add predefined prerequisites to your installation package, covering many common app scenarios, or define custom prerequisites.
- Dialog Editor: Use the Dialog Editor to customize installer dialogs with drag-and-drop controls and configure their behavior for an optimal user experience.
- Launch Conditions: Choose from predefined system and software-related launch conditions or define new ones to suit your requirements.
- Auto-Updater: Leverage the built-in updater tool to check for, download, and install updates, simplifying the update process for end users.
After customizing your installer package in Advanced Installer, close it and return to Visual Studio. When prompted, reload the .AIP file to apply your changes.
The last step is to build the solution in Visual Studio to generate the installer and then run it to install the application.
Conclusion

We hope this article helped you get an overview of how to use Visual Studio to package MSIs.
Visual Studio is a suitable solution to create an MSI package. It is especially convenient for less complex applications, but not so much for complicated packaging scenarios.
If you're working with a more complex installer, it may be a better option to try using an application packaging tool. Advanced Installer provides a quick and easy way to distribute add-ins and extensions for Microsoft Visual Studio. It will automatically generate all the required files, so you don't need to configure your installer manually.
Check out Advanced Installer through our 30-day full feature free trial.
