How to Create a WiX Installer for a Windows Service (.NET)
The Windows services are apps that run in the background of the Windows operating system without direct user interaction. But how do you build and install a .NET-based service?
In this article, I’ll walk you through the necessary steps to create a Windows Service in Visual Studio and build an installer using the WiX Toolset. Additionally, I’ll also share an easier alternative for creating the installer using Advanced Installer.
Create the Windows Service project
Let’s start by creating the service project in Visual Studio:
- Go to File → New → Project.
- Select the Worker Service template from the list.
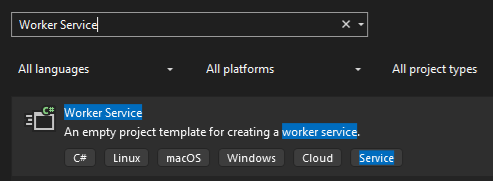
- Configure the project and set the .NET version according to your requirements.
- Click Create - your service project will appear in the Solution Explorer.
Configure the Service
There are two steps to follow after you create the project:
1. Configure the Program.cs file to invoke the UseWindowsService() method in the host builder. Its role is to integrate the app with the Windows Service Control Manager so it can be installed and managed like any other Windows service.
Make sure you installed Microsoft.Extensions.Hosting.WindowsServices NuGet package. This package provides the UseWindowsService() method.
using Demo_Service;
Host.CreateDefaultBuilder(args)
    .UseWindowsService()
    .ConfigureServices((hostContext, services) =>
    {
        services.AddHostedService<Worker>();
    })
    .Build()
.Run();2. Implement the service logic within the Worker.cs file. Let's use an example: configure it to write a message to a text file every five minutes to easily verify that the service is running properly.
public class Worker : BackgroundService
{
    private readonly ILogger<Worker> _logger;
    private readonly string filePath = @"C:\Users\R\ServiceLog.txt";
    public Worker(ILogger<Worker> logger)
    {
        _logger = logger;
    }
    protected override async Task ExecuteAsync(CancellationToken stoppingToken)
    {
        _logger.LogInformation("Worker starting at: {time}", DateTimeOffset.Now);
        try
        {
            // Create the log file if it doesn't exist
            if (!File.Exists(filePath))
            {
                string initMessage = $"[{DateTime.Now}] Log file created.{Environment.NewLine}";
                await File.WriteAllTextAsync(filePath, initMessage, stoppingToken);
                _logger.LogInformation("Log file created at: {path}", filePath);
            }
        }
        catch (Exception ex)
        {
            _logger.LogError(ex, "Error while creating the log file.");
            return;
        }
        while (!stoppingToken.IsCancellationRequested)
        {
            try
            {
                string message = $"[{DateTime.Now}] MyService is running.{Environment.NewLine}";
                await File.AppendAllTextAsync(filePath, message, stoppingToken);
                _logger.LogInformation("Log entry written at: {time}", DateTimeOffset.Now);
            }
            catch (Exception ex)
            {
                _logger.LogError(ex, "Error while writing to the log file.");
            }
            try
            {
                await Task.Delay(TimeSpan.FromMinutes(5), stoppingToken);
            }
            catch (TaskCanceledException)
            {
                // Service is stopping
                break;
            }
        }
        _logger.LogInformation("Worker stopping at: {time}", DateTimeOffset.Now);
    }
}Publish the Service
Before creating the installer for the service, we need to publish the Worker Service project to generate the necessary components for deployment:
- Right-click on the project → Publish.
- Choose to publish the app to a local folder.
- Configure the publish profile. In my example I’ve done the following:
- Set the Deployment mode to Self-contained.
- Checked the Product single file option.
- Set the Target runtime to win-x64.
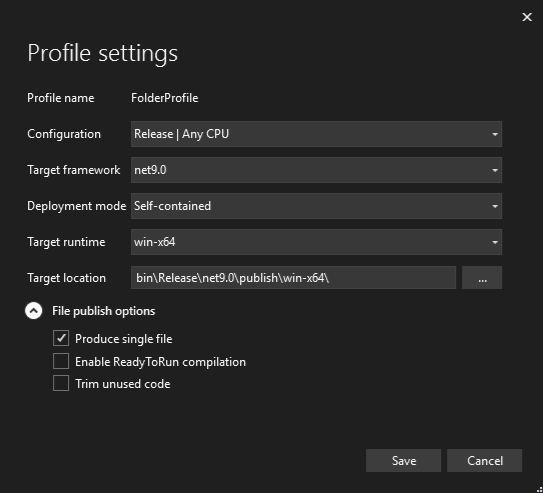
- Once everything is set up, click Publish. This generates the output the installer will package.
Create the WiX Setup Project
Before you create a WiX setup, install the HeatWave Visual Studio extension from the Visual Studio Marketplace.
To add the setup project:
- Navigate to File → New → Project.
- Select the MSI Package template.
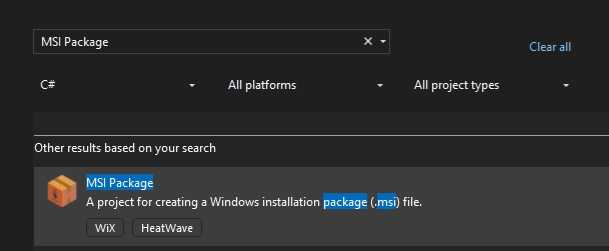
- Configure the project and click Create.
- After it's created, the project should be in the solution explorer.
Configure the Setup Project
Now, it’s time to configure the WiX setup project. We’ll configure the three .wxs files from the project template to define how the Windows Service is installed, registered, and managed:
1. Package.wxs → it is the installer entry point where we can define the package identity, version, and upgrade rules. It also connects the Feature to the component group that contains the files to be installed.
<?xml version="1.0" encoding="utf-8"?>
<Wix xmlns="http://wixtoolset.org/schemas/v4/wxs">
  <Package Id="MyCompany.DemoService"
           Name="Demo Service"
           Manufacturer="MyCompany"
           Version="1.0.0.0"
           Scope="perMachine"
           UpgradeCode="b7998d73-63ec-4e73-b137-cde799a731b4">
    <MajorUpgrade AllowSameVersionUpgrades="no"
                  DowngradeErrorMessage="A newer version is already installed."/>
    <Feature Id="Main">
      <ComponentGroupRef Id="ServiceComponents" />
    </Feature>
  </Package>
</Wix>2. Folder.wxs → defines the installation folder structure.
<?xml version="1.0" encoding="utf-8"?>
<Wix xmlns="http://wixtoolset.org/schemas/v4/wxs">
  <Fragment>
    <Directory Id="ProgramFiles64Folder">
      <Directory Id="DIR_Company" Name="MyCompany">
        <Directory Id="INSTALLFOLDER" Name="Demo Service" />
      </Directory>
    </Directory>
  </Fragment>
</Wix>3. ExampleComponents.wxs → specifies the files to be installed. Also, here we configure the service installation using:
- <ServiceInstall> → register the service and set its startup type, account, and description.
- <ServiceControl> → manages service start/stop during install/uninstall.
<?xml version="1.0" encoding="utf-8"?>
<Wix xmlns="http://wixtoolset.org/schemas/v4/wxs"
     xmlns:util="http://wixtoolset.org/schemas/v4/wxs/util">
  <?define PublishDir = "PathToYourPublishFolder" ?>
  <Fragment>
    <ComponentGroup Id="ServiceComponents">
      <Component Id="cmp.ServiceExe" Directory="INSTALLFOLDER">
        <File Id="fil.ServiceExe"
              Source="$(var.PublishDir)Demo Service.exe"
              KeyPath="yes" />
        <ServiceInstall Id="svc.Install"
                        Name="DemoService"
                        DisplayName="Demo Service"
                        Description="This service logs activity every 5 minutes."
                        Type="ownProcess"
                        Start="auto"
                        ErrorControl="normal"
                        Account="LocalSystem" />
        <ServiceControl Id="svc.Control"
                        Name="DemoService"
                        Start="install"
                        Stop="both"
                        Remove="uninstall"
                        Wait="yes" />
      </Component>
      <Component Id="cmp.AppSettings"
                 Directory="INSTALLFOLDER"
                 Permanent="yes">
        <File Id="fil.AppSettings"
              Source="$(var.PublishDir)appsettings.json"
              KeyPath="yes" />
      </Component>
    </ComponentGroup>
  </Fragment>
</Wix>Make sure your installer package is configured for per-machine installation. Remember: the user running the installer must have admin rights.
Build and Install
Once the setup project is configured, it’s time to build it to generate the installer. Then, run the new .MSI package to install and register the service.
Open the Services Console Manager to check if the service has been registered. It should appear in the list with the configured name and description. You can check the text file to see if a message is added every five minutes to confirm the logging works.

Creating the Service Installer using Advanced Installer
The following steps require Advanced Installer's Professional edition or higher.
Advanced Installer provides an easier alternative to create an installer for your service through its intuitive graphical user interface. Here is a step-by-step guide on how to create your service installer.
1.Start New Project:
- Launch Advanced Installer.
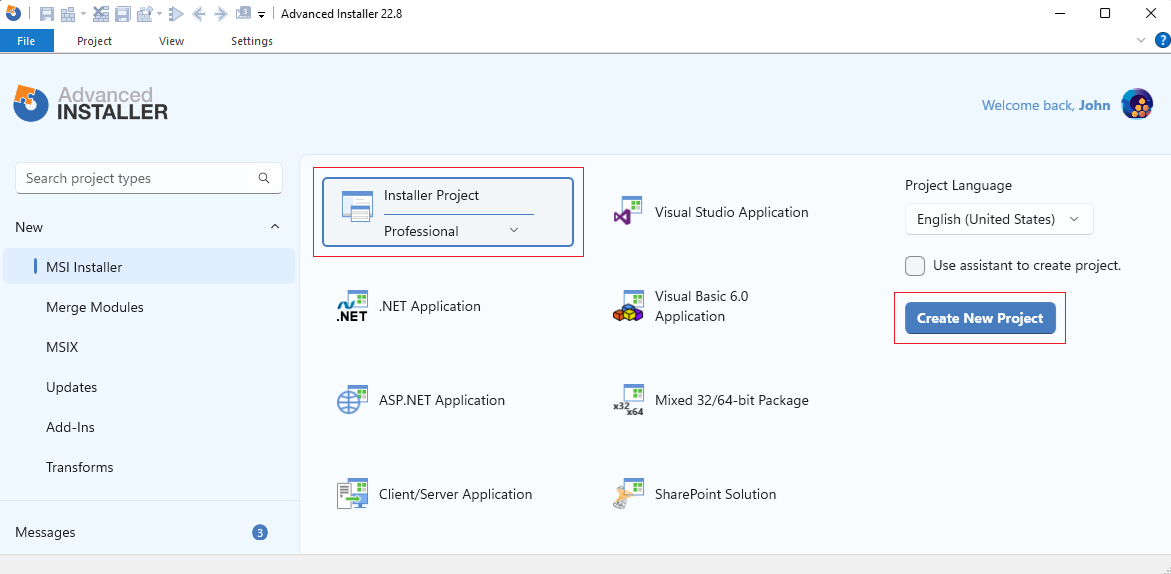
- On the Start Page, select Professional Project or higher and then click Create New Project.
2. Add the service project publish folder:
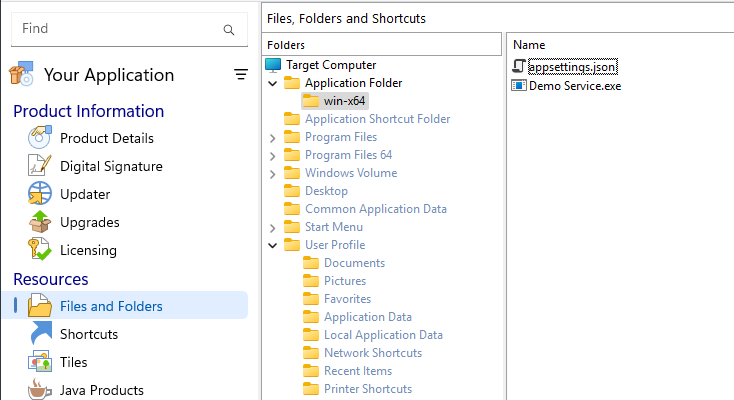
- Navigate to the Files and Folders.
- Add the publish folder to the Application Folder.
3. Define the new service:
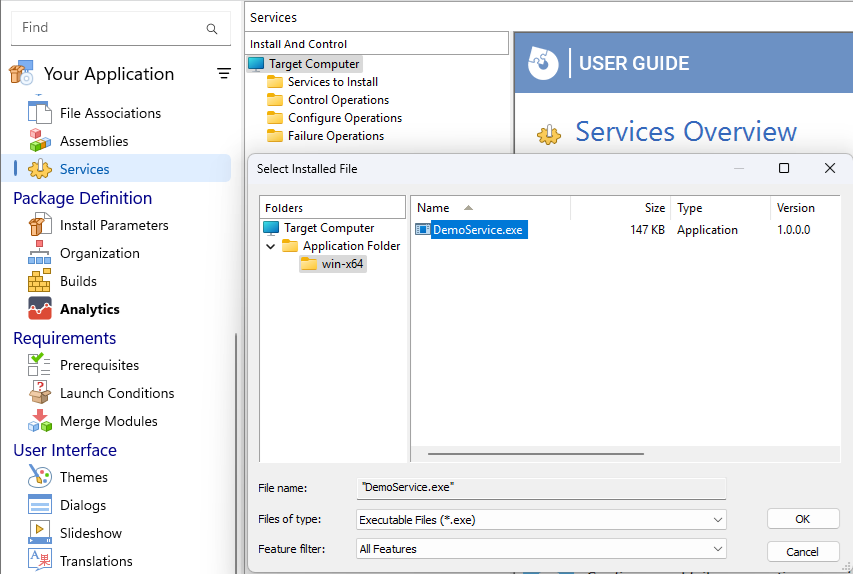
- Go to the Services view
- Click the New Service button
- In the “Select Installed File” dialog, select the executable file of your service that you’ve added in the Files and Folders view.
4. Customize the Service (optional):
- After you add your service, you will find a wide range of customization options directly within the GUI. This allows you to configure many aspects of the service depending on your needs.
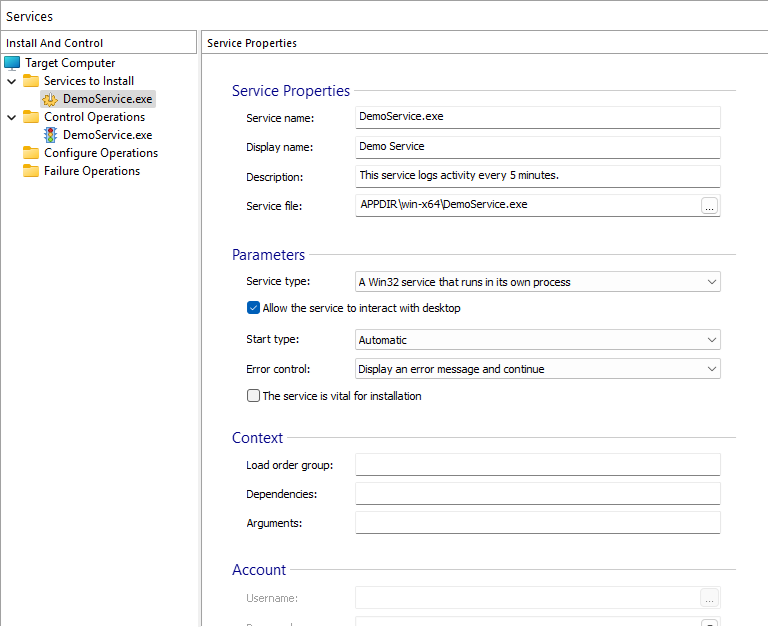
Once you have finished setting up the service, click the Build button to generate the installer. Then, run it to install the service on your machine. That’s it. The Services Control Manager should now display your service.
Conclusion
The WiX toolset allows you to create an installer for a .NET Windows Service. However, this method calls for a more challenging learning curve.
Instead, Advanced Installer is a far more user-friendly option. It simplifies the installer creation through its graphical user interface. It makes the process significantly easier and more efficient.
Check out this free 30 days trial for a full-featured Advanced Installer. |
|---|
FAQs
How do I use WiX to create an installer for a .NET Windows Service?
Install the Visual Studio HeatWave extension. Next, edit the .wxs files and create an MSI Package project. To register the service and manage its lifecycle, use <ServiceInstall> and <ServiceControl>, respectively.
How do I create an installer for a .NET Windows Service using Advanced Installer?
Start a new Professional Project or higher. Then, add the published service files to the Application Folder. Once added, go to the Services view to define and configure the service properties. The last step is to build the project to generate the installer.
