Customize Your App Installer UI in Minutes - No XML Required
Customizing the App Installer UI used to require manually editing an XML file and adding it to your MSIX application. With Advanced Installer, however, you can do the customization directly from its graphical user interface, no XML editing is required.
In this article, I’ll show you how to customize the App Installer UI to deliver a unique installation experience for your users.
How to Enable the App Installer UI Customization

Let’s assume you have already created and configured an MSIX package project in Advanced Installer.
For a complete guide on how to create an MSIX package, check the article here.
To enable the App Installer UI customization:
- Navigate to the Builds page in Advanced Installer.
- Select the MSIX build.
- Go to the App Installer tab.
- Check the Use custom UI option.

How to Customize the App Installer UI

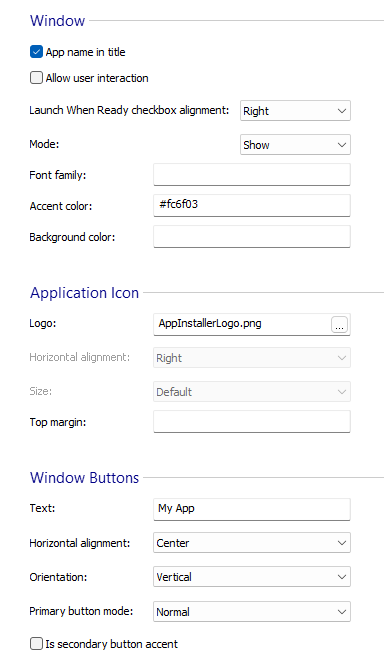
Once the custom UI option is enabled, you will notice a list of configuration options you can adjust. Let’s try a few of them to see how they impact the App Installer UI.

Here’s what I’ve set up:
- The app name is displayed in the installer window title.
- The position of the ‘Launch when ready’ checkbox is set to the right.
- The accent color is #fc6f03.
- A logo will be displayed.
- Additional text is added on on the Install button.
- The window buttons alignment and orientation are changed.
Discover the new App Installer UI customization, available in version 23.1.
Upgrade to 23.1 to unlock App Installer UI customization
or
Start your 30-day free trial.
Build and Test

After making all the changes, build the project to generate the MSIX package and then run it. You’ll see the customized App Installer UI reflecting the changes above.

Video Tutorial

Conclusion

With Advanced Installer, customizing the AppInstaller UI is simple and intuitive. You no longer need to edit any XML files – you can handle all customization directly from its graphical user interface.
