How to display interactive user messages during an Intune system deployment
Ever faced the puzzle of deploying an application silently via Intune in a system context, but also needing to communicate with the user? You're not alone!
Whether it's getting user consent for partial software installation or alerting them about an impending app update, ServiceUI.exe is your go-to solution.
In this article, I’ll show you how to achieve the above scenarios using Advanced Installer and Powershell App Deployment Toolkit.
What is ServiceUI.exe?

ServiceUI.exe, a gem from Microsoft Deployment Toolkit (MDT), acts as a bridge between processes running with SYSTEM privileges and the active user session.
It allows tasks executed under SYSTEM rights to display interactive elements like prompts to the user.
Grab ServiceUI.exe, by downloading MDT here.

After the installation, you can find ServiceUI.exe in the below path. Copy this file and integrate it in your application later.
- 86 bit verision: c:\Program Files\Microsoft Deployment Toolkit\Templates\Distribution\Tools\x86\ServiceUI.exe
- 64 bit version: c:\Program Files\Microsoft Deployment Toolkit\Templates\Distribution\Tools\x64\ServiceUI.exe
TIP: If you are not sure what version to use, pick the x86 version; it's compatible with both system architectures.
With the help of PSADT, you can easily integrate interactive elements like user prompts, even when executed under system context. And guess what? PSADT is available in PacKit, the ultimate tool from Advanced Installer that helps you manage your deployment command lines, automate package updates, and handle Intune app assignments effortlessly. With PacKit, you can streamline your software deployment and management processes, ensuring you stay ahead in the evolving landscape of IT management.
Display Interactive Messages During Intune System Deployment via Advanced Installer

Scenario

- Two prerequisite packages
- A custom action that launches the ServiceUI.exe tool to execute a PowerShell .ps1 script that displays a message box
- The prerequisite packages are installed only if you agree with the ps1 message box otherwise the suite installer just exits
Ready to streamline your Intune deployments with interactive user messages? Try Advanced Installer's 30-day free trial.
Package Preparation Steps using Advanced Installer

1. Start by creating a new Architect Project in Advanced Installer.
2. From “Product Information” > "Product Details" page, uncheck "Register product with Windows Installer" option.

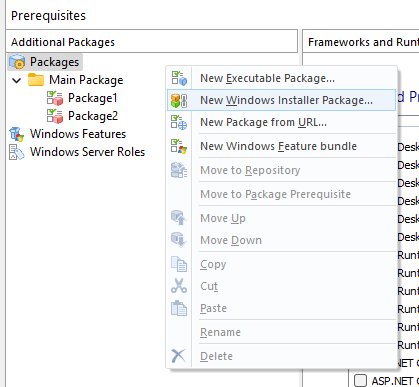
3. To add prerequisites, from "Requirements" > "Prerequisites" page add the setup packages you want to be embedded into your suite installer (in this example our two MSI packages).
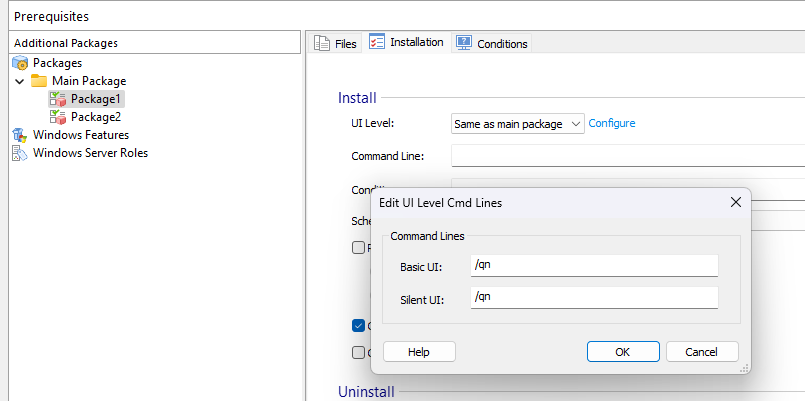
4. Go to the “Installation” tab, set UI Level to "Same as main package" for each package and add the “/qn” parameter.
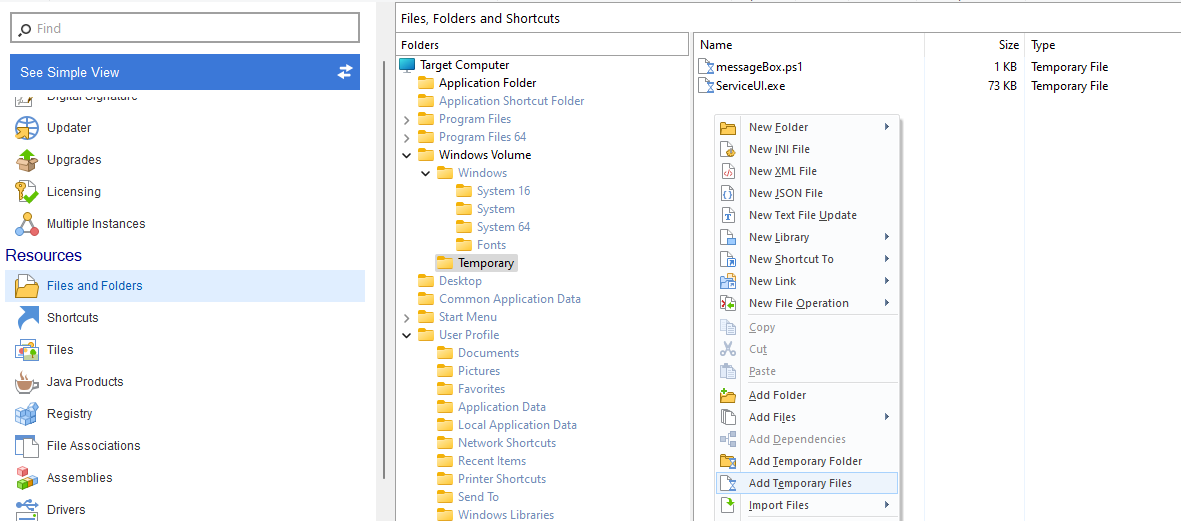
5. Go to the "Files and Folders" page and add as a temporary file the "ServiceUI.exe" tool mentioned above and a .ps1 script file that displays a message box.
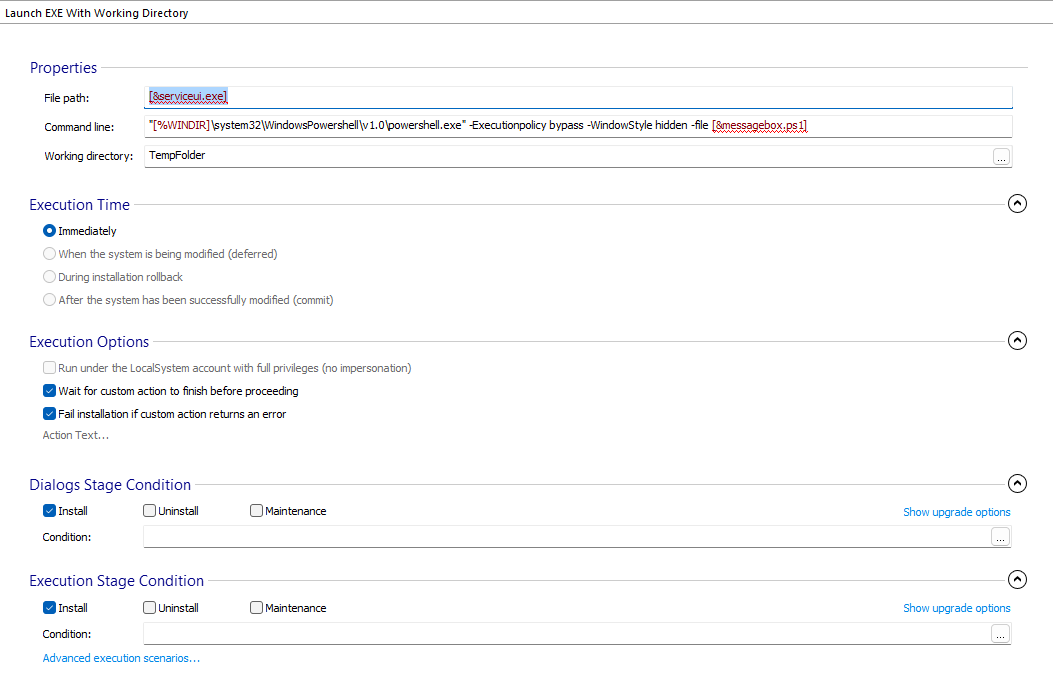
6. From "Custom Behavior" > "Custom Actions" page add a "Launch EXE with working directory" custom action after "Wizard Dialogs Stage → Paths Resolution" action group.
Here, configure the action to launch "ServiceUI.exe" tool and as command line, use:
"[%WINDIR]\system32\WindowsPowershell\v1.0\powershell.exe" -Executionpolicy bypass -WindowStyle hidden -file [&messagebox.ps1]
Configure the rest as shown below.
7. Select the above custom action and, while keeping the [SHIFT] button pressed, drag and drop it under "Install Execution Stage → Paths Resolution" action group.
This way the custom action will be shared by both installation stages (UI and install execution).

8. Next, click on "Advanced execution scenarios..." hyperlink and select the "Skip action in Install Execution Stage if executed in Dialogs Stage".
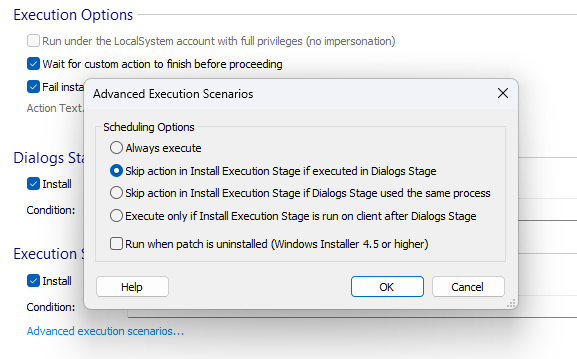
9. Next, from the left pane, go to “Package Definition” > "Install Parameters" page and check "Run as administrator" under Installation Options.
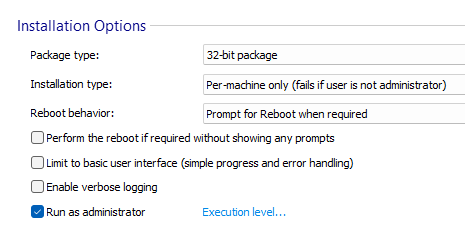
10. Build your application package as an MSI format and local test before you plan to deploy in Intune.
Intune package integration and deployment

To integrate and deploy our package in Intune, follow these steps:
1. Login into Intune portal.
2. From “Apps” > “All Apps” > click “Add”.
3. From the drop-down menu, select “Line-Of-Business-app”. This allows you to add the .msi format application in Intune.

4. Select the .msi file that you have built, using Advanced Installer.
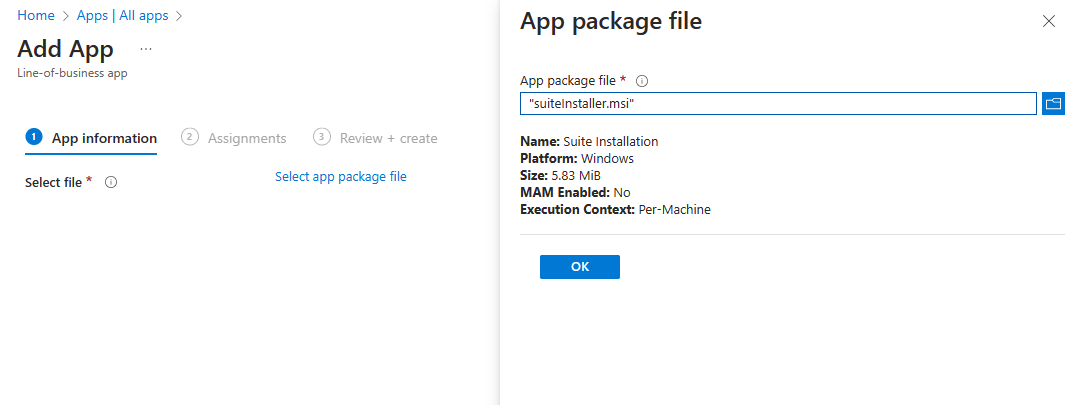
5. Add the app information as you want.
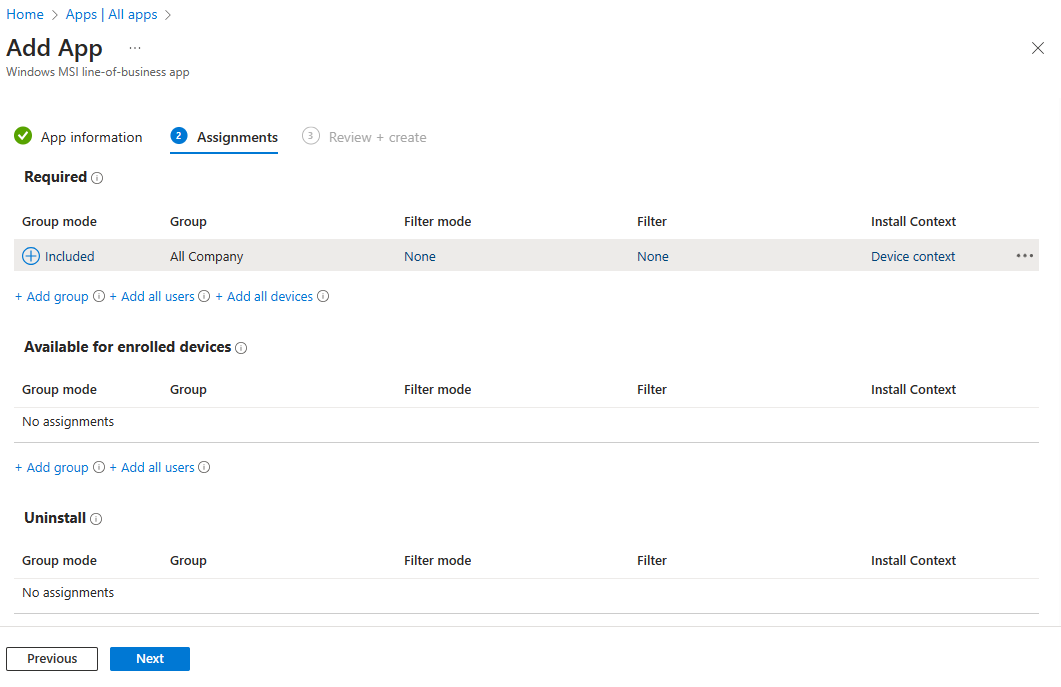
6. Define your target group for automatic installation or make it available in the Company Portal.
As you can see, the install context is Device context (System-Context).
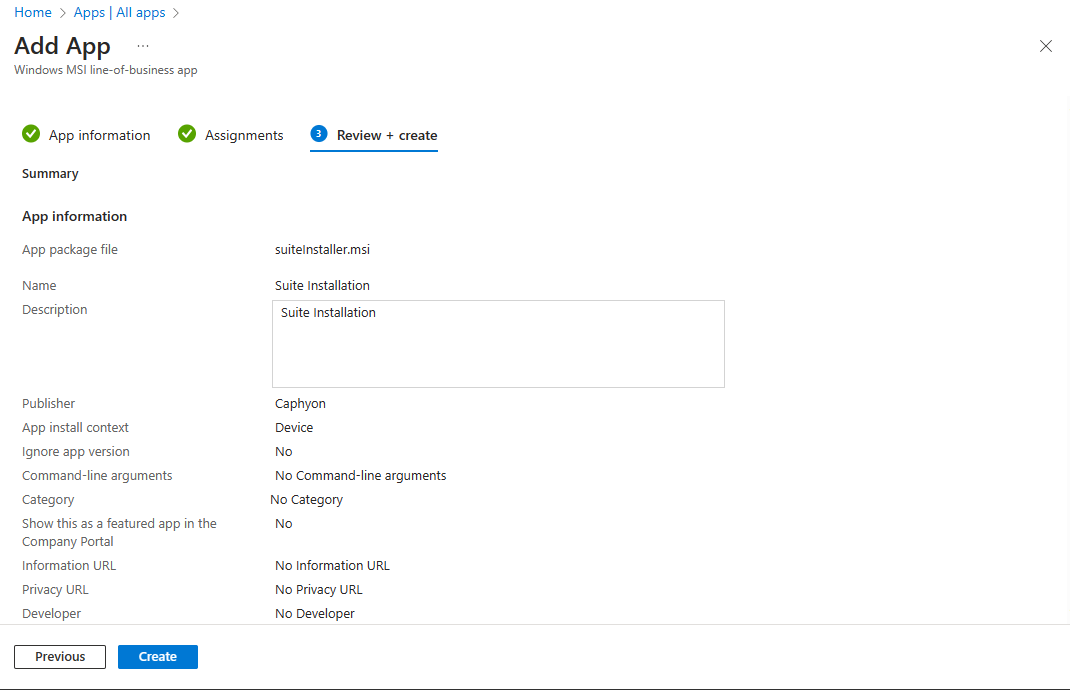
6. Review and create. Since it is a LOB application added as .msi, Intune automatically detects the MSI GUID for the detection method.
Display Interactive Messages During Intune System Deployment using Powershell App Deployment Toolkit (PSADT)

Scenario

- Single application package: Google Chrome
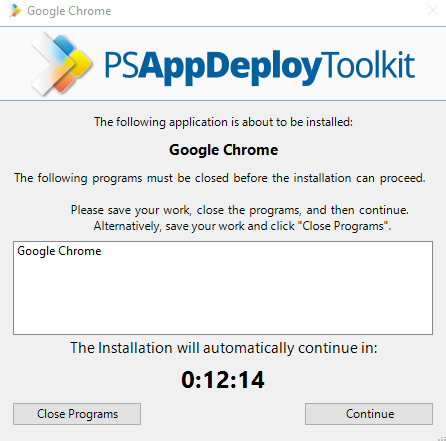
- Pop-Up Display Message if the user has Google Chrome opened
- Automatically close Google Chrome after 15 minutes and continue installation
Package preparation using PSADT

1. In your default PSADT folder structure, copy “ServiceUI.exe” directly into the parent folder.
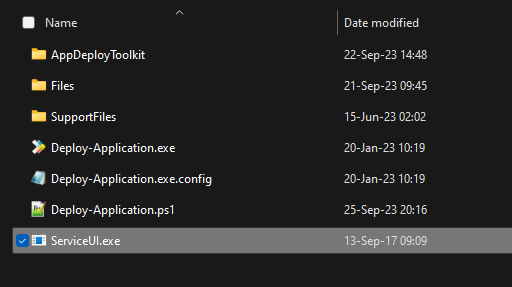
2. Inside the File folder, add your downloaded Google Chrome msi installer.

3. Modify the “Deploy-Application.ps1” accordingly:
- In Pre-install section, add the google chrome process and set the -CloseAppsCountown to 900. That number represents the seconds after chrome is closed automatically if detected.
##*===============================================
##* PRE-INSTALLATION
##*===============================================
[String]$installPhase = 'Pre-Installation'
## Show Welcome Message, Close Chrome if opened after 15 minutes
Show-InstallationWelcome -CloseApps 'Chrome' -CloseAppsCountdown 900
- In Installation section use the default PSADT msi install cmdlet.
## <Perform Installation tasks here>
Execute-MSI -Action "Install" -Path "googlechromestandaloneenterprise64.msi"
- As well in UnInstallation section use the default PSADT msi uninstall cmdlet.
## <Perform Uninstallation tasks here>
Remove-MSIApplications -Name "Google Chrome"
4. Build your package using “intunewinapputil.exe” (download here) from a cmd with administrator rights.
As setup file, use ServiceUI.exe because this will be called in Intune as install command.

Intune package integration and deployment

1. Login into Intune portal
2. From “Apps” > “All Apps” > click “Add”.
3. From the drop-down menu, select “WindowsApp (Win32)”. This allows you to add the .intunewin format application that you built previously.
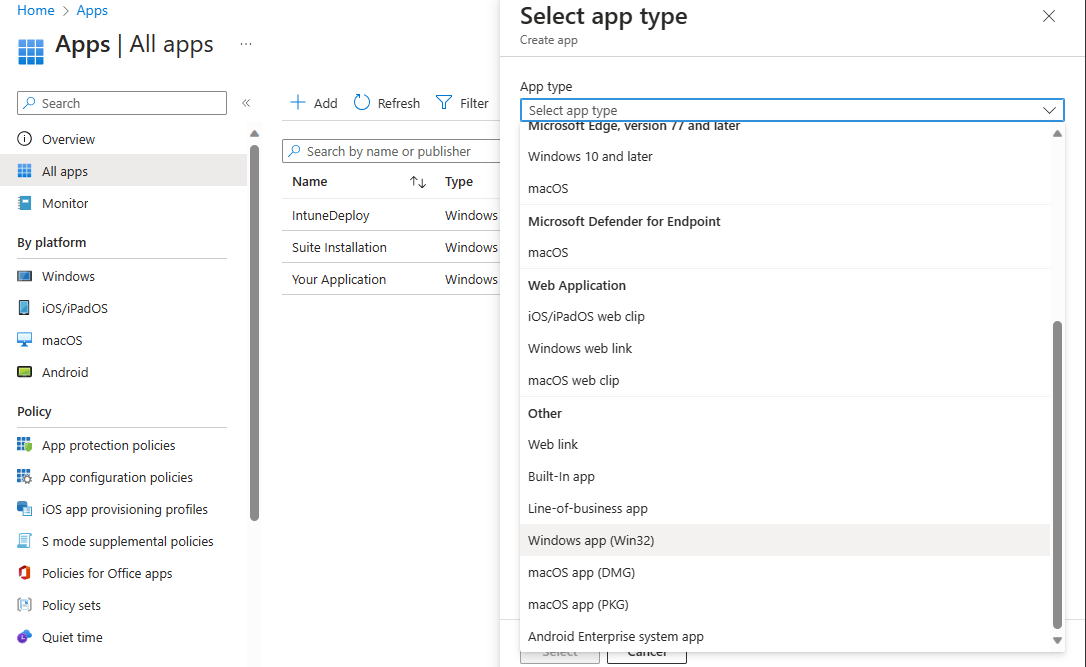
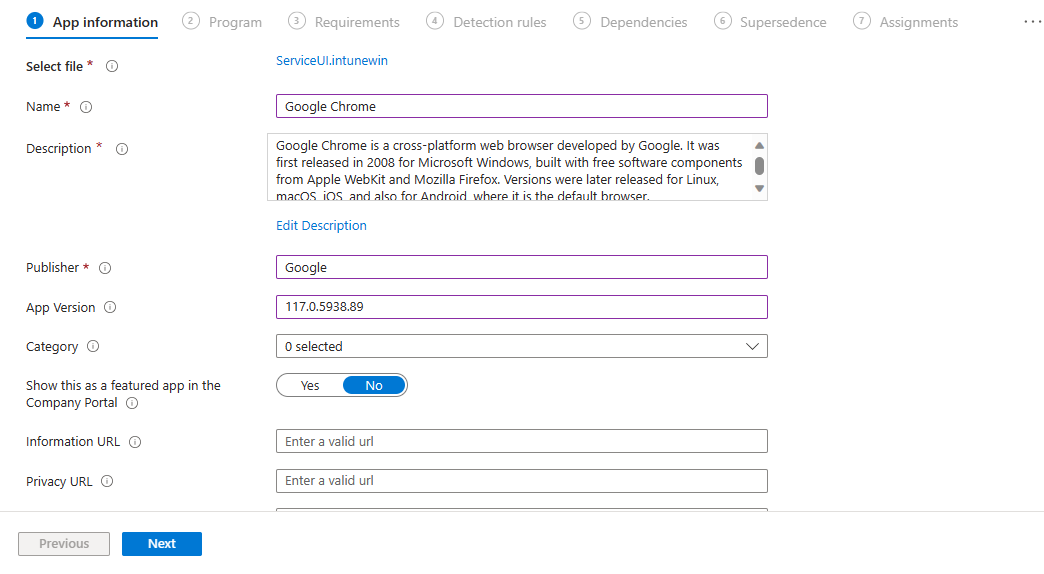
4. Select the .intunewin file that you have built, using Advanced Installer.

5. Add the app information as you want.
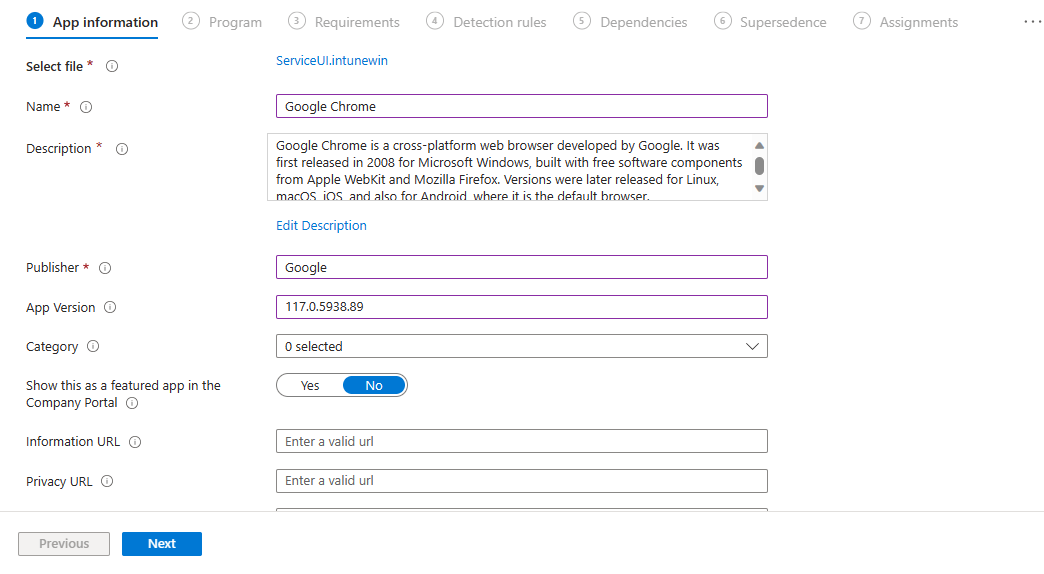
6. On the next step (Program), it is important to set the install and uninstall command as below.
Install command:
ServiceUI.exe -process:explorer.exe Deploy-Application.exe Install
Uninstall command:
Deploy-Application.exe uninstall

7. Set the Requirements as you wish. This sets the architecture and the minimum os version required for the redeployment to happen.

7. As detection rule select manually configure detection rules, MSI, and then add google chrome GUID.
This GUID can be found by:
- Opening the MSI with Advanced Installer,
- Or the free MSI editor ORCA,
- Or by installing the app and looking with regedit under the following hives:
HKEY_LOCAL_MACHINE\SOFTWARE\Microsoft\Windows\CurrentVersion\Uninstall
- x86 Chrome version:
HKEY_LOCAL_MACHINE\SOFTWARE\WOW6432\Microsoft\Windows\CurrentVersion\Uninstall

8. You can skip dependencies and supersedence and under assignments, add your targeted group as required (application will be installed automatically).
If you want the user to initiate the start of the installation via Company portal, you can add the group under Available. As you can see, the install context is Device context (System-Context).
Video Tutorial

Conclusion

ServiceUI.exe is a lifesaver for Intune deployments requiring user interaction. By bridging the gap between system-context installations and user communication, it ensures a seamless and informed software deployment process.
