How to Enable MSIX Auto Updates Through .appinstaller File on Windows Server
MSIX packaging is a modern solution for deploying applications on Windows devices. However, if you want MSIX-deployed apps to support auto-updates via .appinstaller file on Windows Server, you have to manually install the App Installer Tool.
Unlike Windows 10 and 11, where App Installer comes preinstalled and enables auto-updates, Windows Server 2022 and earlier versions do not include the tool by default. You must manually install App Installer and its required dependencies to enable the auto-update mechanism.
In this article, I’ll show you the steps to install App Installer and its dependencies on a Windows Server machine.
How to Create the .appinstaller File 

Before moving on to the App Installer setup on Windows Server, let me quickly show you how to add the .appinstaller file when building an MSIX package using Advanced Installer. If you already know how to do this, you can skip to the next section.
If you want to learn how to create an MSIX package using Advanced Installer, check here.
Advanced Installer lets you quickly generate the .appinstaller file directly from its interface.
To do so, follow the next steps:
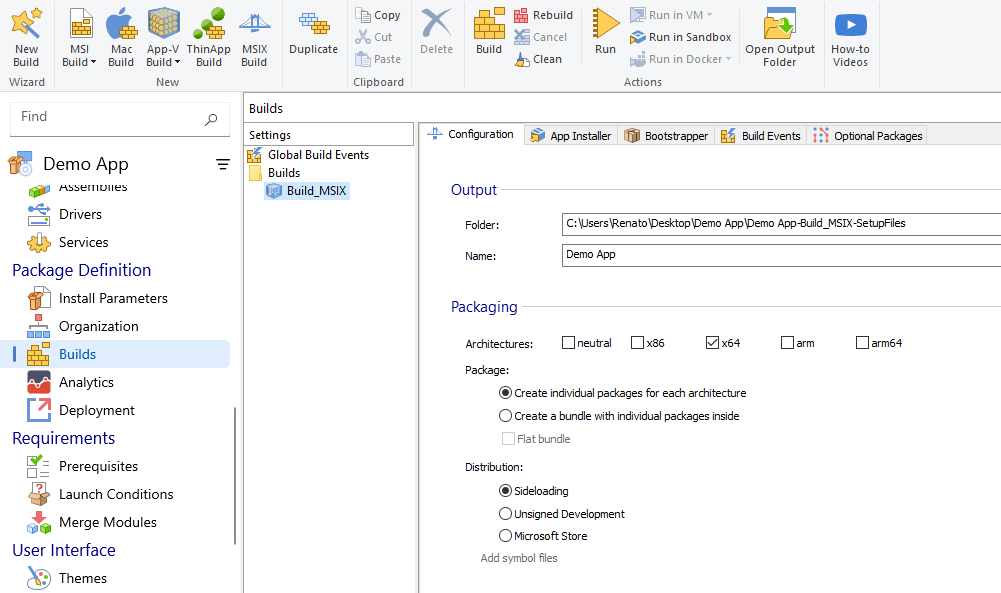
1. Navigate to the Builds page in Advanced Installer and select the MSIX build.

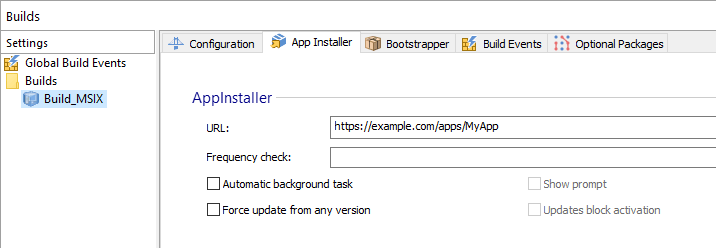
2. Switch to the App Installer tab in the right panel and enter the URL where your .appinstaller and MSIX files will be located.

3. Specify the Frequency check. Use ‘0’ to have the app check for available updates every time it starts.
4. Enable the option ‘Force update from any version’.
5. Build the project to generate the MSIX package and the .appinstaller file.
How to Install Microsoft App Installer Tool

To enable auto-updates on Windows Server, you must have the Microsoft’s App Installer tool installed. If it’s not installed, the update check won’t work.
Follow the next steps to install the tool:
- Download the tool from the Microsoft website.
- Manually install it using the next PowerShell command.
Add-AppxPackage -Path "C:\Users\Administrator\Desktop\Microsoft.DesktopAppInstaller_8wekyb3d8bbwe.msixbundle"
How to Install App Installer Dependencies

Once the App Installer tool is installed, ensure its dependencies, Microsoft.UI.Xaml and VC++ Desktop Runtime v14, are installed as well.
You can download the latest versions of the dependencies from the Microsoft’s Winget repository available here.
- Open the 14.0.33728.0 folder, then open the Microsoft.VCLibs.Desktop.14.installer.yaml file. Copy the URL for the x64 Installer of VC++ Desktop Rutime v14.
- Paste the URL into your browser to download the ZIP file, then extract its contents.
- Next, navigate to the extracted x64 folder and manually install the APPX packages by using the following PowerShell commands:
3.1 For Microsoft.UI.Xaml
Add-AppxPackage -Path "C:\Users\Administrator\Desktop\New folder\Microsoft.UI.Xaml.2.8_8.2310.30001.0_x64.appx"
3.2 For VC++ desktop Runtimev14
Add-AppxPackage -Path "C:\Users\Administrator\Desktop\New folder\Microsoft.VCLibs.140.00.UWPDesktop_14.0.33728.0_x64.appx"
Conclusion 

By following these steps, you can enable auto-updates via the .appinstaller file for your MSIX-deployed apps on Windows Server.
I hope this article helped clarify the setup process. If you have any questions, please feel free to let me know in the comments.
FAQs
Why do I need to install the App Installer tool on Windows Server?

Windows Server 2022 and earlier don’t have the App Installer tool preinstalled, unlike Windows 10 and 11, and it’s required for MSIX auto-updates.
How do I create an .appinstaller file for my MSIX package?

In Advanced Installer, go to the App Installer tab, enter the URL for your files, set the frequency to ‘0,’ enable ‘Force update from any version,’ and build the project.
Where can I download the App Installer tool and its dependencies?

Get the App Installer from the Microsoft website and the dependencies (Microsoft.UI.Xaml and VC++ Desktop Runtime v14) from Microsoft’s Winget repository.
