How to Replace ClickOnce application with MSIX
Although not as popular and widely adopted as MSI, ClickOnce has been around for some time in the application packaging industry. ClickOnce enables you to create self-updating Windows-based applications that can be installed and run with minimal user interaction.
The deployment process is extremely easy to do from Visual Studio and provides a simple solution for the developers to work with Windows Installers. ClickOnce fully supports Visual Basic or C# projects.
Visual Studio offers tools to export your C++ projects with ClickOnce, for more information, check out ClickOnce Deployment for Visual C++ Applicationsthis link.
In this article, we will be showing how to perform a migration from ClickOnce to MSIX.
What is ClickOnce? 

ClickOnce was originally created to facilitate three main areas of application development:
- Updates: MSI didn’t offer full support for updates and there were many options that a developer had to consider, like full update (replace an old version with a newer one) or MSP (keep the old version and only apply patches). ClickOnce provides the updates automatically and the setup for this mechanism, making it extremely easy.
- Computer interference: MSI technology offers a way to have shared components between multiple applications, thus eliminating the risk of an application to, for example, install an older version of a file over a new one. ClickOnce apps are self-contained and cannot interfere with other applications.
- Security permissions: If you are creating a per-machine MSI installer, this will ask for permissions to install it. ClickOnce apps are designed to be installed per user without requiring permission.
What is the difference between ClickOnce and MSIX?


If we have a look over the points above - we can see many similarities between ClickOnce and MSIX. MSIX offers all of the above and more (check out our MSIX documentation here).
With MSIX being the technology we envision taking over in the future, it is obvious that many developers or IT Pros are looking to change their ClickOnce installers to MSIX.
How to Migrate your ClickOnce Installer to MSIX?

To understand the migration from ClickOnce to MSIX, we are going to cover two main scenarios:
- When you have the app project in Visual Studio and want to output the installer as MSIX
- When you don’t have access to the app project/source code and want to convert the ClickOnce to MSIX
The first scenario addresses developers and ISVs, while the second one is intended for IT Pros and enterprise environments.
First Scenario: The app project is located in Visual Studio and you want to output the installer as MSIX

How to create a ClickOnce Installer in Visual Studio?

Creating a ClickOnce installer with Visual Studio is quite easy. You just need to follow these steps:
1. In the Solution Explorer, right-click your solution and click on Properties.
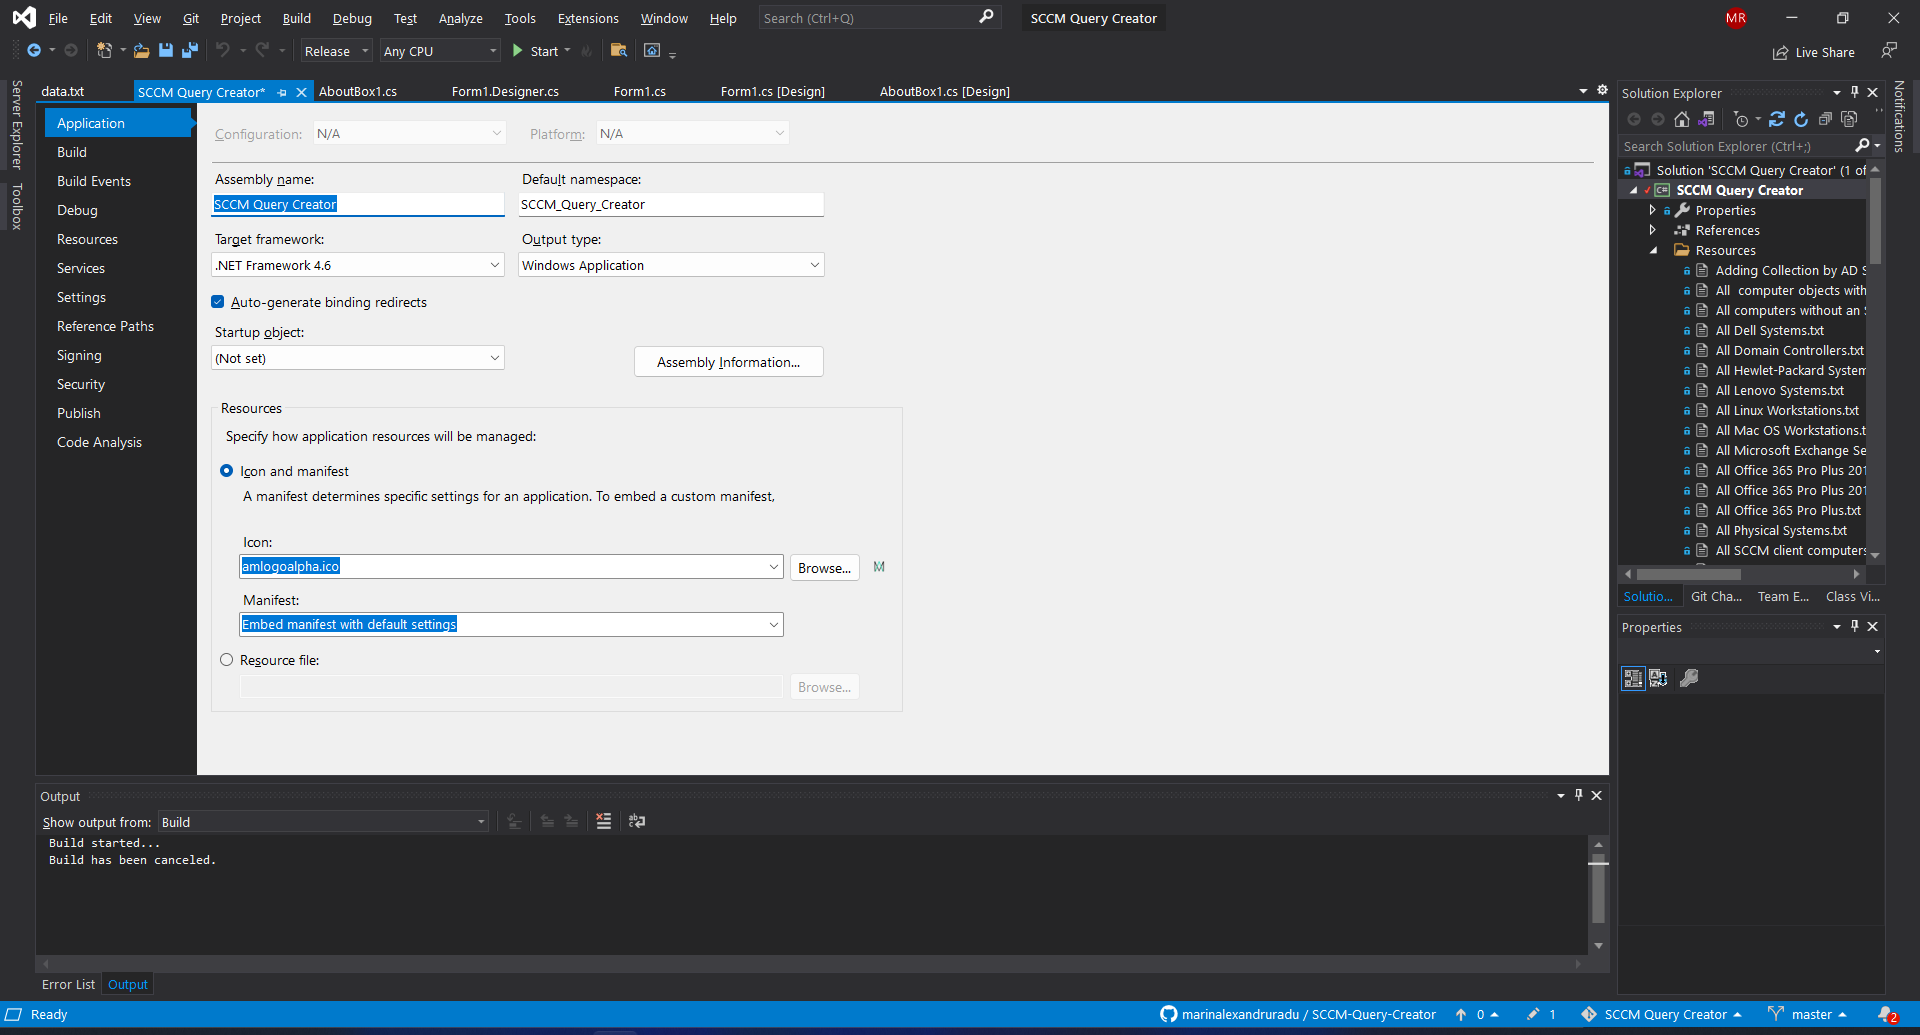
2. Navigate to Publish.
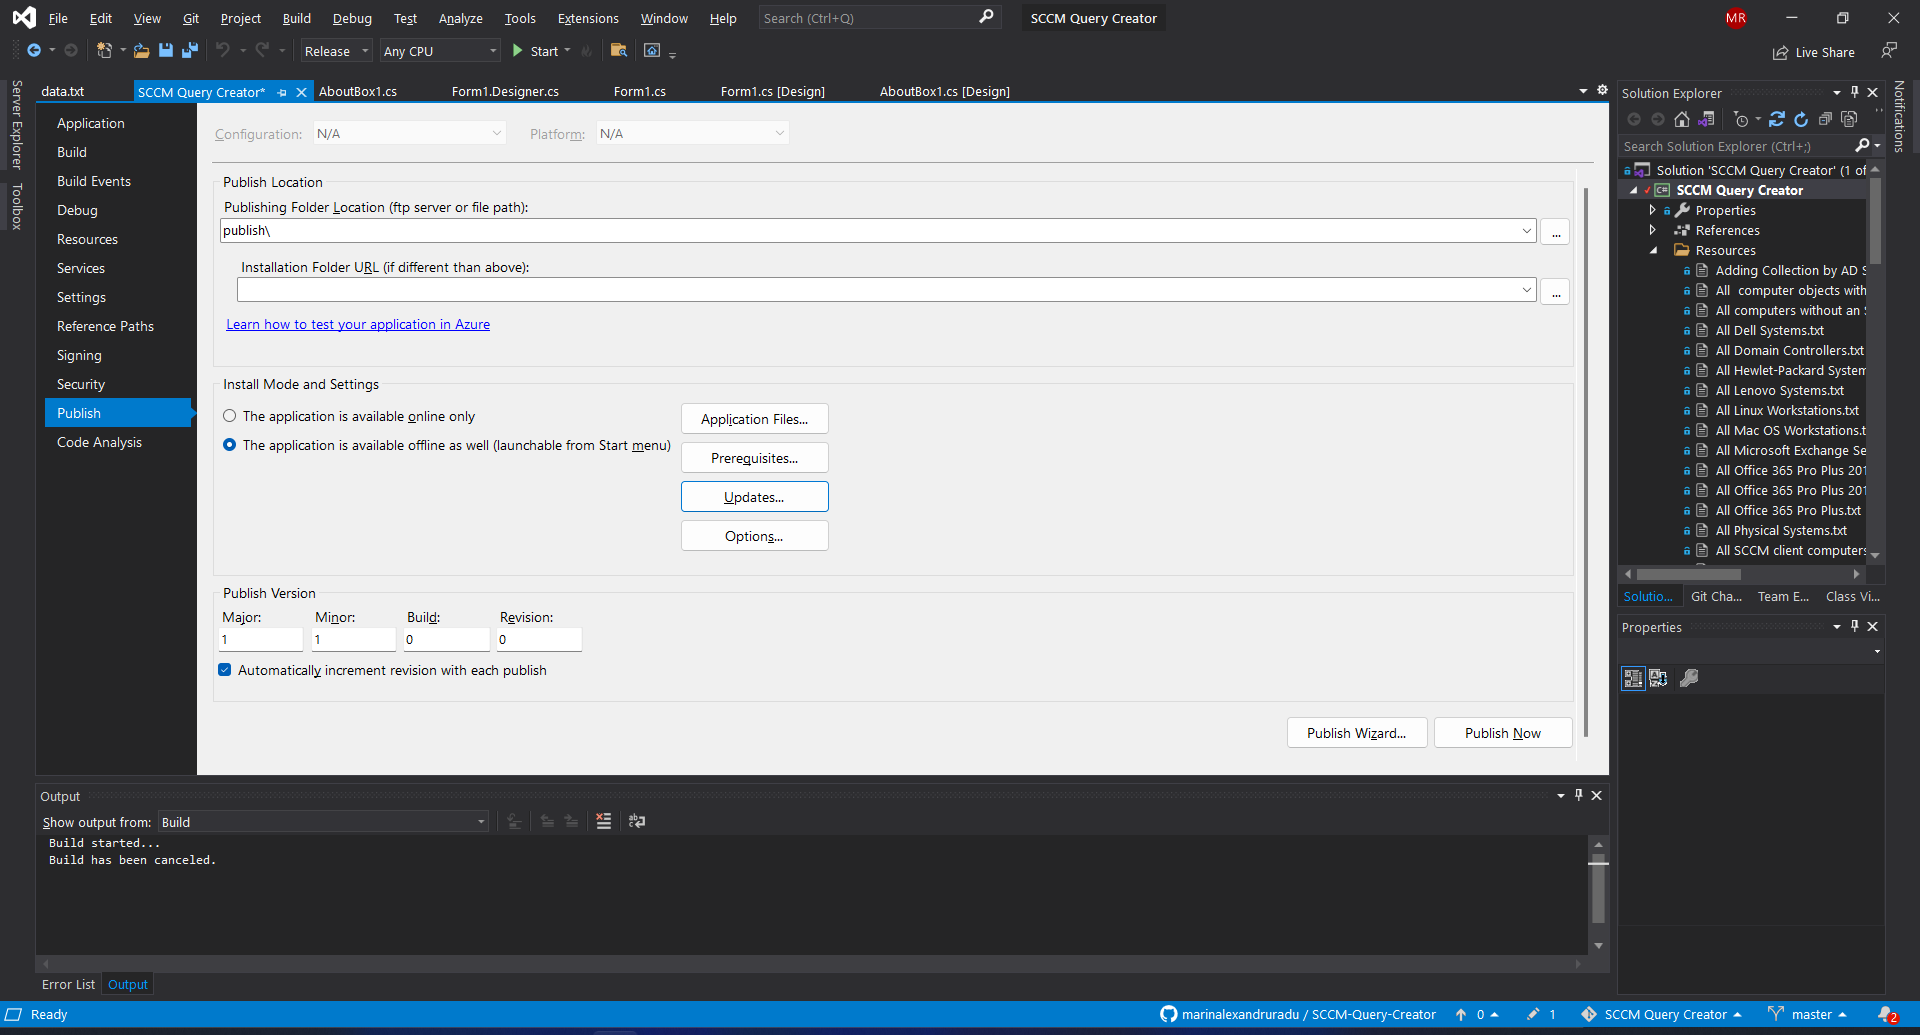
In the Publish tab, you can configure all the options you want for your ClickOnce installation. As an example, you can choose to make your application only available online, with no option to launch it from the Start Menu.
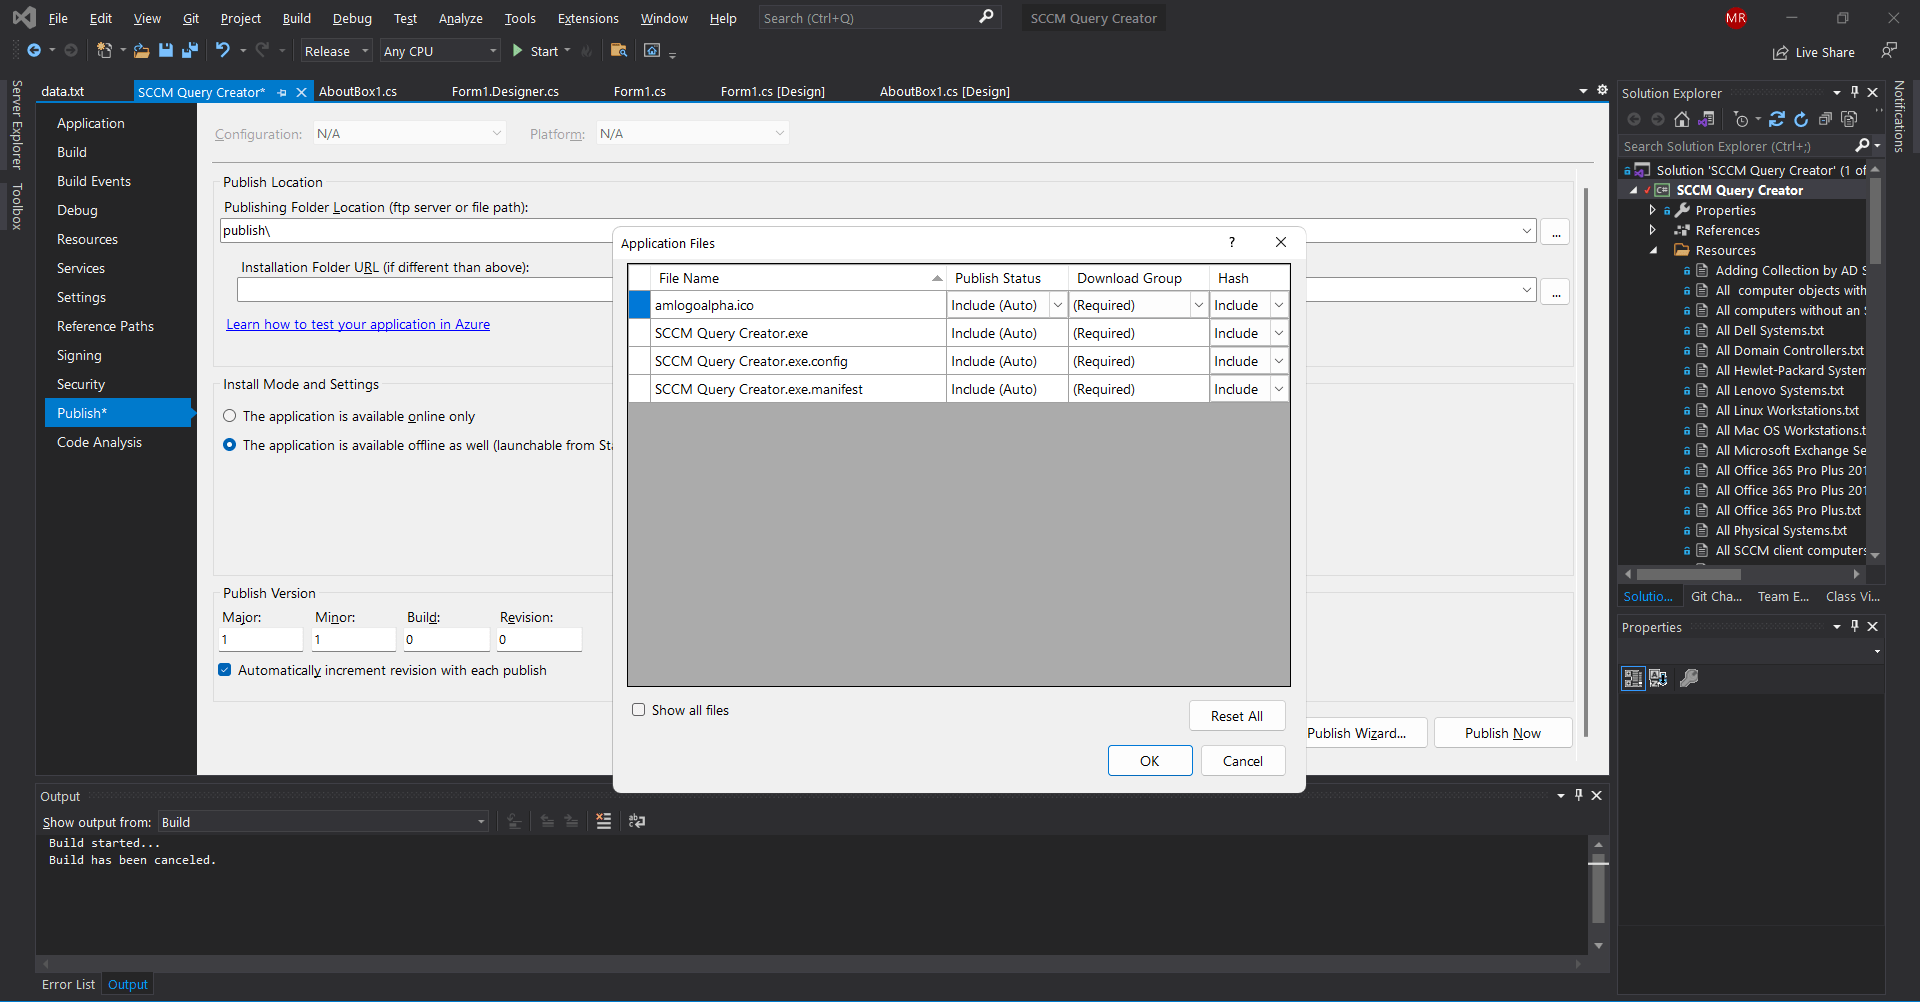
There, you can also define which application files are included in the package, what prerequisites are necessary and select how updates work.
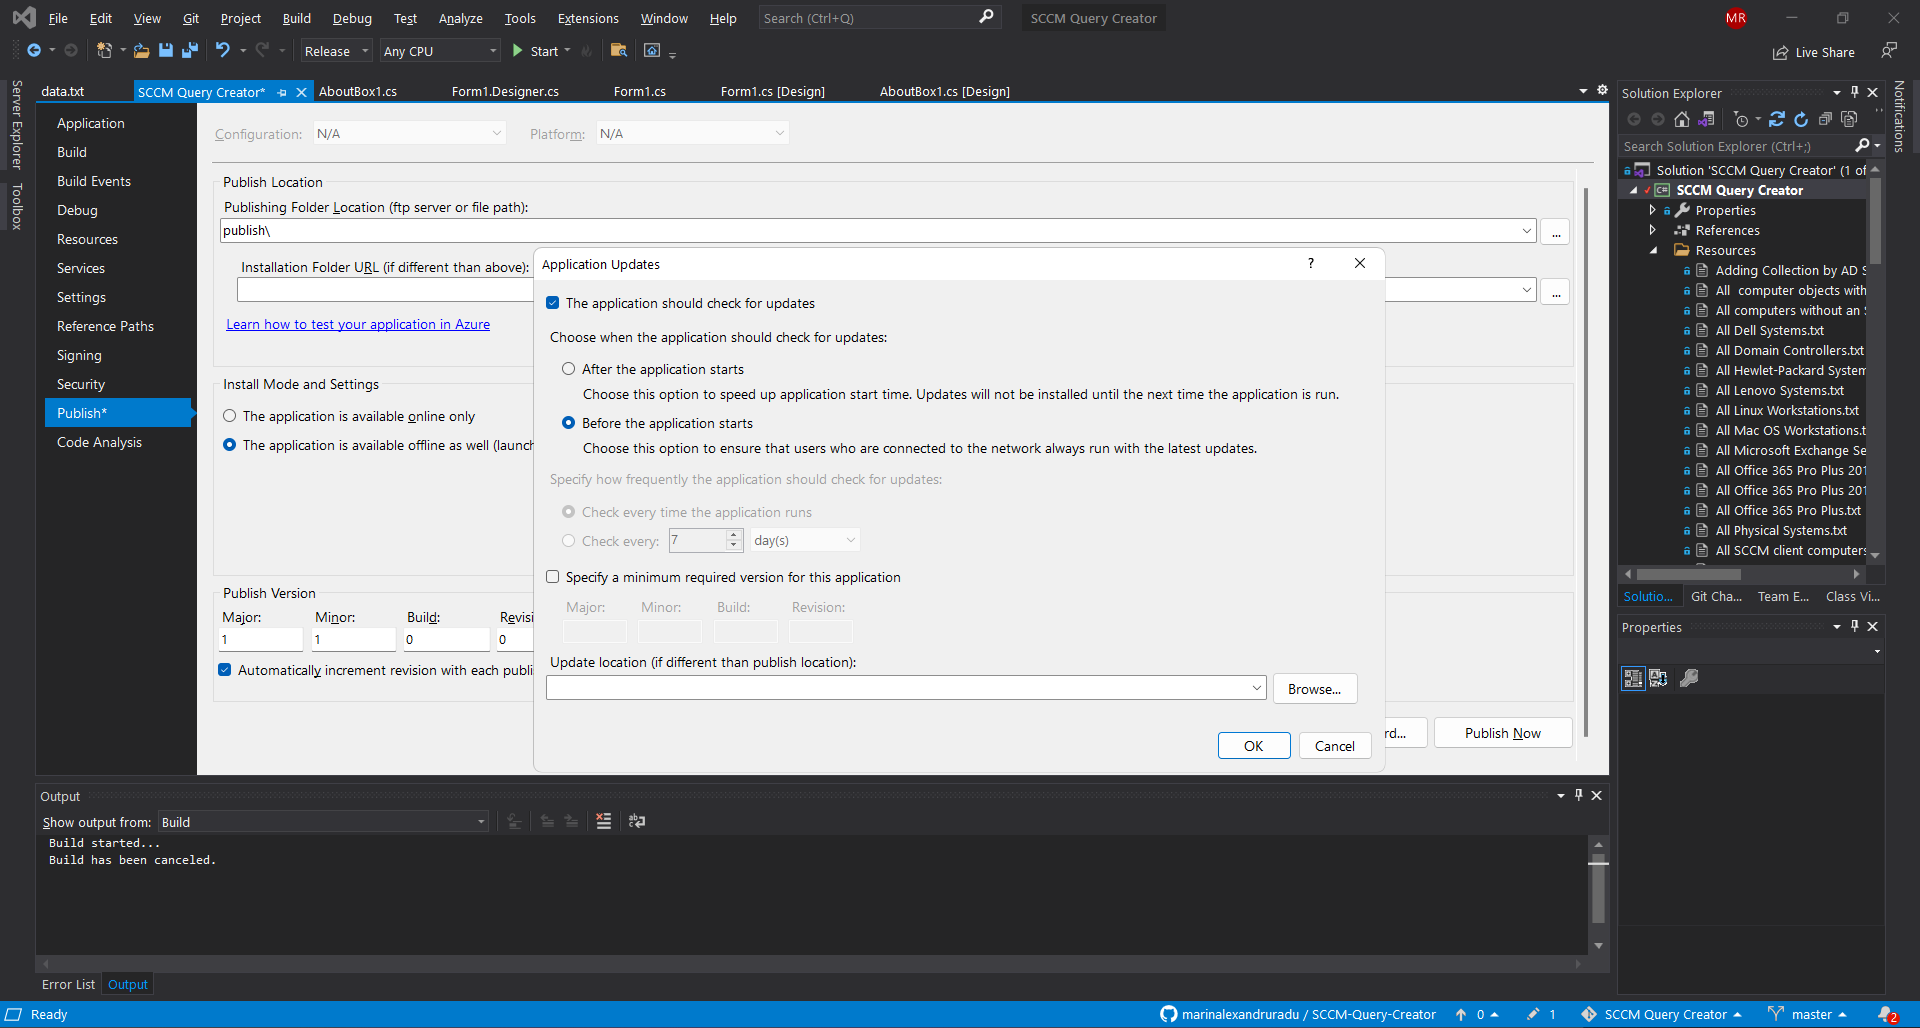
The update options are quite similar to MSIX, offering you the possibility to choose whether the app checks for updates before the application starts or after. You can also define an update location (for example your local FTP or Web server where the ClickOnce will be located).
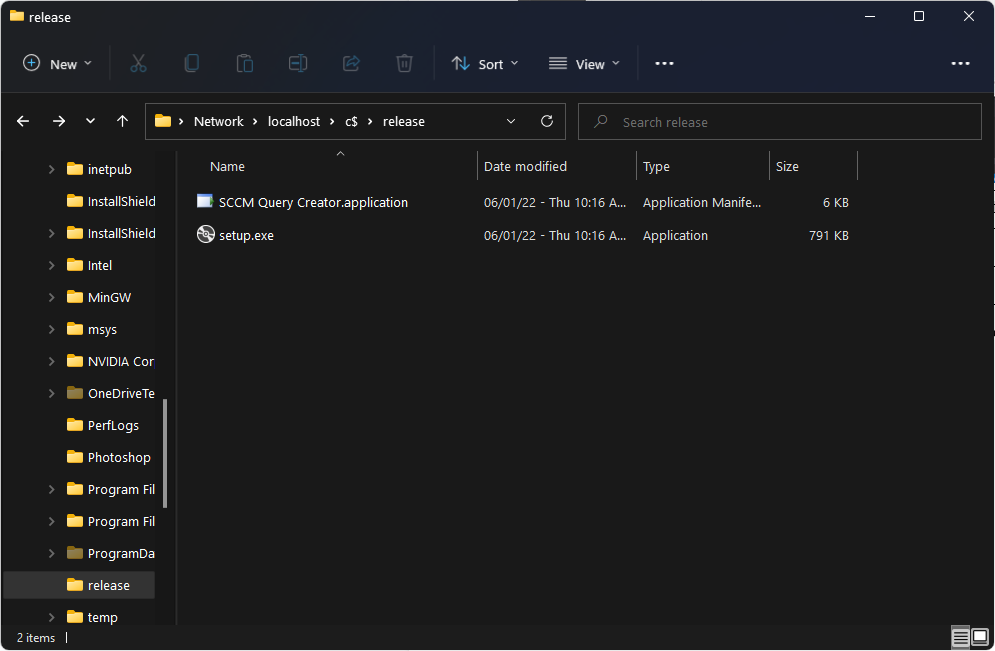
3. Once you define the behavior of the installer, click Publish and the setup will be created.
How to create MSIX packages with Visual Studio?

We have an article on How To: Create MSIX Package in Visual Studio and a video that shows How to create an MSIX package with Visual Studio.
The process is not so different from the ClickOnce process, and MSIX offers the same options and more to customize your installation.
“Converting” your project into an MSIX application is actually simple. All you have to do is to open your project and follow the steps presented in the above tutorials and you will have an MSIX installation in no time. The difference here is that you don’t use the standard Publish option that you have in Visual Studio.
Second Scenario: You don’t have access to the app project/source code and want to convert the ClickOnce to MSIX

When it comes to IT Pros, we are going to assume that the source project is not available. The only option, in this case, is to convert the ClickOnce installer to MSIX by using the Advanced Installer Repackager. You can check our step-by-step guide - Convert a legacy package to the MSIX/APPX format.
ClickOnce offers you the possibility to add prerequisites to your installation.
The same principle applies to MSIX prerequisites, but if you want the prerequisite to be automatically installed with the main package, the prerequisite must be available near your MSIX main package, or in the Microsoft Store.
Check this in-depth article for more info: MSIX Applications: Handle Prerequisites by Declaring Dependencies in MSIX.
Conclusion

ClickOnce is a Microsoft technology that allows you to create an installation package for your application.
We covered the two main scenarios: for devs and ISV and for IT Professionals in an enterprise environment for how to migrate the ClickOnce packages into MSIX. Did you find this article useful? Tell us in the comments below.
Subscribe to Our Newsletter
Sign up for free and be the first to receive the latest news, videos, exclusive How-Tos, and guides from Advanced Installer.