How to Install Files into a Registry specified path using Wise Package Studio
When creating an installer package, you typically provide a default installation folder and allow the users to modify it if required. But what if you need to set the installation path based on a value saved in the registry?
In this article, I’ll demonstrate how to create an installer using Wise Package Studio that installs an application to a path specified by a registry value.
Additionally, I’ll illustrate how to accomplish this using Advanced Installer, a versatile and feature-rich tool for creating professional installation packages.
How to Create a Project in Wise Package Studio

To start, create a new package project in Wise Package Studio:
- Open the Windows Installer Editor in Wise Studio.
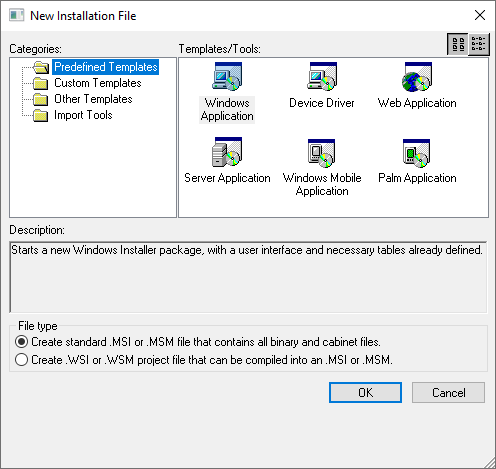
- When the New Installation File dialog appears, select the Windows Application template and click OK.
How to Add the Project Files in Wise Package Studio

Once you’ve created the package project, it’s time to add the app resources:
1. Navigate to the Files page from the Page Views.
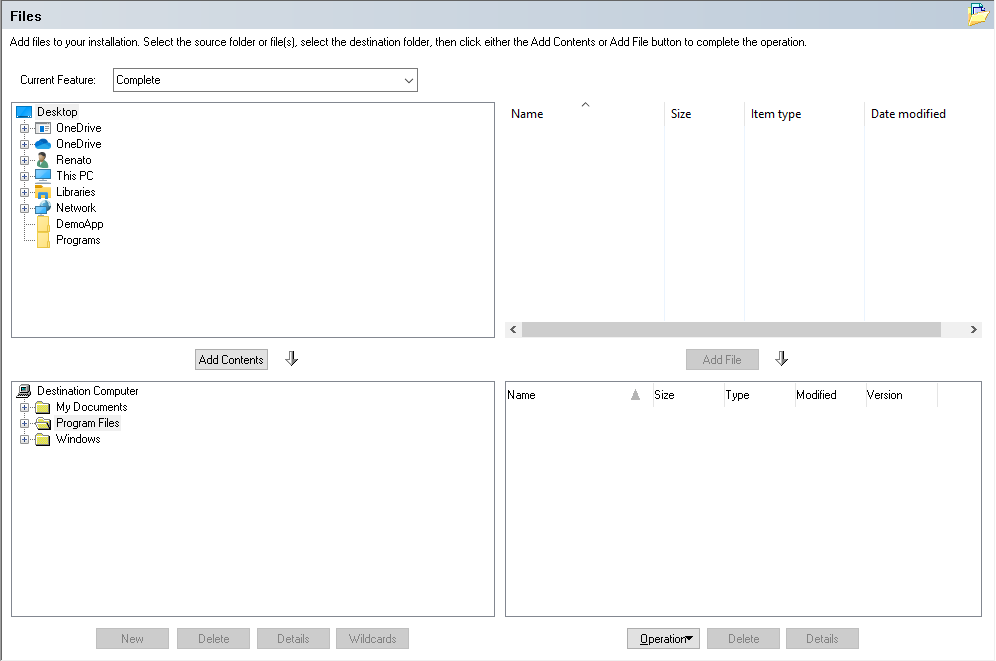
2. Once opened, the Files page is organized as follows:
a. The top left tab displays the content stored on the machine.
b. The top right tab displays the content of a folder selected in the top left tab.
c. The two bottom tabs represent the Windows Installer Package. The left tab shows folders and the right tab folder contents.
3. To add files, select them in the top-right tab and click the Add File button.
How to Set the Installation Directory in Wise Package Studio

After adding the application resources, configure the installer to retrieve the installation path from the registry and set the TARGETDIR property. This property determines the default installation directory where the app files will be installed.
Here’s how to set the installation directory:
- Navigate to the System Search view in the Windows Installer Editor.
- Click Add and select Registry to initiate a registry search.
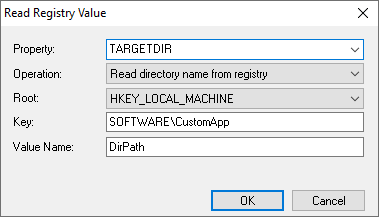
- In the Read Registry Value dialog, configure the following:
3.1 Set the property to TARGETDIR.
3.2 For Operation select Read directory name from the registry.
3.3 For Root select HKY_LOCAL_MACHINE (or another root based on where your registry key is stored).
3.4 In the Key field, input the registry path. (e.g., SOFTWARE\CustomApp)
3.5 In the Value field, input the name of the registry value that contains the path.
That’s all. Now compile the project. The installer will retrieve the installation path from the registry and install the app in that location.
Setting the Installation Directory Using Advanced Installer

Advanced Installer offers a powerful and user-friendly solution for configuring installation paths based on registry values. Let’s explore how to use its intuitive interface to seamlessly set the installation directory.
Step 1: Create a New Package Project
- On the Start Page, select the project type and click Create New Project.
- Navigate to the Files and Folders page and add your application files to the Application Folder.
- To edit product details, go to the Product Details page
Step 2: Retrieve the Installation Path from the Registry
1. Go to the Search view.
2. Click New Extended Search on the toolbar and select the Registry value exists option.

3. Name the property (e.g., INSTALLPATH). In the Search Properties, choose the registry value in the Registry key field.
Step 3: Set the APPDIR Property Using the Registry Search Result
1. Go to the Custom Actions page.
2. Under the Existing Custom Actions tab, select Set Installer Property.
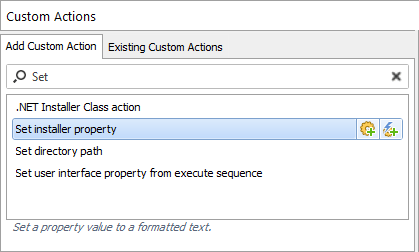
3. In the custom action property view, navigate to the Property section. In the Property field, enter APPDIR, and in the Value field, select the property defined in the previous step—INSTALLPATH.
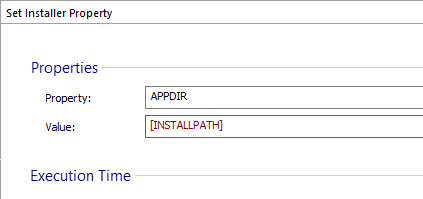
Build the project. The application will now install in the directory specified by the registry value.
Conclusion 

Both Wise Package Studio and Advanced Installer provide effective methods for installing an application to a path specified in the registry. Wise offers a simple, direct approach, while Advanced Installer adds flexibility and advanced features to streamline the installer creation process.
Whether you prefer simplicity or advanced customization, these tools can help you tailor your installation process to meet your specific requirements.
