MSIX Shared Containers: How to access resources between different applications
MSIX delivered Shared Package Containers to allow applications to share their files and registries, enabling classic Win32 apps to communicate with each other without changing any code.
What's exciting about Shared Package Containers is that IT Pros can now define containers and deploy them in the infrastructure without needing the apps to be installed.
Containers are only available for MSIX Packages, APPX packages do
not support this functionality.
To better understand how shared containers work, let’s take a look at an example of an application that has source files in two different MSIX containers. Let’s jump into it.
Using Shared Containers: Step 1 - Creating the Application

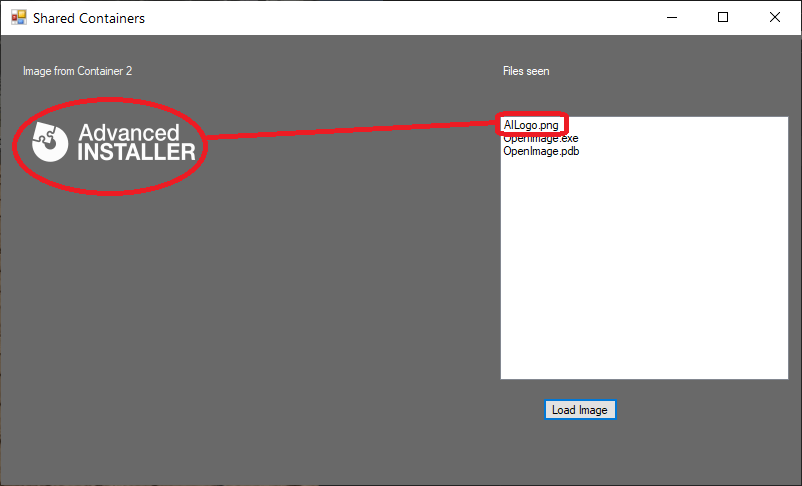
To demonstrate how shared containers work, let's begin by creating a simple C# application that loads the Advanced Installer logo image (located in the same folder), and shows all the files that are present in the same folder with the executable.

As you can see from the screenshot, the logo that is shown in the left is the AILogo.png which is located near the executable.
The goal here is to separate the image file from the executable in two different MSIX packages and then create a Shared Package Container that allows the executable to see the image from a second MSIX package.
Step 2 - Build your MSIX Package with Advanced Installer

Once the application is created, let’s open Advanced Installer to create two MSIX Packages.
You can try Advanced Installer for free through the 30-day, Full-Featured Trial. Download from here.
First, we want to separate the executable and the image into two MSIX packages.
1. The first MSIX package (Caphyon.WithoutImage) contains the OpenImage.exe which is placed in the %ProgramFiles% folder:

As seen in the image below, the Application (shortcut) will point to that specific executable:

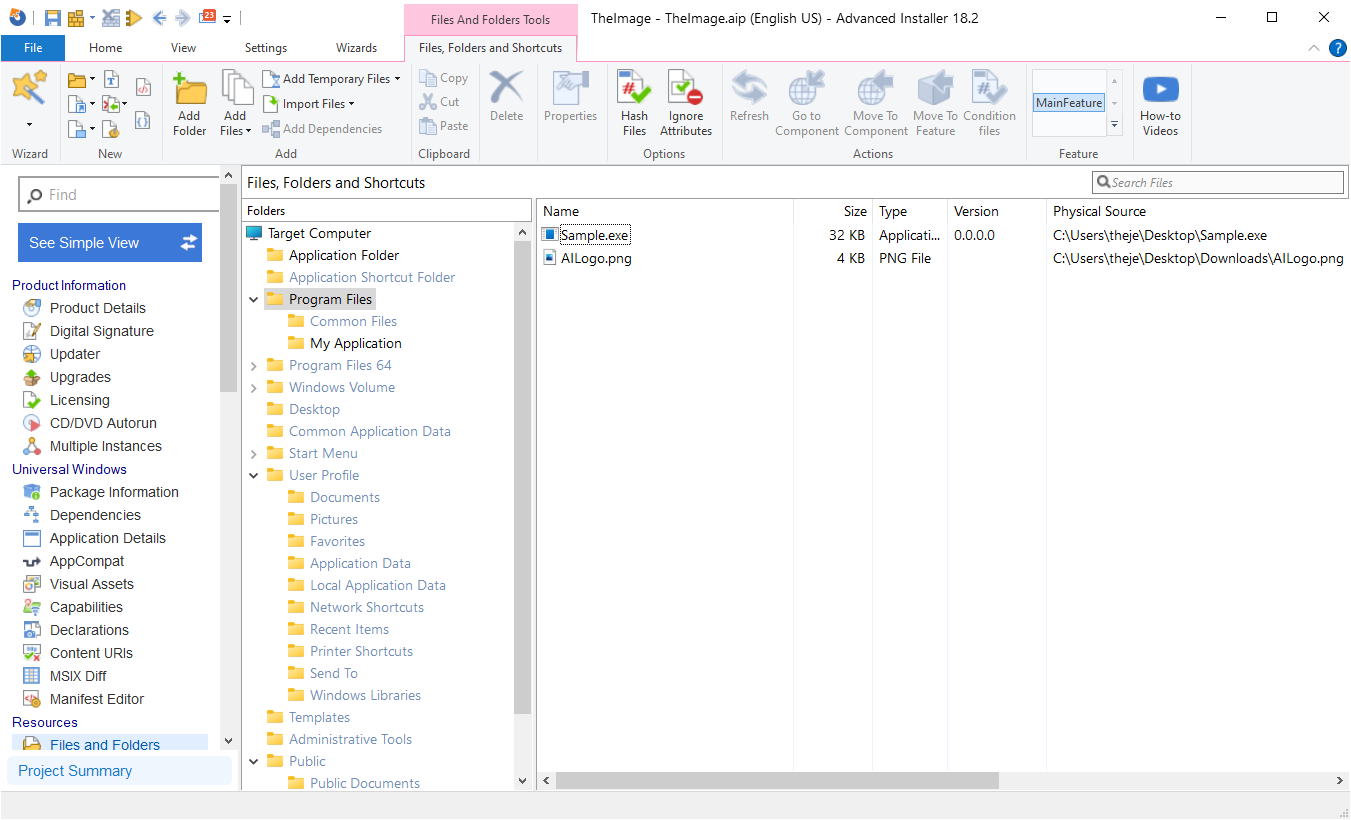
2. The second application (Caphyon.TheImage) contains the image file (AILogo.png) and another sample executable that we won't use. The purpose of the second executable is to have an application entry in the Start Menu.

With everything set, all that is left to do is sign , build and install the MSIX packages.
You can check this video to learn how to create an MSIX package from scratch with Advanced Installer:
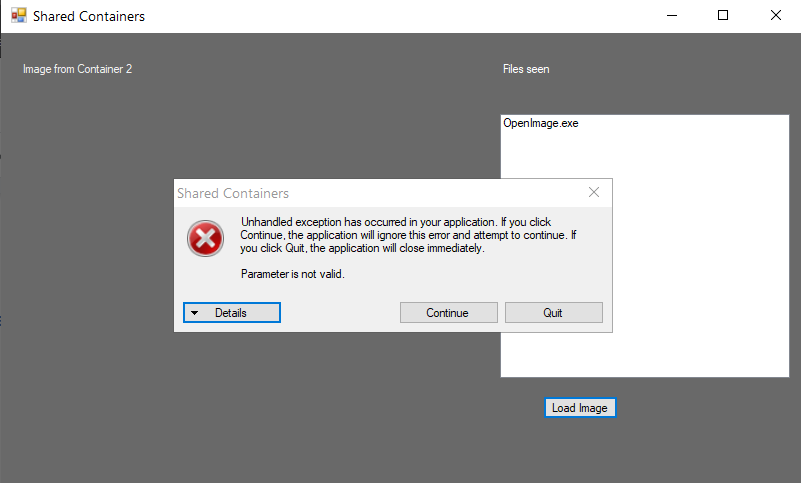
Keep in mind: If we test the application without creating the Shared Package Container, the application will crash and the image will not be loaded when clicking the “Load Image” button. This is because there is no AILogo.png present near the executable.

Step 3: How to create an MSIX Shared Package Container

Shared Package Containers are simple XML files. These XMLs require a unique Package Family Name for each package that belongs in that container.
Optional packages and modification packages will be automatically
included in the container since they share the same container with the
main package that they were created for.
The most important thing to note here is the package priority. The priority is established from top to bottom of the XML file, meaning that the top package will have the highest priority.
In our case, it is important that the first MSIX package (Caphyon.WithoutImage) is the first in the list, otherwise, the VFS or Virtual File System merge will not happen when we launch our executable, and the image will not be seen or loaded.
For our container, the XML file looks like this:
<?xml version="1.0" encoding="utf-8"?>
<AppSharedPackageContainer Name="ContosoContainer">
<PackageFamily Name="Caphyon.WithoutImage_r21n0w1rc5s2y" />
<PackageFamily Name="Caphyon.TheImage_r21n0w1rc5s2y" />
</AppSharedPackageContainer>
We left the container name as “ContosoContainer” as mentioned in the Microsoft Documentation, but feel free to change the name as you prefer.
To find out the package family name, you can use the Get-AppPackage cmdlet or our
free tool: Hover.
Once the XML file is created, we can use the following PowerShell cmdlets to deploy, reset, update, and remove a Shared Package Container from the device:
- Add-AppSharedPackageContainer <path>
- Remove-AppSharedPackageContainer -Name <name>
- Get-AppSharedPackageContainer -Name <name>
- Reset-AppSharedPackageContainer -Name <name>
These cmdlets require Administrator rights.
Once everything is set, run the Add-AppSharedPackage container:

To be sure we get the correct package order in the container, we need to execute the Get-AppSharedPackageContainer cmdlet:

Although it’s not entirely documented by Microsoft, we found that
the Add-AppSharedPackageContainer does not support UNC (Universal Naming
Convention) paths and must use only local paths.
Step 4 - Testing the Shared Package Container

Now that our MSIX packages are installed and the container is created, configured, and placed correctly on the system, it’s time to start the application again and see if the “Load Image” button works.

The AILogo.png image is now found near the executable (while also present in a completely different application and location on the machine), and the application sees the files from both our MSIX Packages, letting us know that the virtual file systems have been merged correctly.
Conclusion

Shared Containers has been a popular topic requested by the community in our industry since the launch of MSIX.
With Shared Containers, we now have additional options, such as app customization, prerequisite sharing, addons for MSIX applications, and more.
We hope you enjoyed this article and that it helped you get a better understanding of MSIX Shared Containers.
We would love to hear if you use this information or if you have any use cases for it, let us know by dropping a comment down below.
Subscribe to Our Newsletter
Sign up for free and be the first to receive the latest news, videos, exclusive How-Tos, and guides from Advanced Installer.