How to create an MSIX package for a Portable App
Alright, let's dive into the fascinating world of portable applications!
A portable application is a software program designed to run on multiple Windows computer systems without the need for installation or modification of the host operating system.
Portable applications typically include all the necessary files, libraries, and dependencies required to run the program, making them self-contained and easy to move between computers.
They are commonly developed using programming languages and frameworks that support platform independence, such as Java, Python, or .NET. This characteristic allows the same application code to run on different operating systems, such as Windows, macOS, or Linux, without requiring recompilation or adaptation. These types of applications are widely used in various fields, such as software development, system administration, and data analysis, where portability, security, and flexibility are critical requirements.
When it comes to distribution, portable applications prefer a lean and agile approach. They are often distributed as standalone executables or compressed archives. Microsoft recognized their potential and added support for portable applications starting with the MSIX Packaging Tool version 1.2023.118.0.
In this article, we're going to explore how it works and how it simplifies the process of creating an MSIX installer for a portable application.
How does the MSIX Packaging Tool Help Simplify Portable Apps?

Before version 1.2023.118.0, you had to treat the portable applications as any other application, so you had to monitor the system and capture the changes to create an MSIX package based on those changes.
That's no longer needed since the release of MSIX Packaging Tool version 1.2023.118.0. Now, you can just create a zip file for the portable application files if it was not delivered as a .zip file by the vendor, and then select the.zip file as the installer for your package.
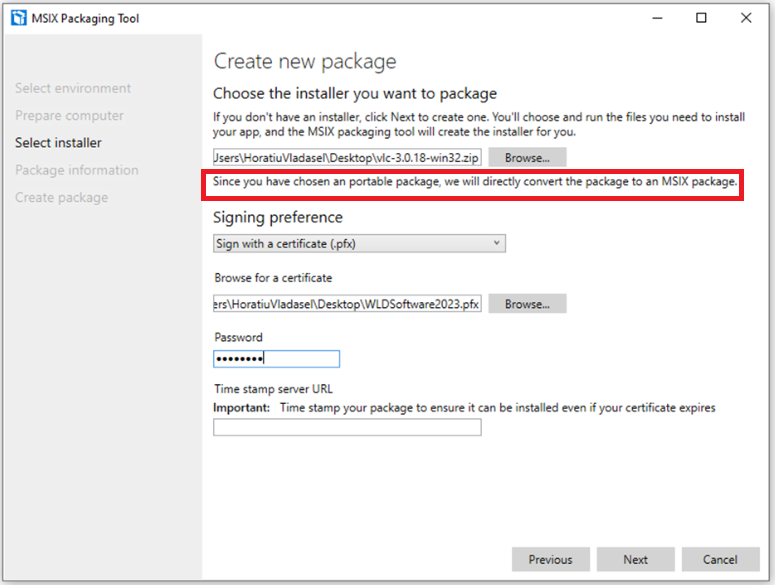
As you can see in the screenshot above, the MSIX Packaging Tool automatically detects that this is a portable application and lets you know that it will directly convert it to an MSIX package.
Next, as we do for any other MSIX package, we need to define the package information.
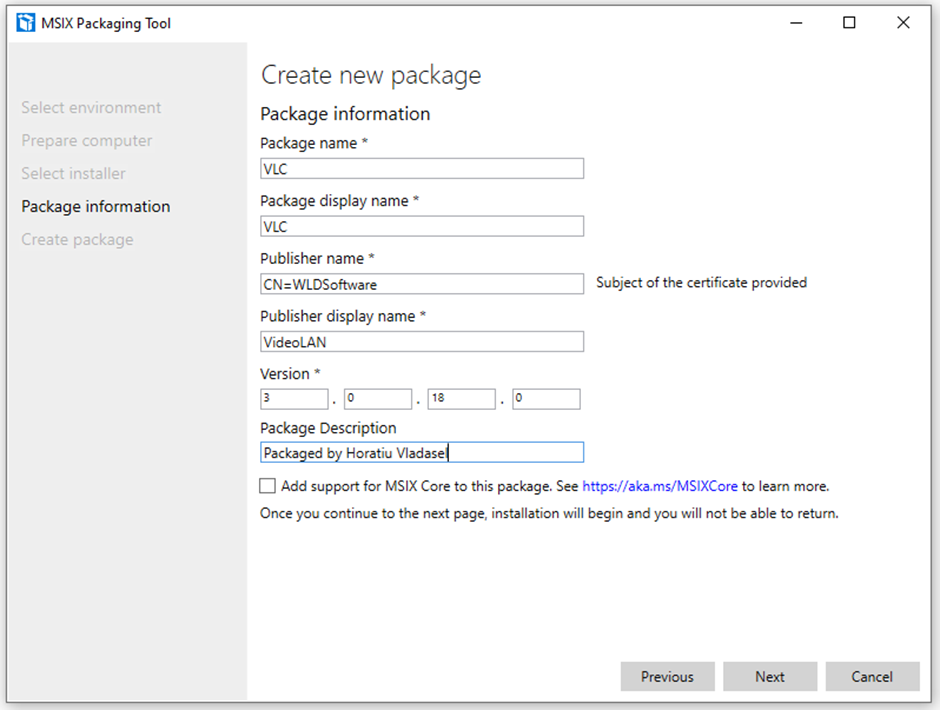
And that’s it. Once you click Next, you can click on the Create button, which will build your MSIX package straight away.
One thing you must be aware of is that the MSIX Packaging Tool creates a StartMenu EntryPoint (shortcut) for each of the executables included within the package. Therefore, you may need to edit the AppxManifest.xml file.
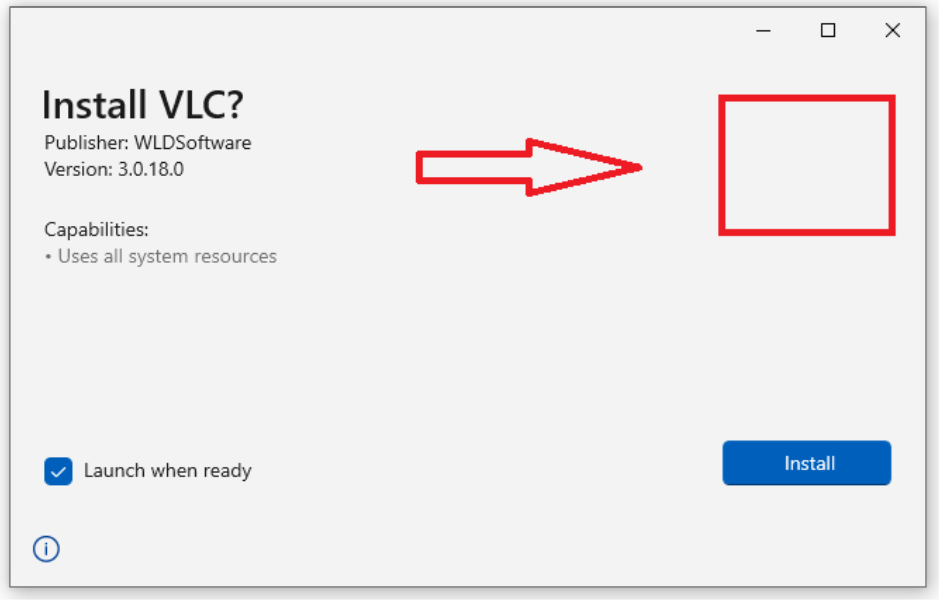
Also, when you install the application, you will notice that the AppInstaller GUI is missing the MSIX package logo, something that can be fixed by editing the AppxManifest.xml file.
How to Create a Package for a Portable App with Advanced Installer

When it comes to Advanced Installer, the simplest way to convert a portable application into an MSIX package is to create a Windows Store Package project. Here's how:

1. Once the project is created, browse to the Files Folder page and add the file resources of your portable application.
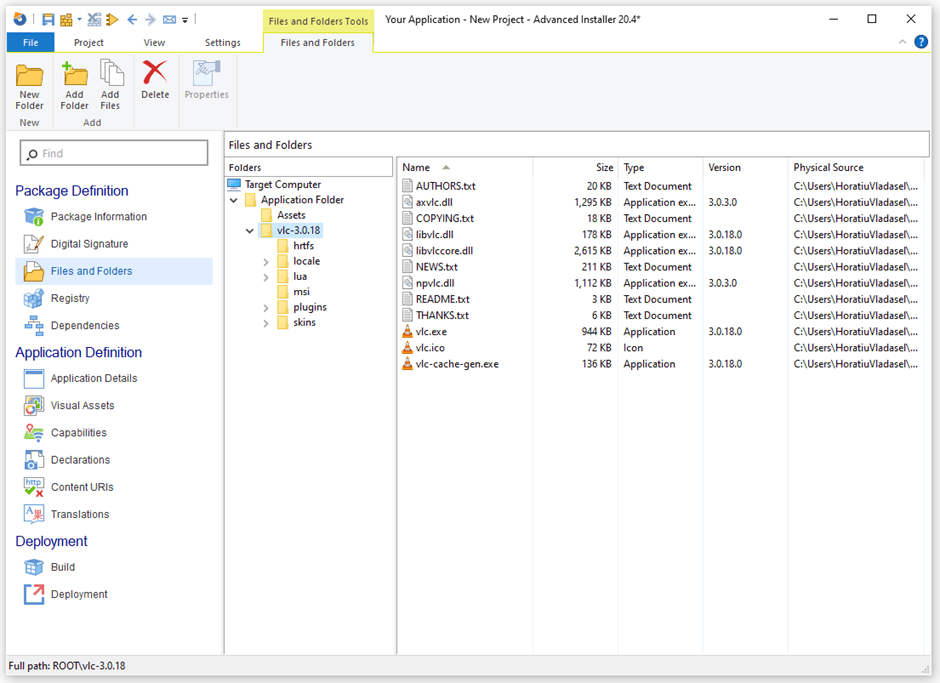
2. After that, browse to Application Details page and configure the StartMenu EntryPoint (shortcut). You’ll need to do this for each of the EntryPoints of your MSIX package.
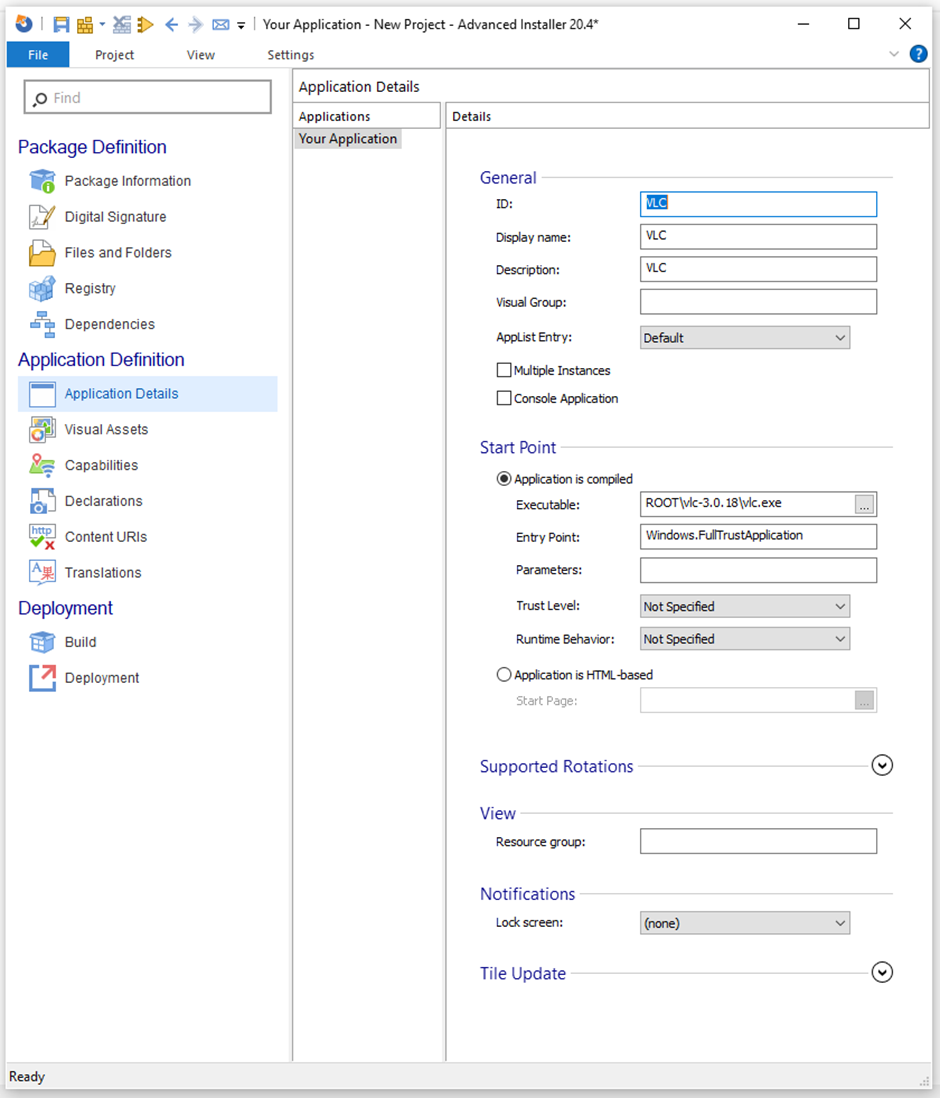
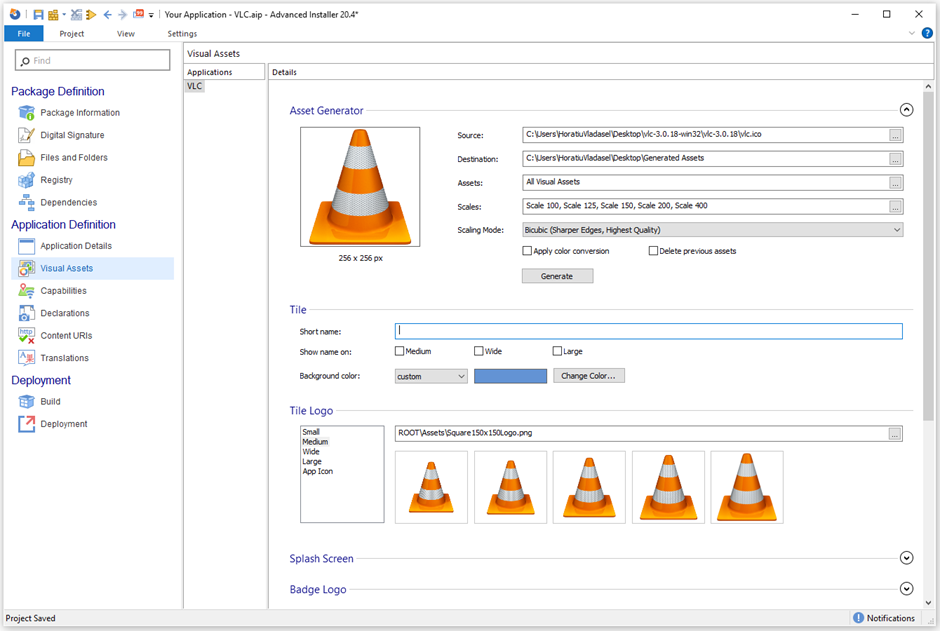
3. Once you're there, browse to Visual Assets page and configure the icon for the StarMenu EntryPoint(s) created earlier. You can also generate all the visual assets required for the MSIX package by clicking the Generate button.
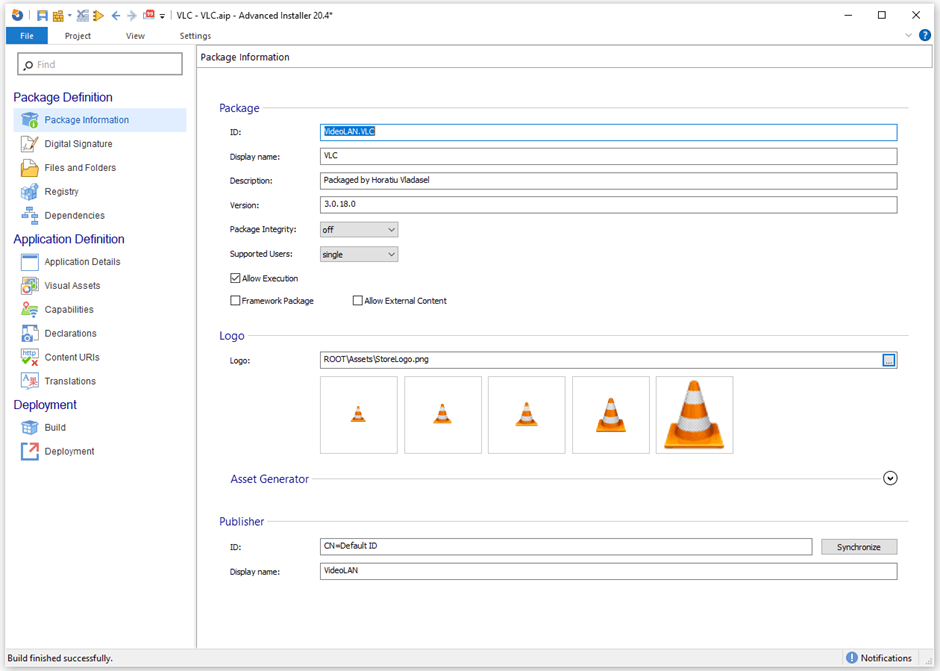
4. Following up, browse to Package Information page and set the package details. Do not forget to set the Logo for the MSIX Package. You can select it from the list of Visual Assets generated previously.
5. Lastly, you will need to browse to Digital Signature page and sign your MSIX package. Remember that all MSIX packages must be digitally signed.
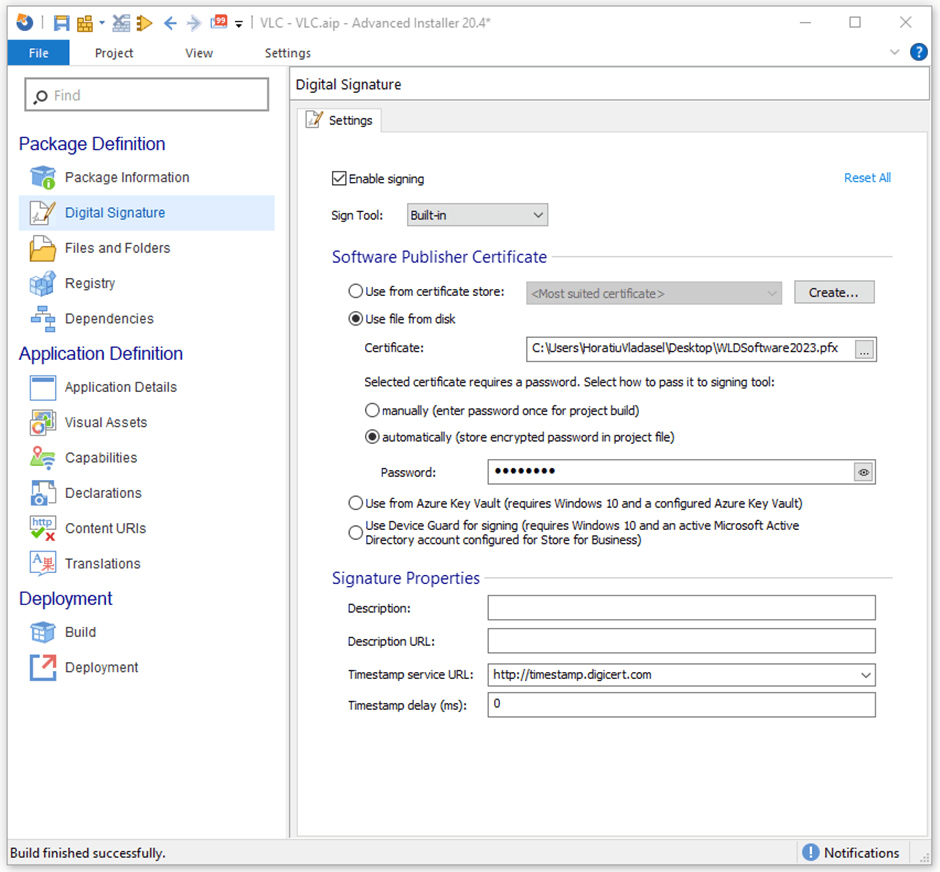
And that’s it. You can now build your MSIX package.
Now, when you install the application, you will notice that the AppInstaller GUI has the MSIX Package logo you set earlier.
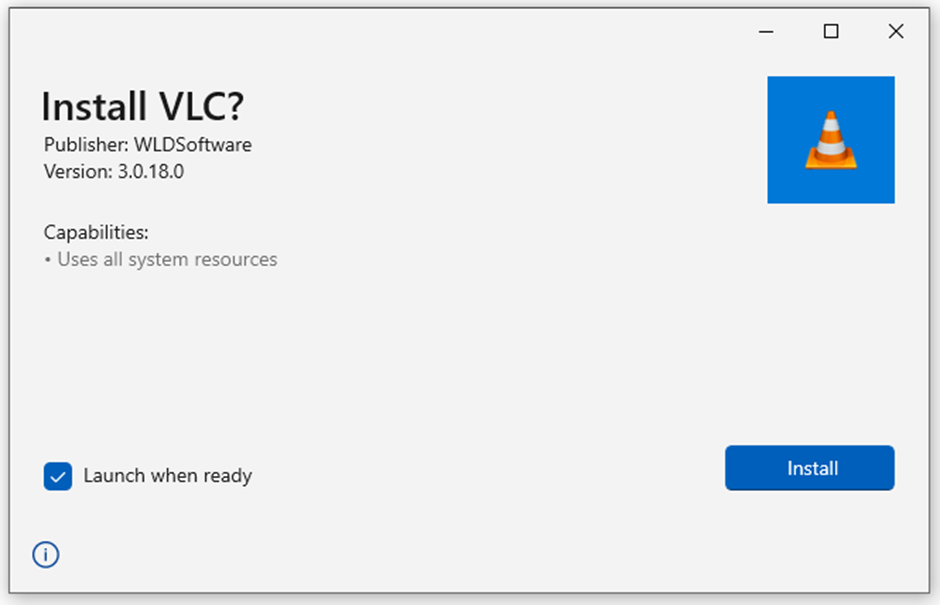
And also, the StartMenu EntryPoint shows the icon you selected.

Conclusion 

When it comes to Advanced Installer, the process of converting a portable application into an MSIX package is somehow comparable with the MSIX Packaging Tool.
However, there is no need to edit the AppxManifest.xml file manually because everything can be configured within the Advanced Installer GUI.
