How to update your MSIX application in Microsoft Store
There's a certain feeling of relief and achievement when we finally launch our application to the Microsoft Store.
Read our article on how to publish your MSIX application to the Microsoft Store - and review the steps you need to follow when launching your app to the store.
As with all of our MSIX applications, publishing your app to the store is not the final step. You still need to keep it up-to-date with all its new fixes and versions. To achieve that, you have to submit a new updated version to the store.
In this article, I will explain how updates work in Microsoft Store and show you the steps to successfully add your updated application to this marketplace.
What is considered an update in Microsoft Store?

From the moment you create your first application submission to the Microsoft Store, any new modification that you make is considered an update to your application.
Some of these changes include:
- Pricing and availability changes
- Package property changes (such as including the application category)
- Age rating changes
- Uploading a newly developed application package
- Updating your store listing (i.e. Adding Support Languages)
As you can see, these are mostly the same fields required when the application was initially uploaded to the Microsoft Store.
How to Update your Application in the Microsoft Store?

Now that we know which changes are considered updates by the Microsoft Store -- let's start updating our application.
1. Log in to the Microsoft Partner Center.
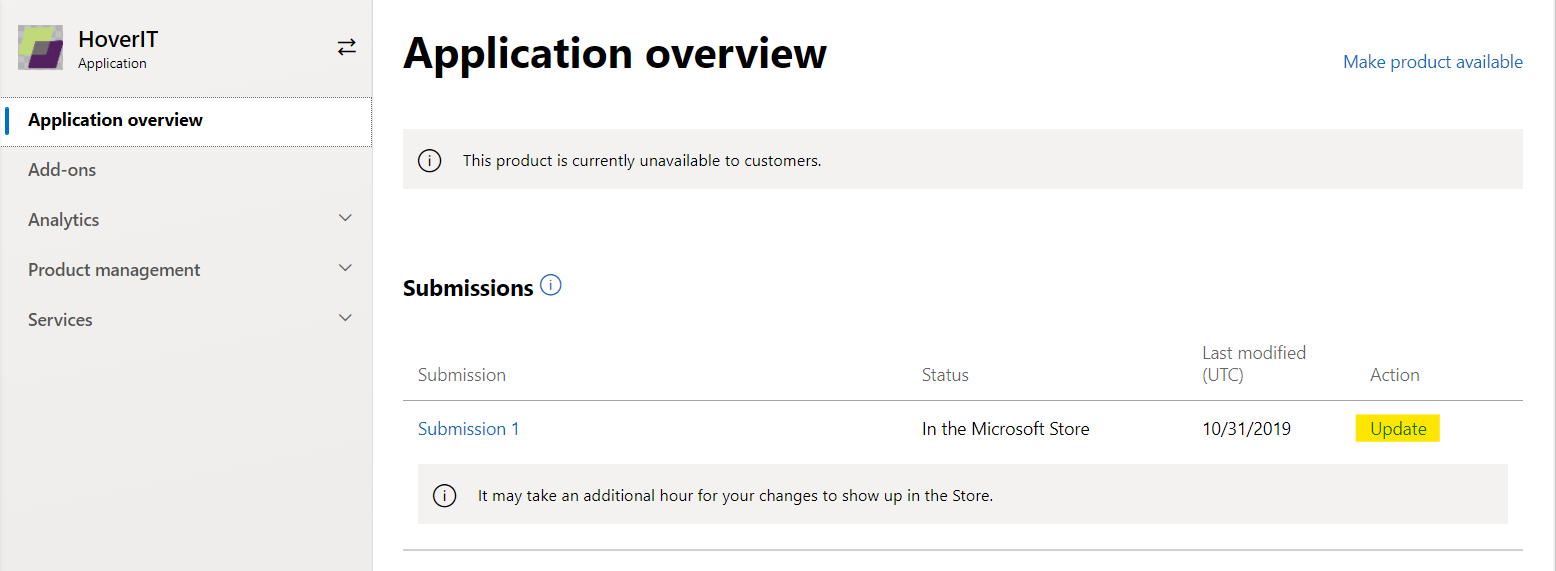
2. Navigate to Windows & Xbox, then Overview, from the left pane. You will see your application listed as seen below.

3. Click on your application name. This will lead you to the Application overview screen, then click on the Update button.

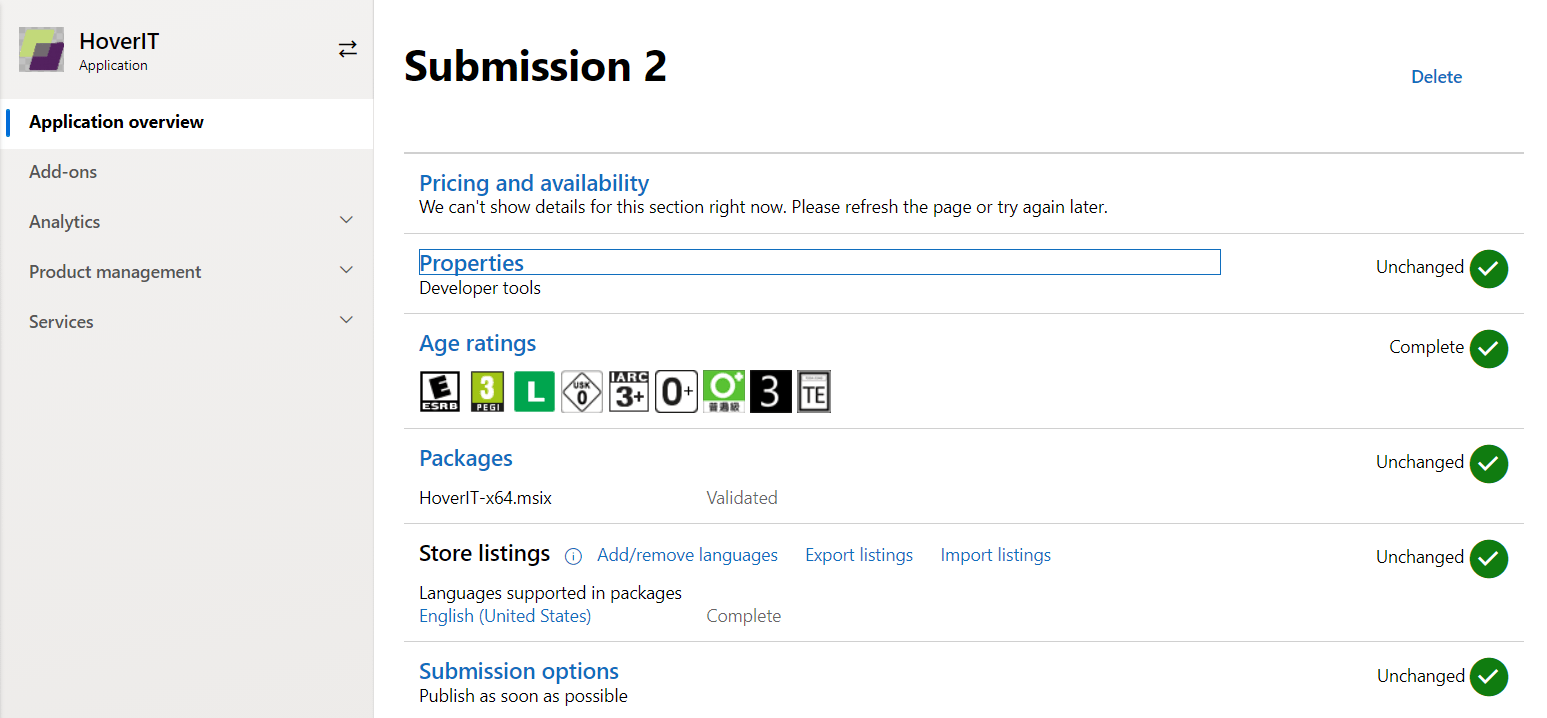
4. Now you can create a new Submission (as shown below).

5. Once there, click on the name of the section that you want to modify.
In this example, I will make the following changes:
- Update the application category,
- Add a newly developed package, and,
- Modify the Store listing to explain the changes made in this update.
1. Update the Application Category
Once you have your submission created, you will see the Properties option right above the Age Ratings (check the previous image).
In my case, I changed the application to a more relevant category and also added a subcategory. Previously, it was listed under Utilities+Tools. Now, I chose Developer tools and Utilities.

Once you have made the changes, don't forget to save them.
2. Add a Newly Developed Package
To add the newly developed package, click on the Packages section from the Application overview submission page.

This will take you to the Packages page. There, browse for the source file and wait until the package is uploaded, analyzed, and validated automatically.

If there are any validation issues with your package, you will get an explicit error message with what needs to be changed.
When you publish your updated package, you have two additional options:
- Roll out the update gradually after submission. This means the update is available only for our chosen percentage of the existing users. The users that get the update are randomly selected by Microsoft.
- Make the update mandatory. In this option, users are essentially obligated to update the application before the date that you established. If they fail to do so, they could get limited access to the application functionalities or won't be allowed to use the application at all.
As you can see in our example below, we decided to make this update mandatory.

At the end of your package upload, click save.
3. Modifying Store Listing
To modify your Store Listing information:
1. Go to the Application overview submission page, under Store Listing.
2. Click on English (United States).

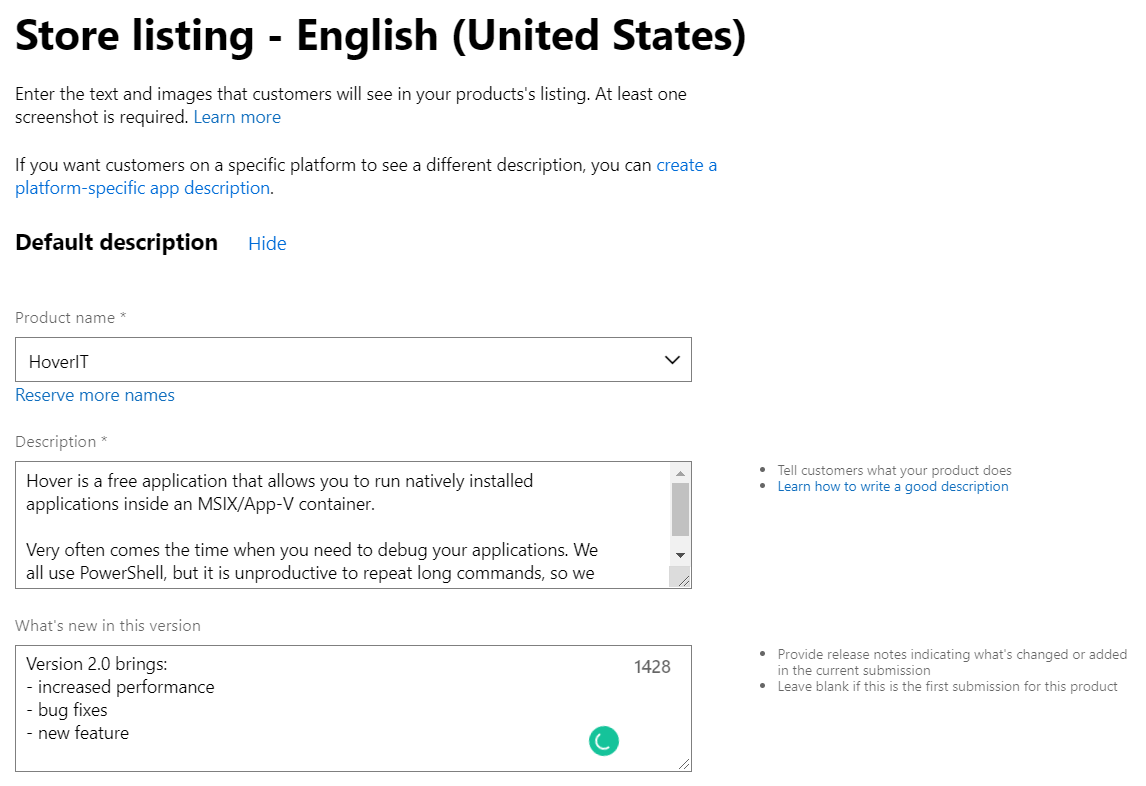
3. Once the store listing is opened, complete the “What’s new in this version” section. As seen in the example below.

4. Then, scroll down to the end of the page and click Save.
5. After finishing the previous steps, go back to the latest Submissionoptions page and click on Submit to the Store.

Conclusion

Updating your application in the Microsoft Store is a regular and ongoing process that shouldn't be neglected.
We hope that this article makes it easier for you to update your MSIX application on the Microsoft Store.
Let us know if you have any questions or if you would like us to write about any other subjects related to applications and Microsoft Store.
Subscribe to Our Newsletter
Sign up for free and be the first to receive the latest news, videos, exclusive How-Tos, and guides from Advanced Installer.