Migration Upgrade from SCCM 2012 to Current Branch (1902)
1. Introduction
In November 2015, Microsoft released the first edition of System Center Configuration Manager called SCCM (Current Branch) 1511. And since then, Microsoft decided to change its name to “SCCM YYMM (Year Month)” following the same naming convention as for Windows 10 YYMM (example Windows 10 1809).
SCCM being now part of the SaaS(Software as a Service) platform, leads to a much faster update cycle, the same update cycle as in Windows 10 case.So, it made sense for Microsoft to keep the same naming convention for much easier identification.
Nowadays, with the release of SCCM 1902 and 7 years apart from the launch of SCCM 2012, it’s about time to take into consideration migrating to a more up to date version which brings a lot of new features and functionalities. SCCM 2012 R2 SP1 (latest SCCM 2012 version) mainstream support ended in 2017, and now it’s in the Extended Support until 2022.
2. What’s new ?

The latest version of SCCM 1902 comes with a lot of new features and functionalities, especially when it comes to managing Windows 10 client machines. This version is available as an in-console update, or if you have a new site in a new hierarchy, you can also install it as a baseline version (stand-alone annual version).
You can check some of the features and functionalities that SCCM 2019 brings, compared with SCCM 2012 below:
- Windows 10 Servicing - check the state of Windows as a Service in your environment and keep the Windows 10 up to date
- Compliance settings for Windows 10 -check whether your devices are compliant and if you want to remediate them when they are not
- Windows 10 in-place upgrade task sequence - upgrade the operating system to any supported version of Windows 10, and take full advantage of not having to migrate all users’ data and applications’settings
- Integrated native management of Office 365 desktop client update
- Improved application management-New Package Conversion Manager and native support (integration and deployment) of MSIX application type
- Multiple Automatic Deployment Rules
- Mobile Device Management
- New improved Software Center
For the full list of new features that come with Configuration Manager 1902, click here.
3. Servicing Support

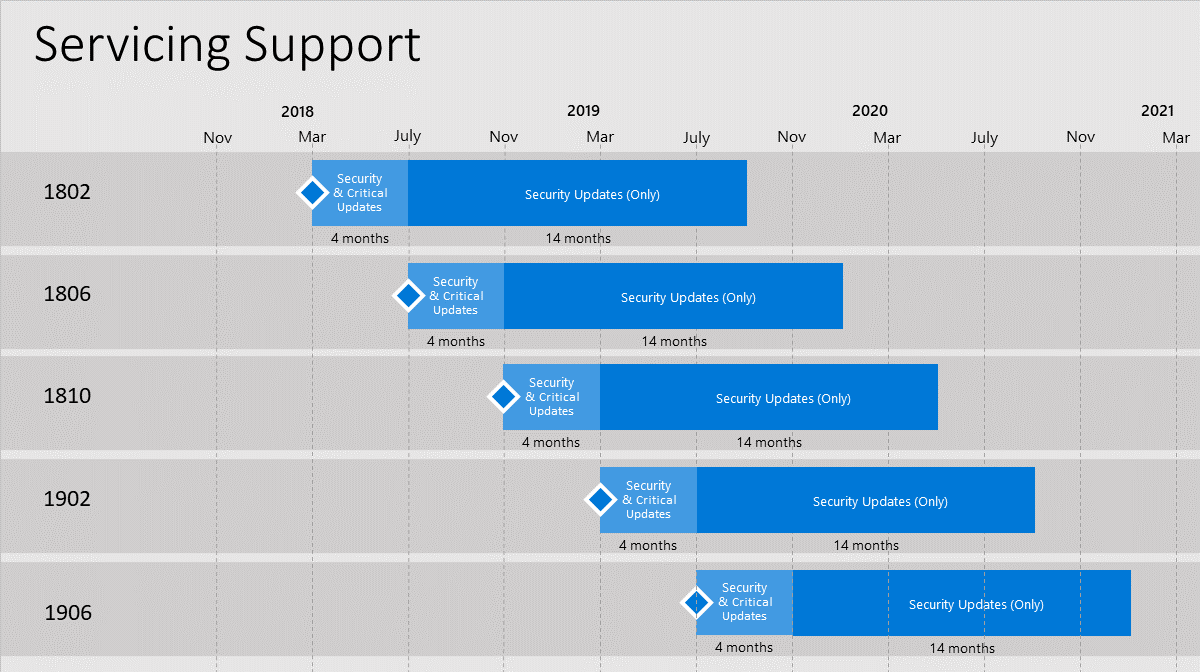
Microsoft tends to release a few major updates for the current branch every year, and starting with update 1710, they offer support for 18 months for each update.
There are two kinds of servicing phases:
- Security and Critical Updates - If you are on the latest current branch version, you receive both security and critical updates
- Security updates - After a new current branch has been released, you receive only security updates if you remain on an older current branch
Here is a Servicing Support Graph:
4. Prerequisites

When it comes to OS, in order to migrate to Current Branch, you must have at least Windows Server 2012 or newer. Windows Server 2008 or older versions can act only as a Distribution Point. So, make sure you upgrade your OS to a supported version and only then perform the SCCM migration. See here a full list of supported OS’s.
Same applies to the SQL Server installed. The minimum version supported is SQL Server 2012 SP3(Standard, Enterprise). See here a full list of supported versions.
If you perform OS deployments in your environment, then you need to also update your Windows ADK to the latest version (Windows 10 Assessment and Deployment Kit).
Don’t forget to check Microsoft .NET version. The minimum requirement is .NET Framework 4.5. As a best practice, it is recommended to upgrade to the latest version.
5. Side-by-side or In-Place upgrade migration

The Side-by-Side upgrade involves setting up a new server with the desired OS and installing the SCCM with a new site code name.
Pros:
- lower downtime due to still having the old infrastructure in place, up and running, until the new one is ready
- if something goes wrong in the migration process, you always have your main infrastructure operational
Cons:
- more hardware resources required since you are setting up a new server (this involves additional costs)
- the process itself it’s harder and involves additional steps
The In-Place upgrade involves upgrading the SCCM directly on the current machine operating system using the baseline media file and choose the install type as “Update”.
Pros:
- no additional hardware required (cost-saving)
- faster and easier process compared with a side-by-side migration upgrade
Cons:
- bigger downtime during the upgrade (make sure you perform this operation outside business hours)
- if something goes wrong during the upgrade, troubleshooting takes time(meanwhile your infrastructure is not operational)
Subscribe
and get your copy
6. Backup and database check

It is crucial to perform a back-up of your SCCM database, just in case something goes wrong with the upgrade process.
Here is a quick overview of what needs to be done:
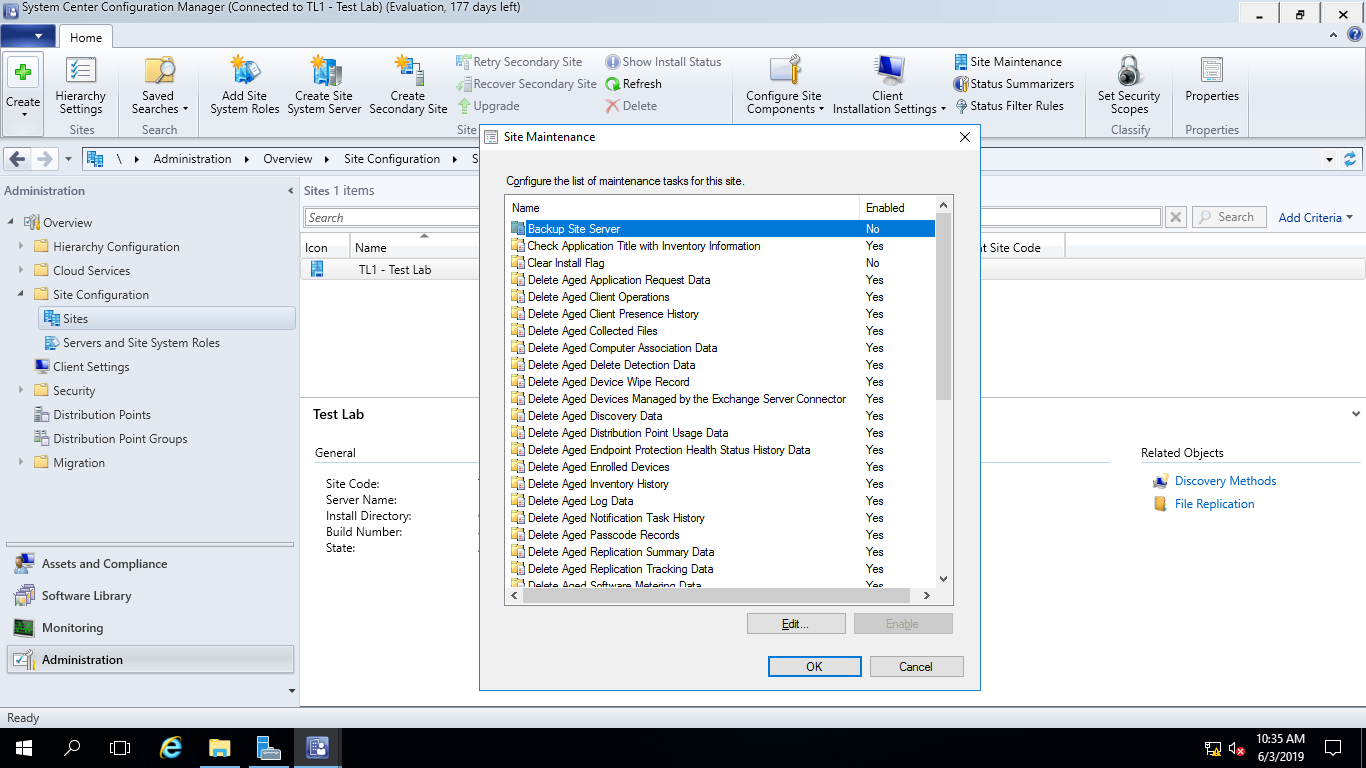
a) From SCCM console go to Administration->Site Configuration->Sites, select your site and click Site Maintenance, then edit Backup Site Server
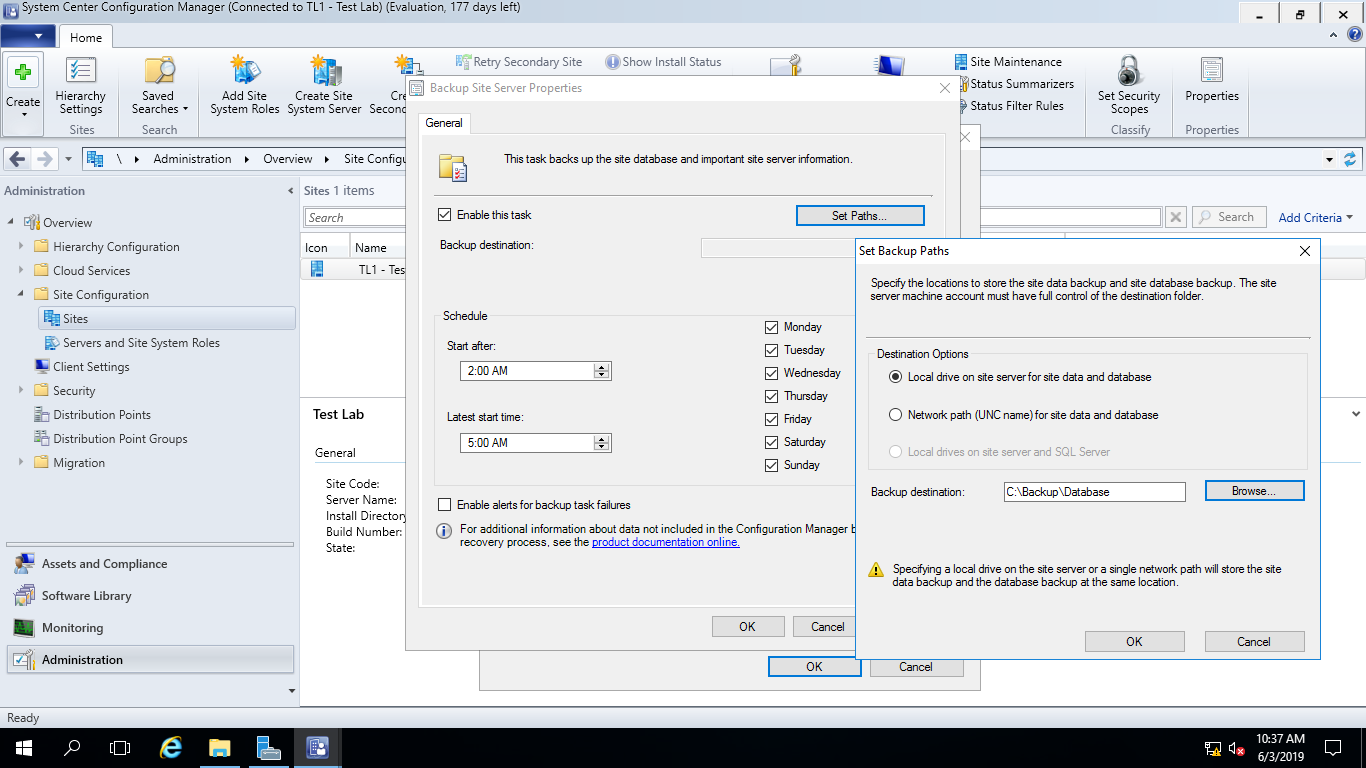
b) Check Enable this task button and Set Paths…where you want your database back-up to be stored. Also here you can edit the schedule based on your own requirements/preferences
c) If you want to start the back-up manually, you can start the SMS_SITE_BACKUP service from the services console
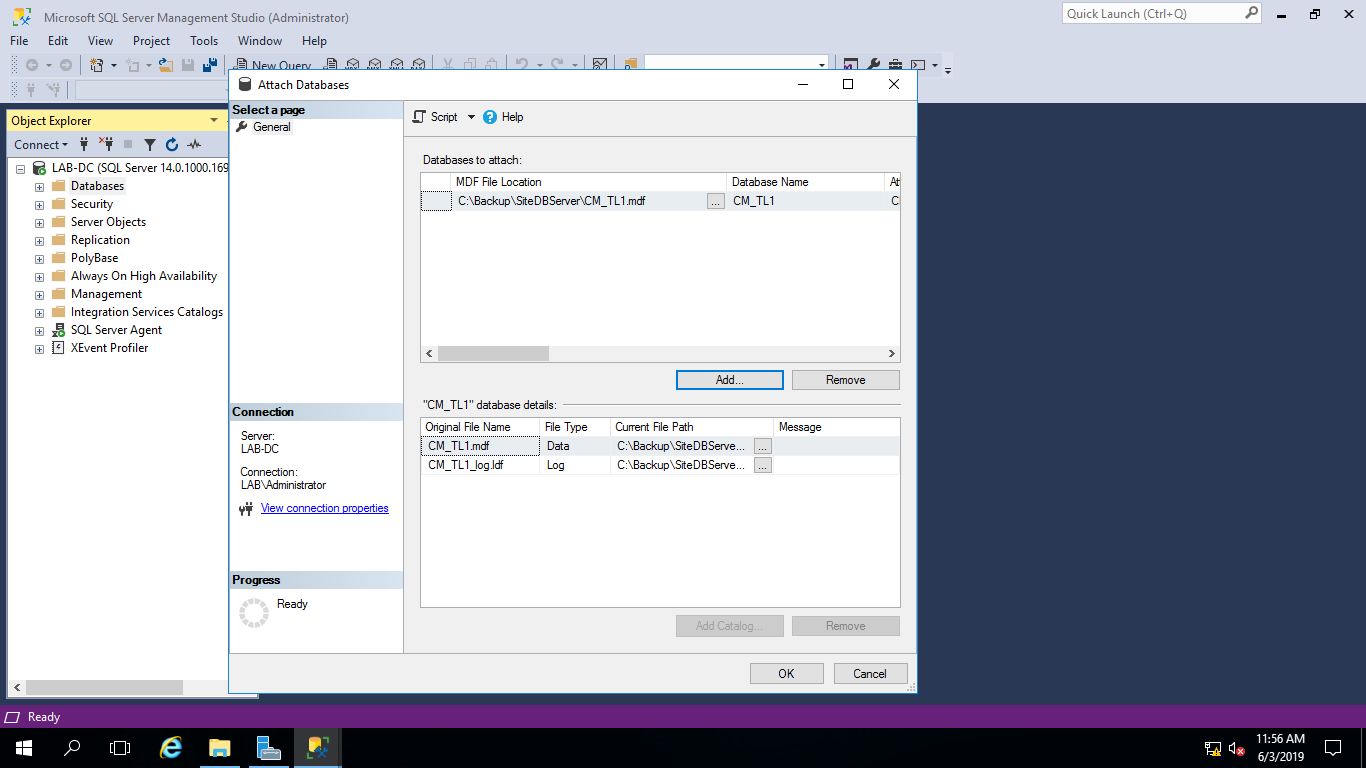
d) Now that you have the back-up files, it is time to restore them on a SQL server running the same version as your SQL SCCM instance. From SQL Management Studio, you can attach the required back-up files
e) Open a cmd instance with elevated privileges, navigate to SCCM setup files and run the setup.exe command line with “testdbupgrade” switch:
Setup.exe /testdbupgrade CM_TL1_backup
CM_TL1_backup represents the database name (replace with your
database backup name)
As we mentioned earlier, you need to use another SQL server to test
the database. Otherwise, you get the following error:

For more information, you can check this TechNet article section.
7. Upgrade install procedure

Now that we have our database backed up, we can proceed with the installation. First, we need the installation media file. In this tutorial, we are going to use the latest baseline media file from Microsoft.
In case you have the ISO file, mount it and run Splash.hta. When on the main menu, select Install.

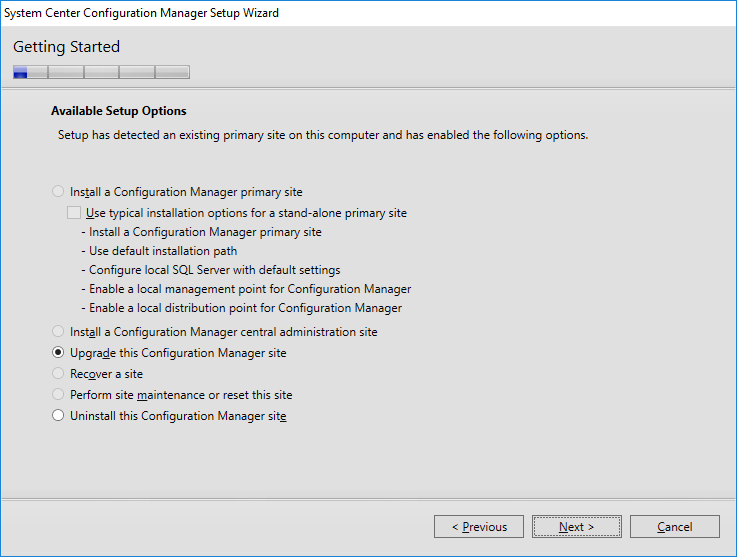
Use default installer options, then on the Available Setup Options window, select Upgrade this Configuration Manager site and click Next.
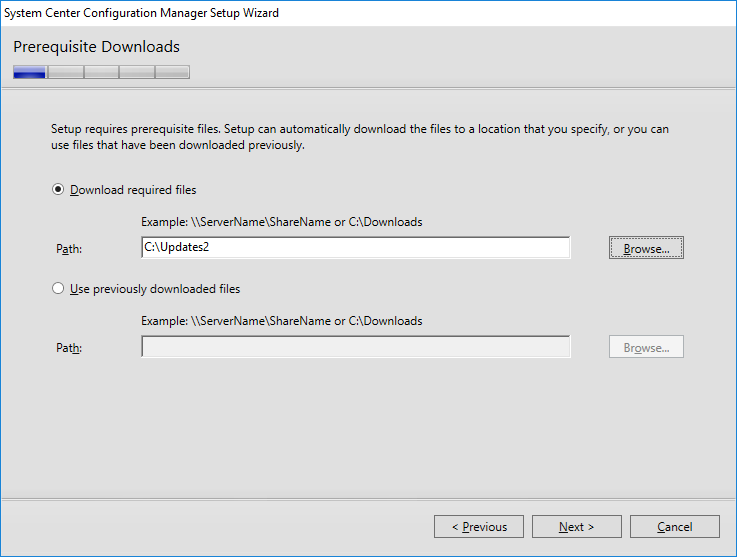
Click Next until you reach the Prerequisite Downloads window and set up your preferred download path.
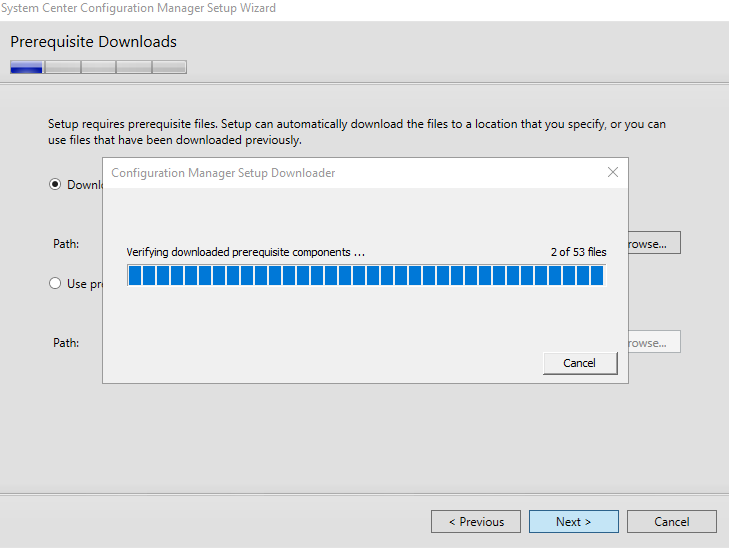
Click Next and wait for the downloader to finish.
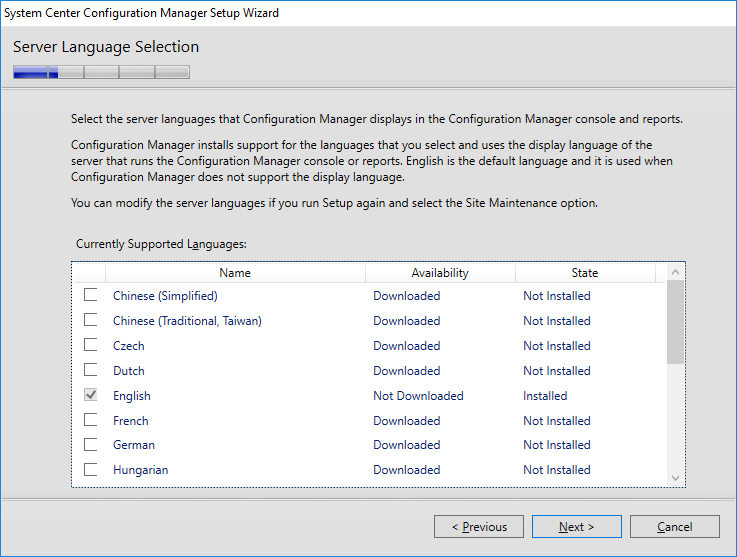
On the Server Language Selection window, select any additional language you need to add and then click Next.
Same applies to Client Language Selection.
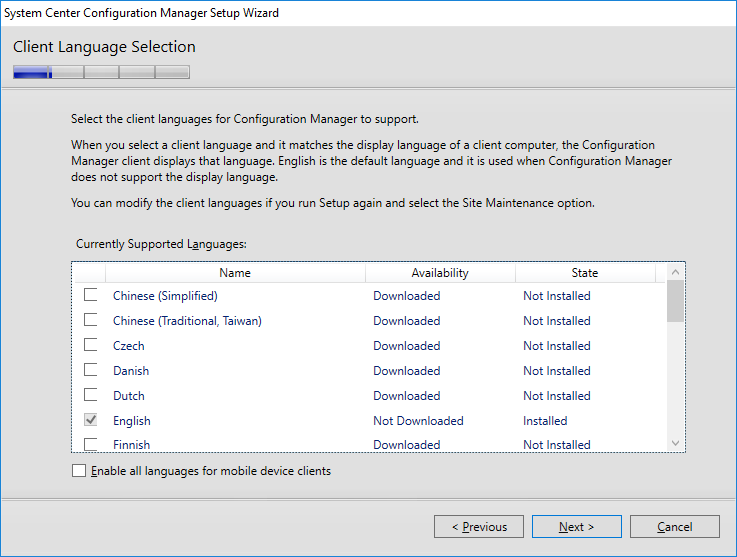
Click Next until you reach Prerequisite Check window. Run Check and wait for prerequisite check to finish.
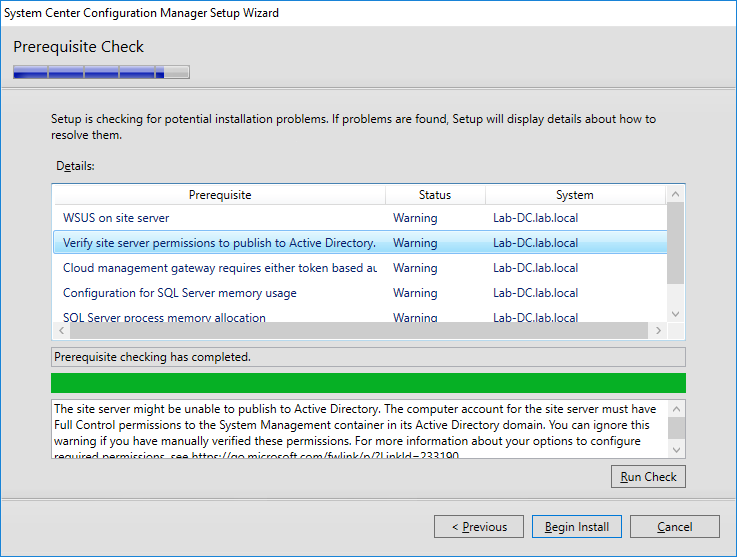
You can now click Begin Install. This is the moment where you can take a break since the upgrade takes around 1 hour, depending on your environment.
When the setup finishes, you receives the following window

8. Post install configuration 

After the setup wizard is finished, we still have some few things to do.
8.1 Check Log filesand About sectionfor a final version check-up
- Open setup log from C:\ConfigMgrSetup.log
- Open About section from SCCM console

8.2 Check Site version
- Go to Administration -> Site Configuration -> Sites
- Right click on your site and press Properties
- Here you can see that the site version and build number has been updated

8.3 Check Boot Image version
- Navigate to Software Library -> Operating Systems -> Boot Images
- Here on both Boot Images, you can see the OS Version was upgraded to WinPE 10

8.4 Update Console
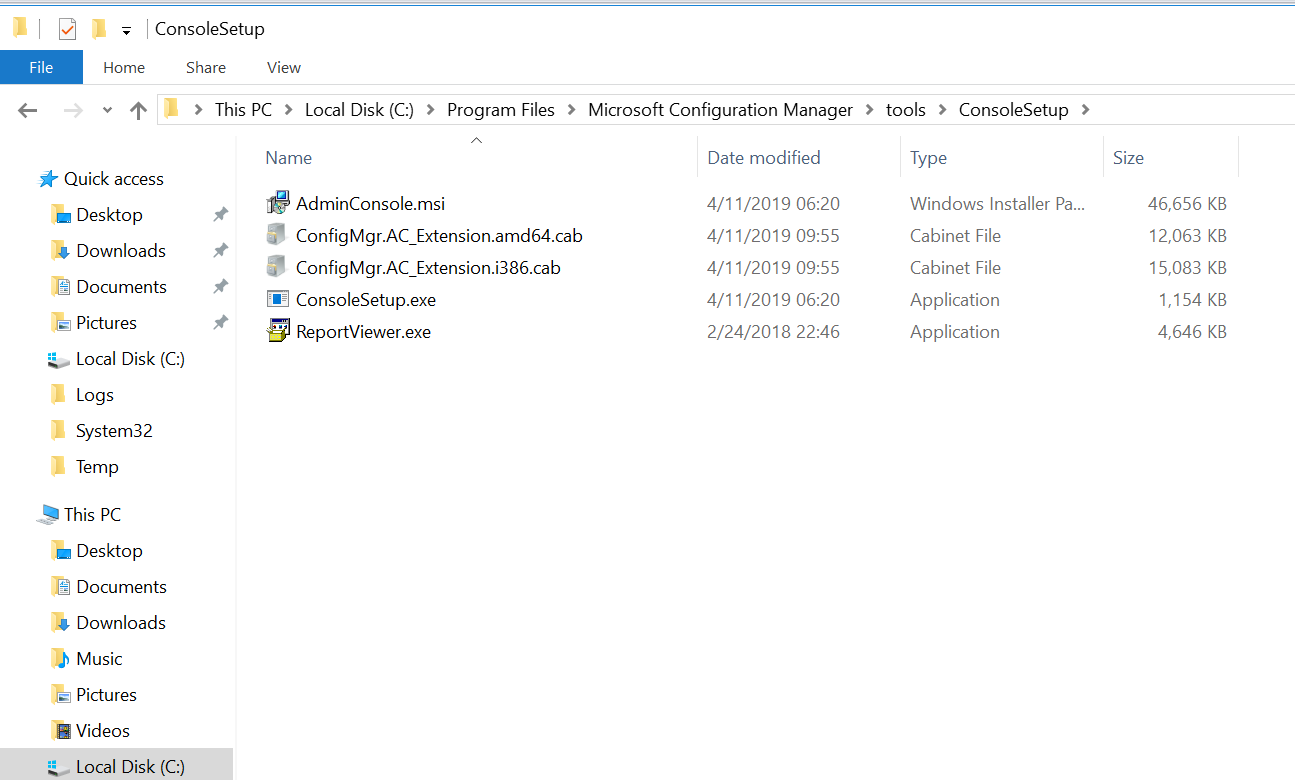
- The console can be manually upgraded by executing ConsoleSetup.exe from .\ConfigMgrInstallationFolder\tools\ConsoleSetup
- You can run this operation on each computer from your infrastructure that is running the console.
8.5 Update Clients
To get the Client updated, you can use 2 methods: Client Push & Automatic Client Upgrade.
For the Client Push, you can create a device collection, right click and push Install Client. Then you can proceed with the wizard and choose the settings which best meet your requirements/preferences.

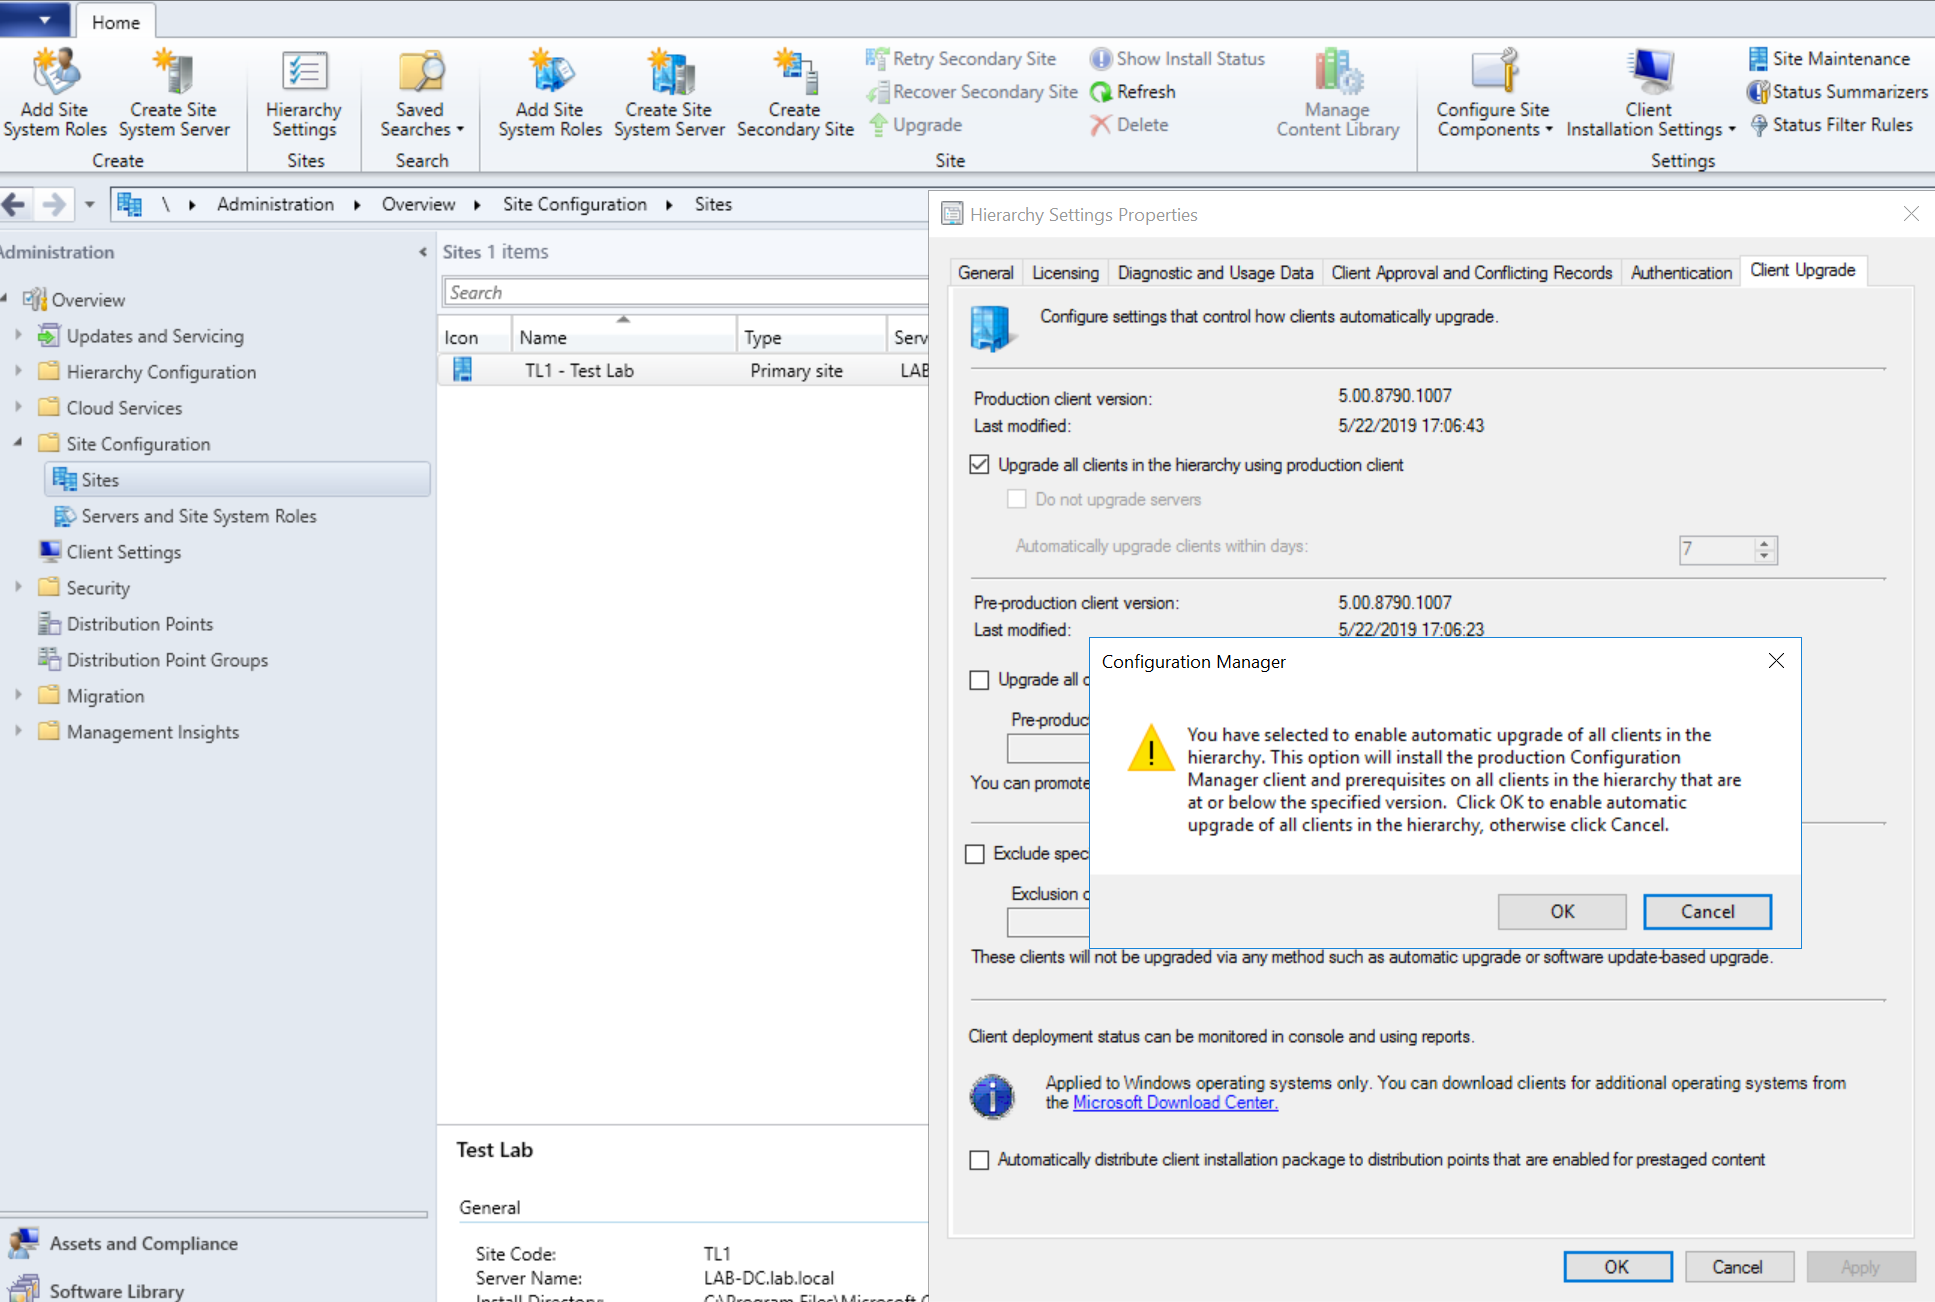
For the Automatic Client Upgrade, you need to enable Upgrade all clients in the hierarchy using the production client:
- Navigate to Administration / Site Configuration / Sites
- Push Hierarchy Settings on the top side ribbon
- Go to Client Upgrade tab and check Upgrade client automatically when new client updates are available
- Now a scheduled task will be created and it will run in the timeframe specified (number of days)
8.6 Database replication & Maintenance tasks
- If before the upgrade you want the database replication configured, you need to enable it now
- If you had any database maintenance tasks disabled before the upgrade, this should also be reenabled
8.7 InTune configuration
- If you used InTune before and you also want to keep it after the upgrade, you need to reconfigure the site system role with the InTune subscription
- Also, the service connection point must be installed
9. Conclusion

As you can see, upgrading from SCCM 2012 to Current Branch 1902 is not that difficult if you follow a guideline.The benefits that come with the latest version are well worth, especially in these times where most of the managed devices tend to migrate to Windows 10.
