Branding your MSI Installation Package using Logos
Software branding plays a fundamental role in distinguishing your product in the competitive market. Beyond functionality, your software's brand recognition is crucial.
An efficient brand recognition strategy starts by integrating logos into your MSI packages. This will enhance visibility for your brand throughout the installation process.
In this article, we’ll break down how to leverage Advanced Installer to make your logo a part of the user experience during and post-installation.
Embedding Logos from the Start

Let's begin with the installer dialog, where you can integrate your brand identity right away. We'll explore:
- Installer Dialog Logos: By adding your logo to the installer dialog, you increase brand recognition and improve user experience. Advanced Installer lets you add your logo quickly, supporting various image formats (.svg, .bmp, .jpeg, .jpg).
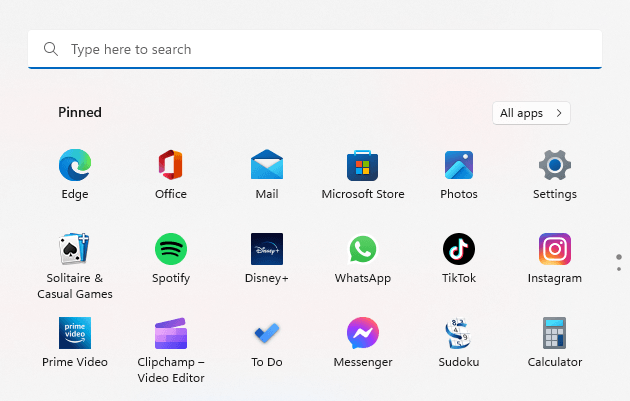
- Customizing Tiles: Tiles are dynamic icons used to represent the application on the Start Menu. With Advanced Installer, you can create and personalize tiles, giving you control over colors, images, and visibility settings.
- Logo Integration for Shortcuts: Offer users quick access to your software by adding logos to desktop shortcuts, enhancing the user interface further.
- ARP Icon Addition: Customize the icon displayed in the Add/Remove Programs for your application, adding a personal touch to every element of your software.
How to Add Logos to the Installer Dialog

A logo is not just a picture, but the face of your brand. Integrating your logo into the installer dialogs enhances recognition and elevates the user experience.
Here’s how you can easily add your logo to the installer dialogs using Advanced Installer:
1. Adding Main Logo
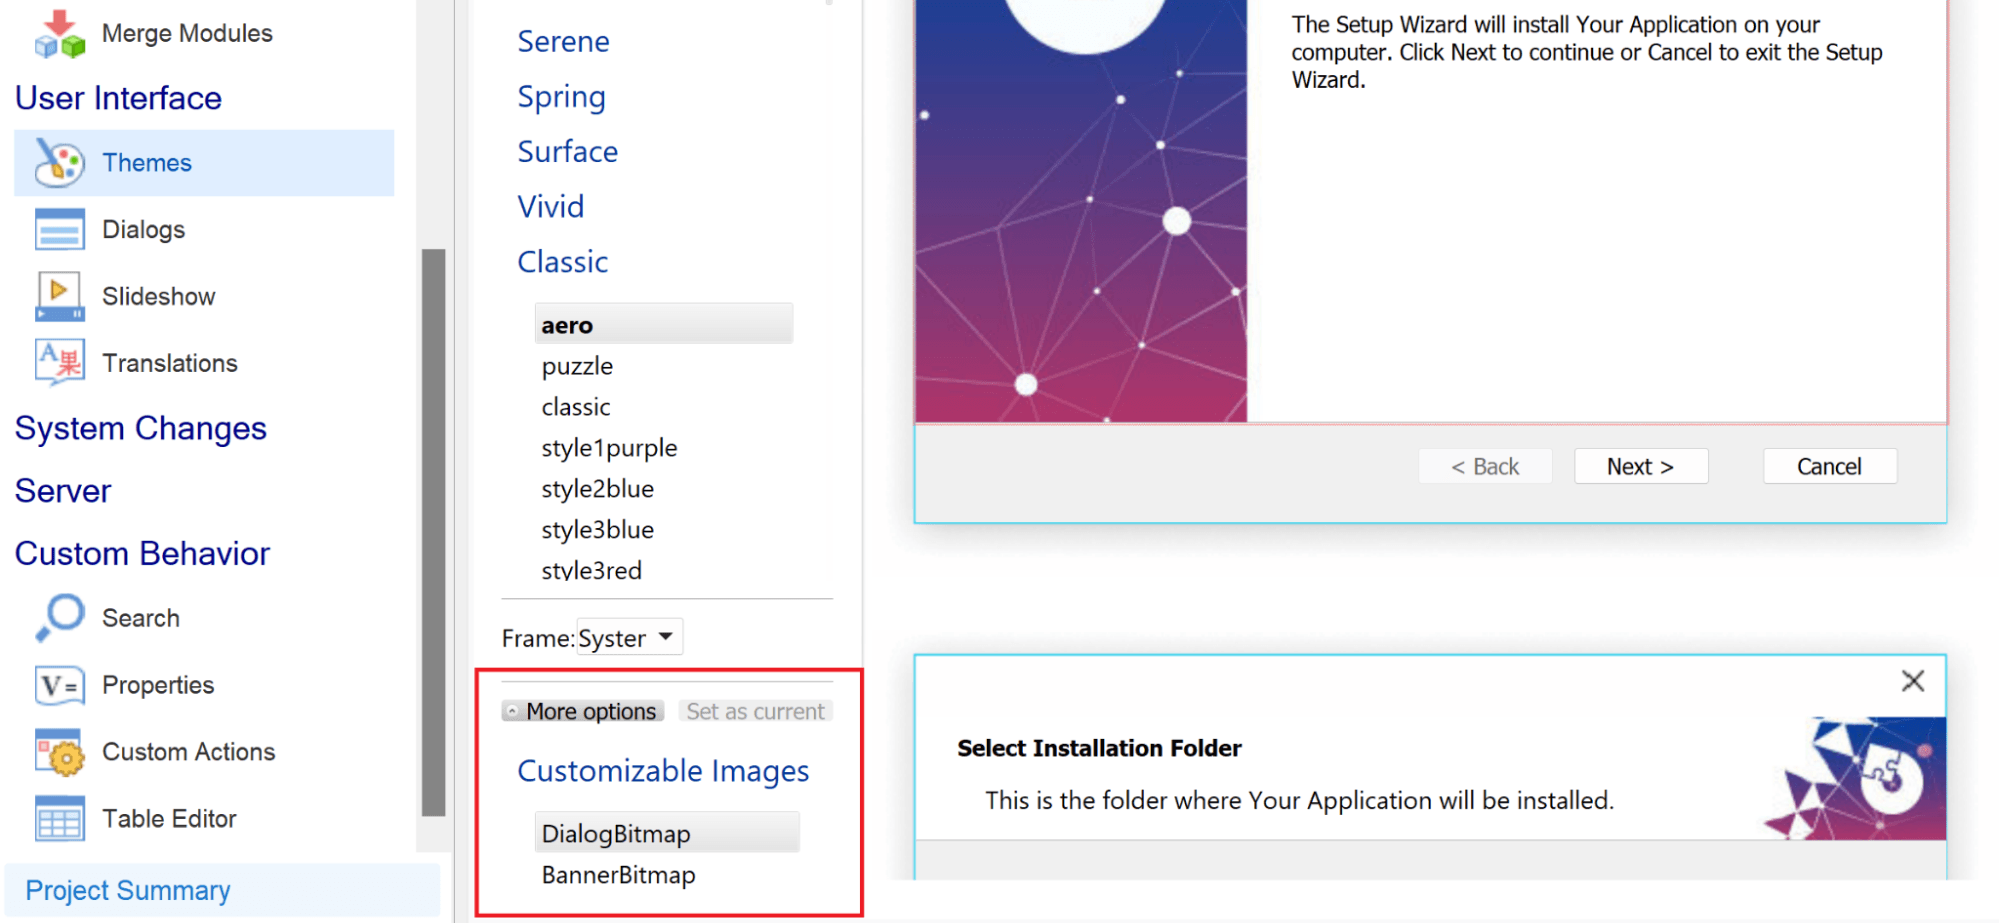
One option is to choose a theme and change the DialogBitmap and BannerBitmap of the dialog with images containing your logo (supported formats: .svg, .bmp, .jpeg, .jpg).
- Go to the Themes page → Preview tab, choose the theme and set as current.
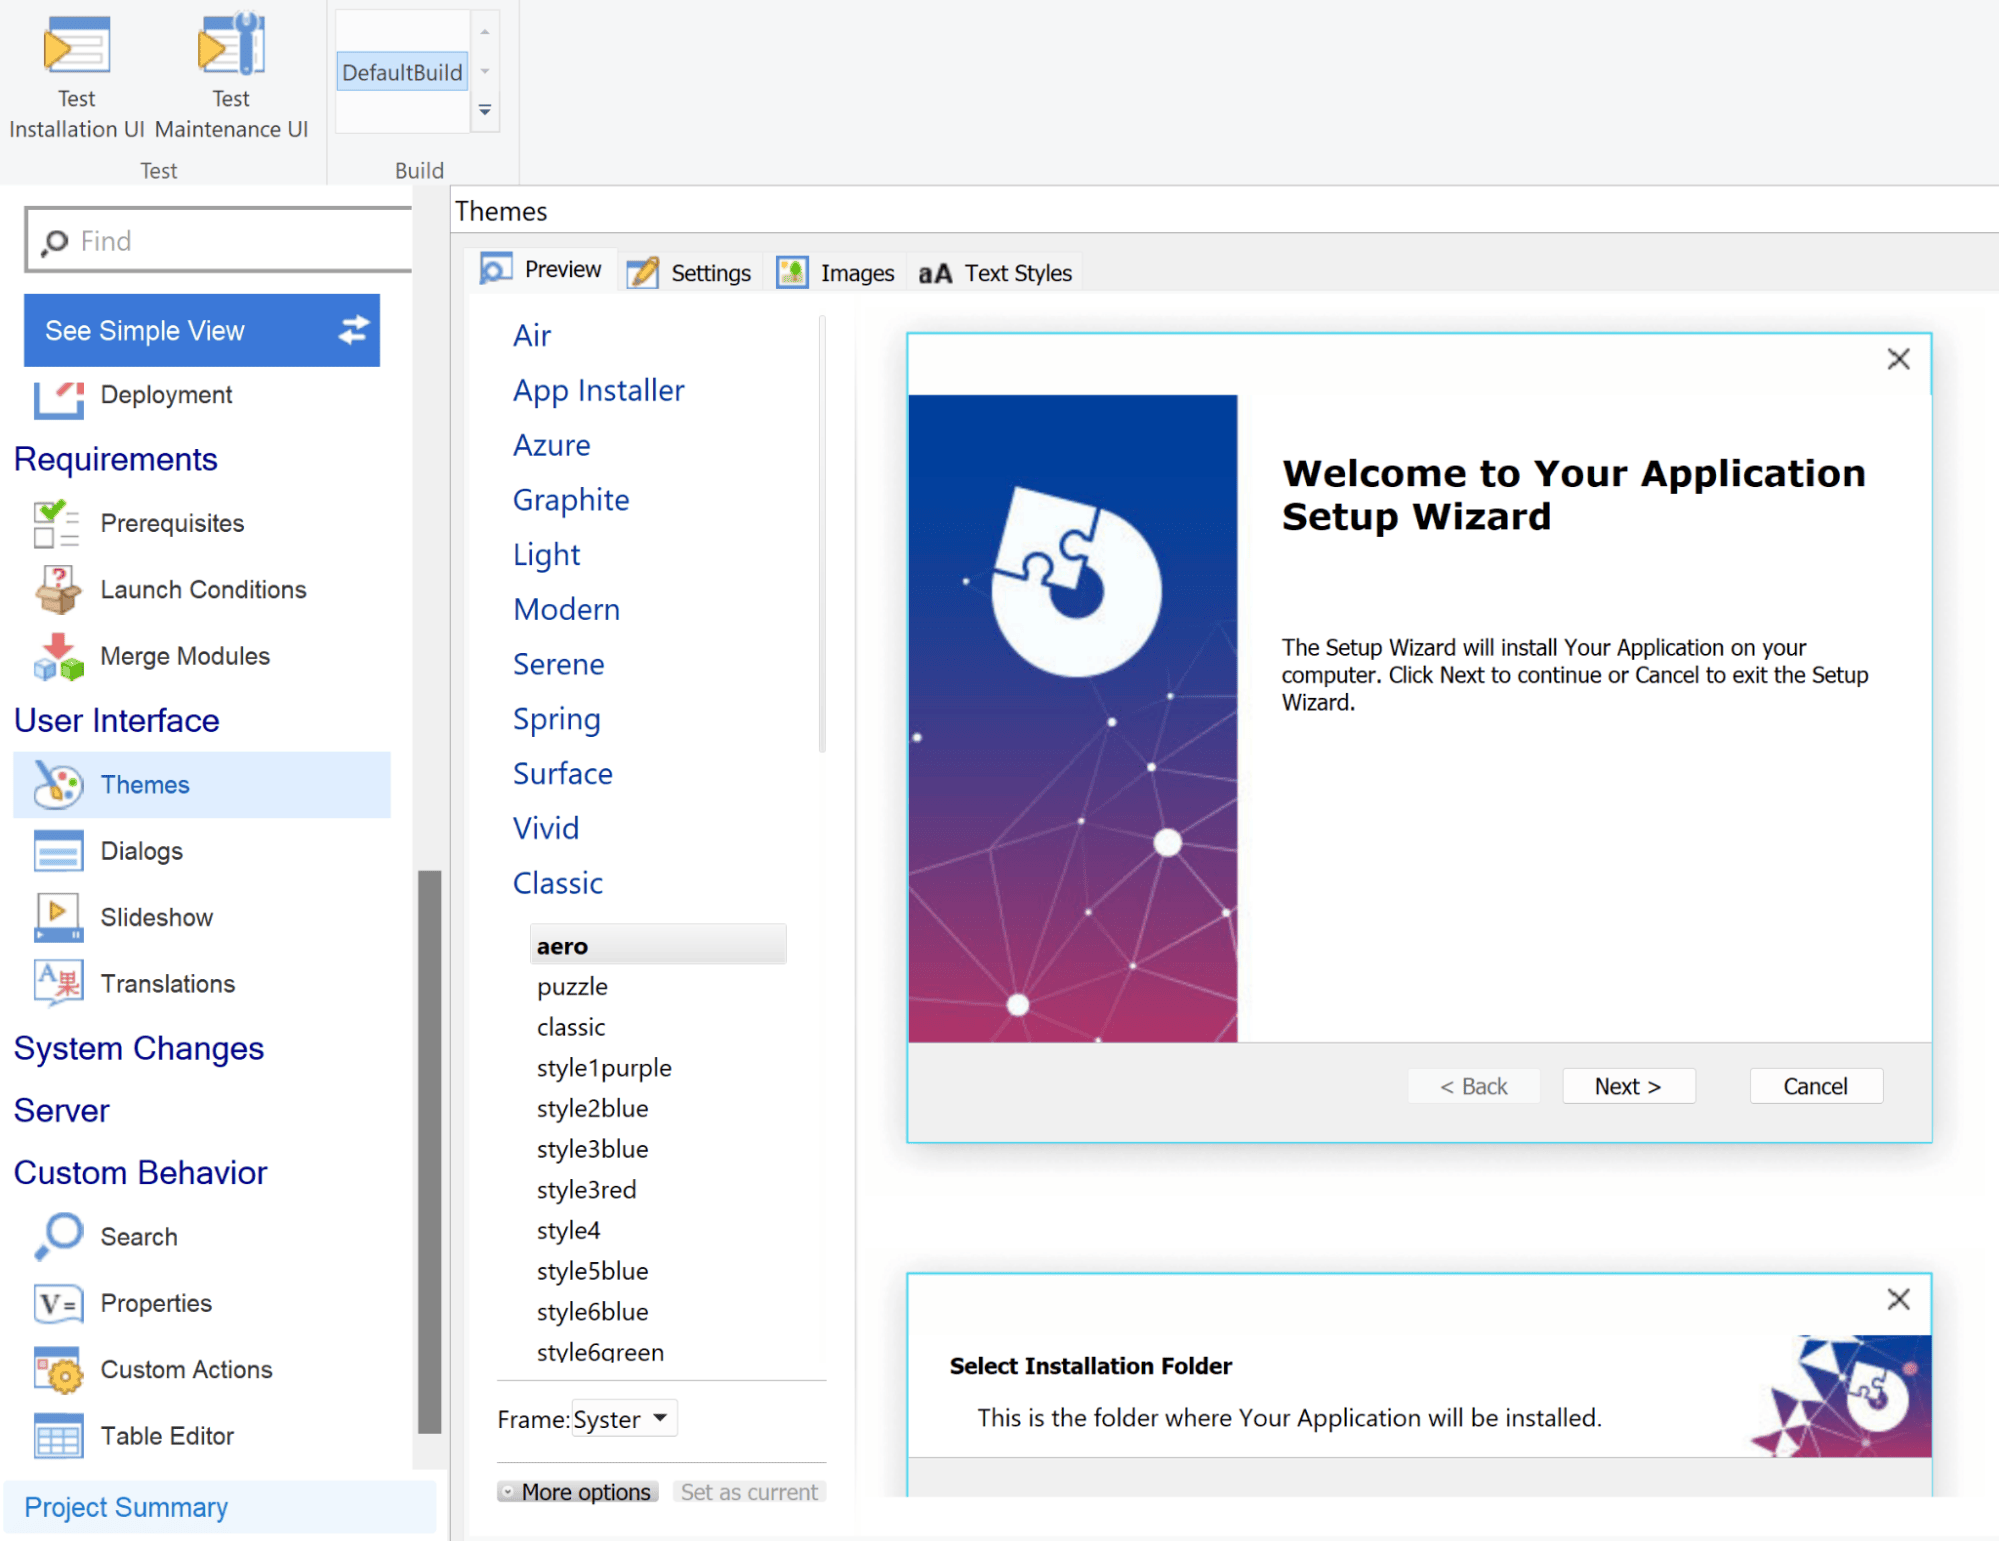
- Click More options, then double click on the image to customize, and upload your logo.
2. Customizing Controls with Images
The second option is to add images to customize the controls in the dialogs (supported formats: .bmp, .jpg, .jpeg, .png, .ico, .svg).
- Go to the Images tab on the Themes page.

- Click New, choose the image, set a property, and press OK.

Once the images are added, you can use them in the Dialogs page to customize the controls. If you want to use an image for a control, you need to select the property you set for that image.
How to Create and Customize a Tile

With Advanced Installer, you are able to customize a 'tile' for your application's installer package.
But, what exactly is a tile? It's a special type of icon that appears on the Start Menu. Unlike traditional icons, tiles were first introduced with Windows 8 and provide a more engaging experience, as they can display live updates from a specific application.
Creating a Tile in Advanced Installer
To create a tile in Advanced Installer, just follow the next steps:
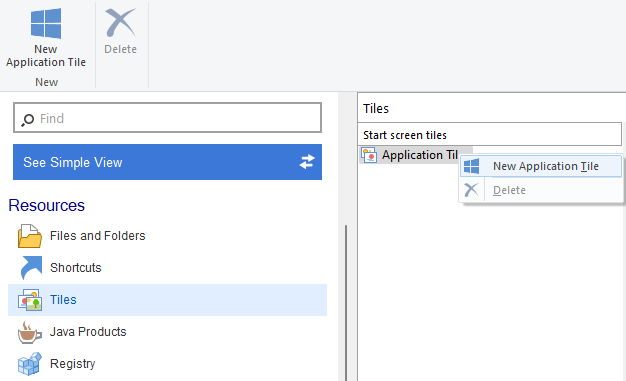
1. Go to the Tiles page.
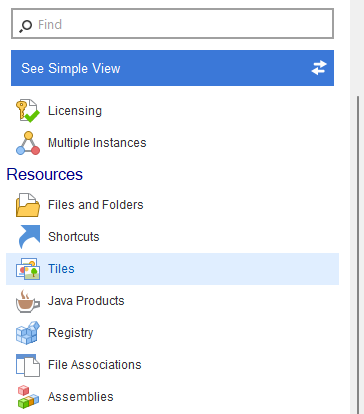
2. Right-click on Application Tiles and then select New Application Tile.
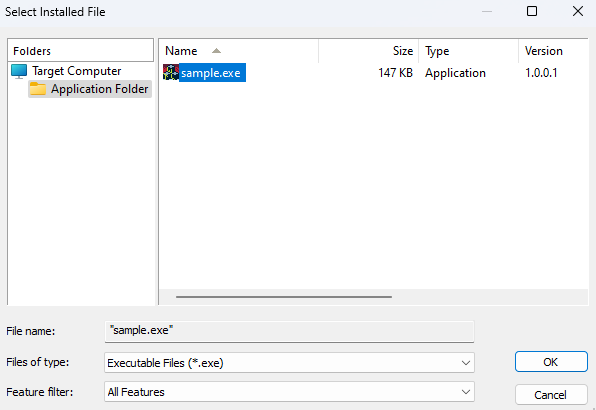
3. From the opened dialog, choose the executable file and press the OK button.
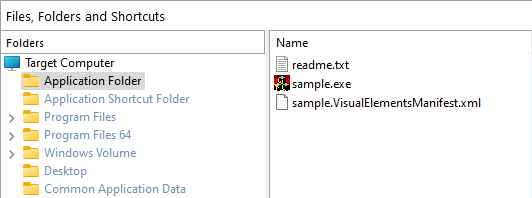
A specialized XML is added automatically in the Files and Folders Page and used by the MSI package during installation.
Customizing a Tile in Advanced Installer
Once the tile is created, let’s customize it. Creating tiles for your application does not make them automatically visible in the Start Menu from Windows. That’s because Microsoft recommends it should be the user’s choice.
Using the Advanced Installer, you can make the tiles visible immediately after installation if the installing user confirms it. To achieve this, follow the steps below:
1. In the Tiles Page, enable the Show in Start option.

2. Set the PINTOSTART property to IDYES as follows:
- From the Dialog Editor page - for Enterprise or Architect edition
- Or by using a Message Box custom action - for Professional edition
If the property is not set, the tiles will be visible after installation only if the user will manually pin the application or the shortcut to the Start Menu.
3. You can select one of the predefined standard colors or you can customize the tile using your own colors and images.
Please note that additional customizations are available only if you do not let the background color set to System default.

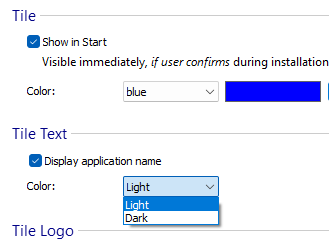
4. You have the option to show the application’s name on the medium tile or not. The name will be the name of the application’s shortcut file from the Start Menu if it exists. If not, it will be the executable file name. Additionally, you can choose the text color on the tile to be dark or light.
5. When it comes to the tile logo, you have two options:
- You can use the application’s icon - if the executable has one (the icon from the executable is extracted and is used for the app icon and for pinning to Taskbar).
- You can use a custom icon - if you choose to use a custom icon, please note that both small and medium logos should be present in order to be used as an application logo.
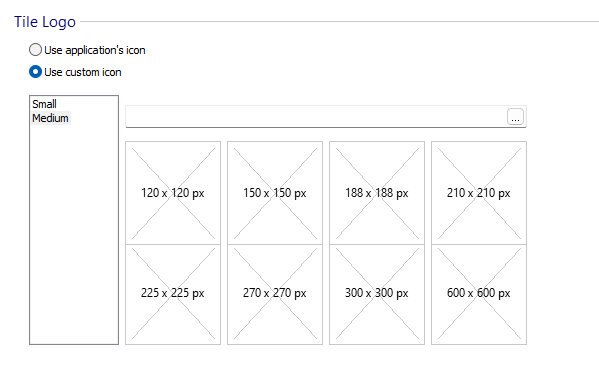
If you choose to use a custom icon, you can use a tool called the Asset Generator. This tool allows you to take an image file and create all the different versions needed for the Windows platform.
Asset Generator supports various image types, including:
- Raster images, like .png, .jpeg, .jpg, .tiff, .tif, .bmp, .gif, and .ico.
- Vector images, like .pdf, .ai, and .svg.
One special feature of the Asset Generator is its support for .svg files, or Scalable Vector Graphics. This type of image is perfect for logos because it can be resized to any dimension without losing quality.


How to Add a Logo for Shortcuts

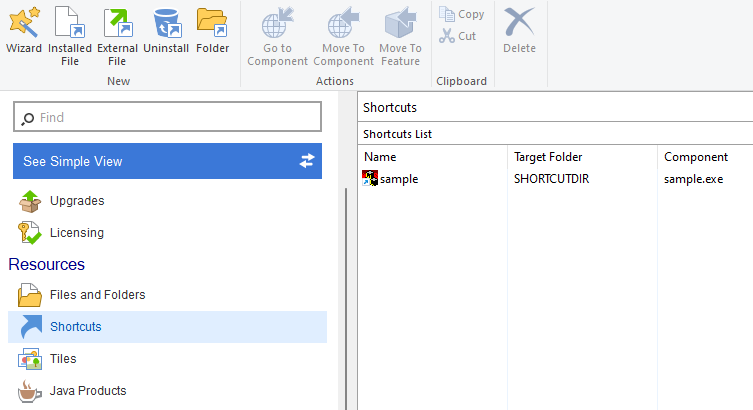
Desktop shortcuts are useful components designed to provide quick access to software, saving valuable time for the users. If you want to set the logo for your application shortcut, follow the next steps:
1. Go to the Shortcuts page and select the shortcut you’ve created.
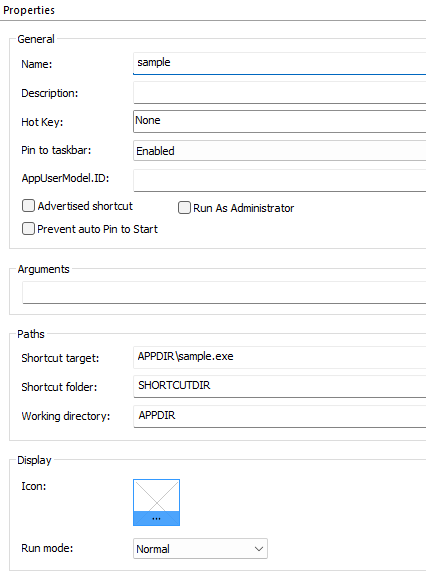
2. In the Properties panel, go to the Display section and choose an icon for the shortcut.
How to Add an Add/Remove Programs (ARP) Icon

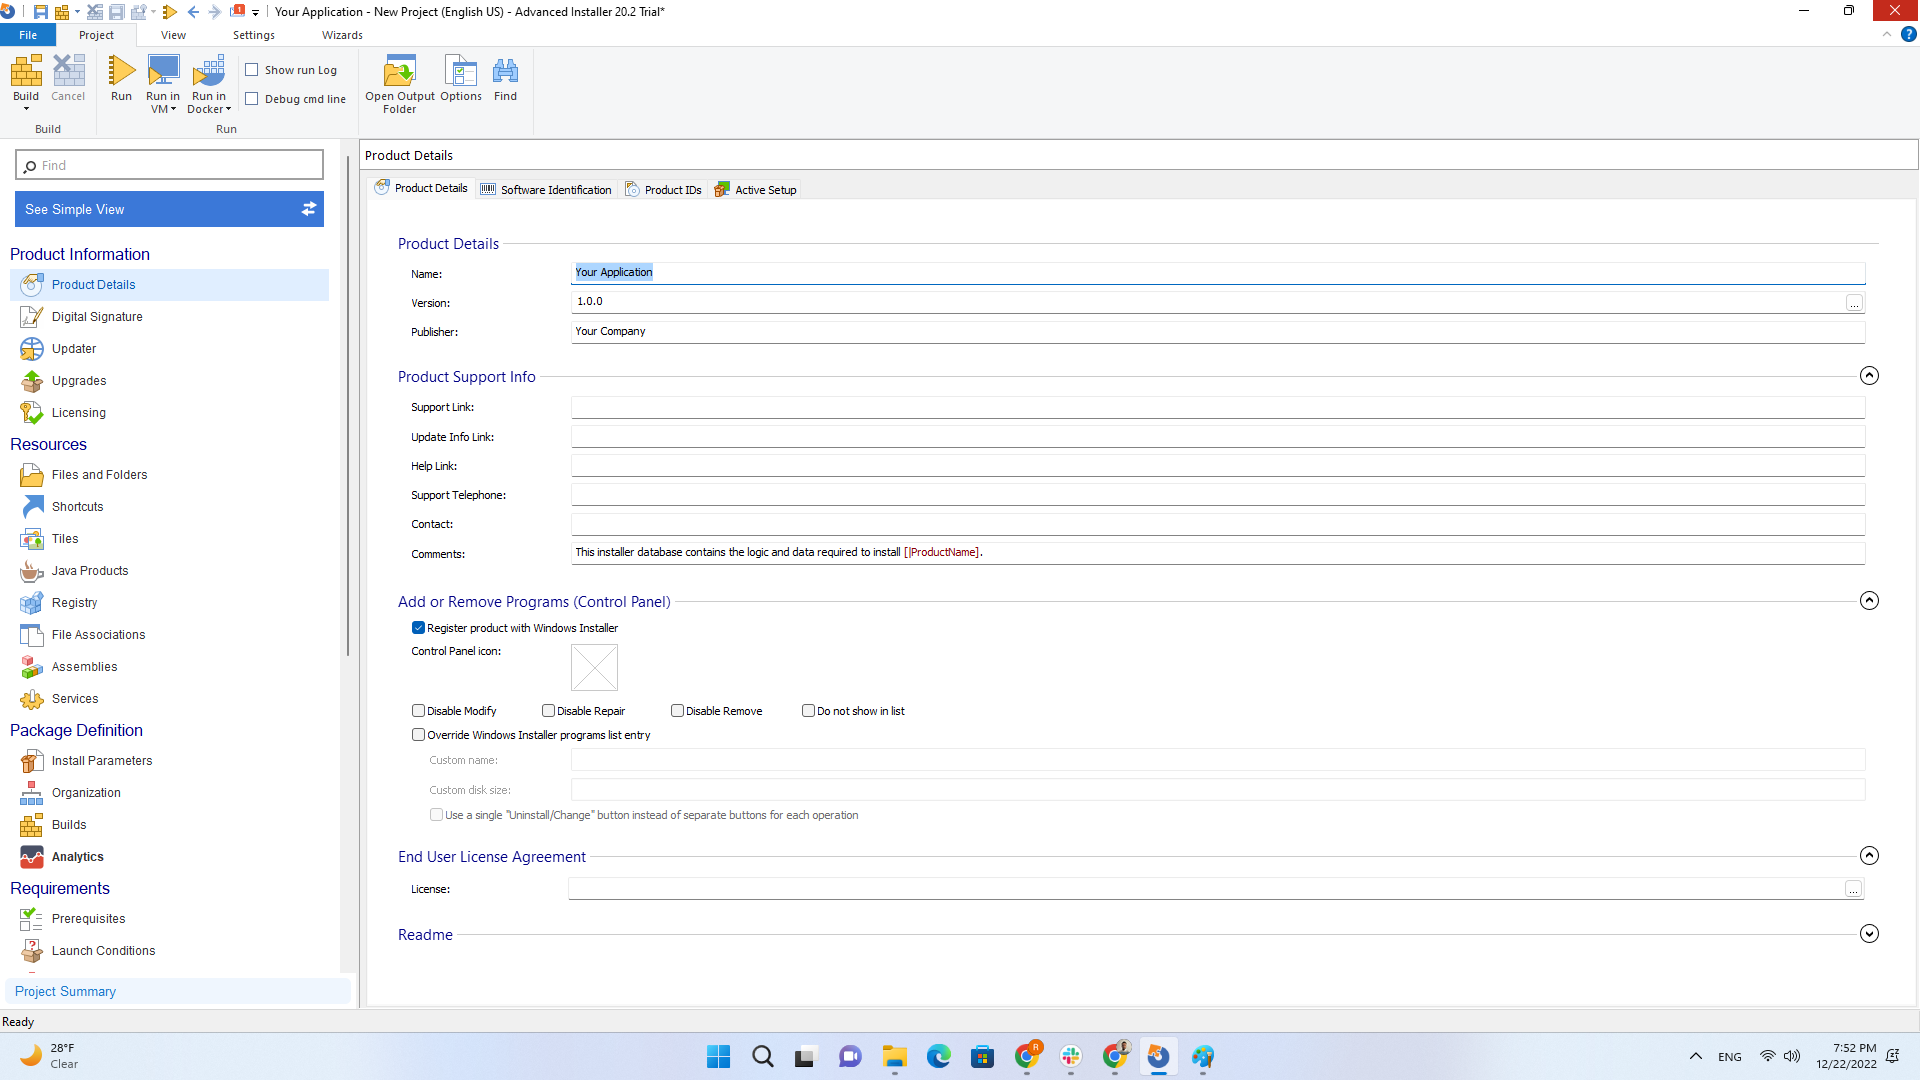
To add the icon displayed in the Add/Remove Programs for your application:
- Go to the Product Details page
- Under the Add or Remove Programs (Control Panel) section and select the icon from your disk.
When EUI is used, the ARP icon is used also for the Exe icon.
How to Add Logo for File Associations

File associations are a significant part of an application's user experience, as they enable your software to be the default program that opens certain file types. Having a recognizable icon associated with these files not only enhances brand awareness but also guides users more intuitively.
When using Advanced Installer, you can add an icon to file associations right after creating the extension. Simply go to the ProgId Properties and select an icon from the Display section.
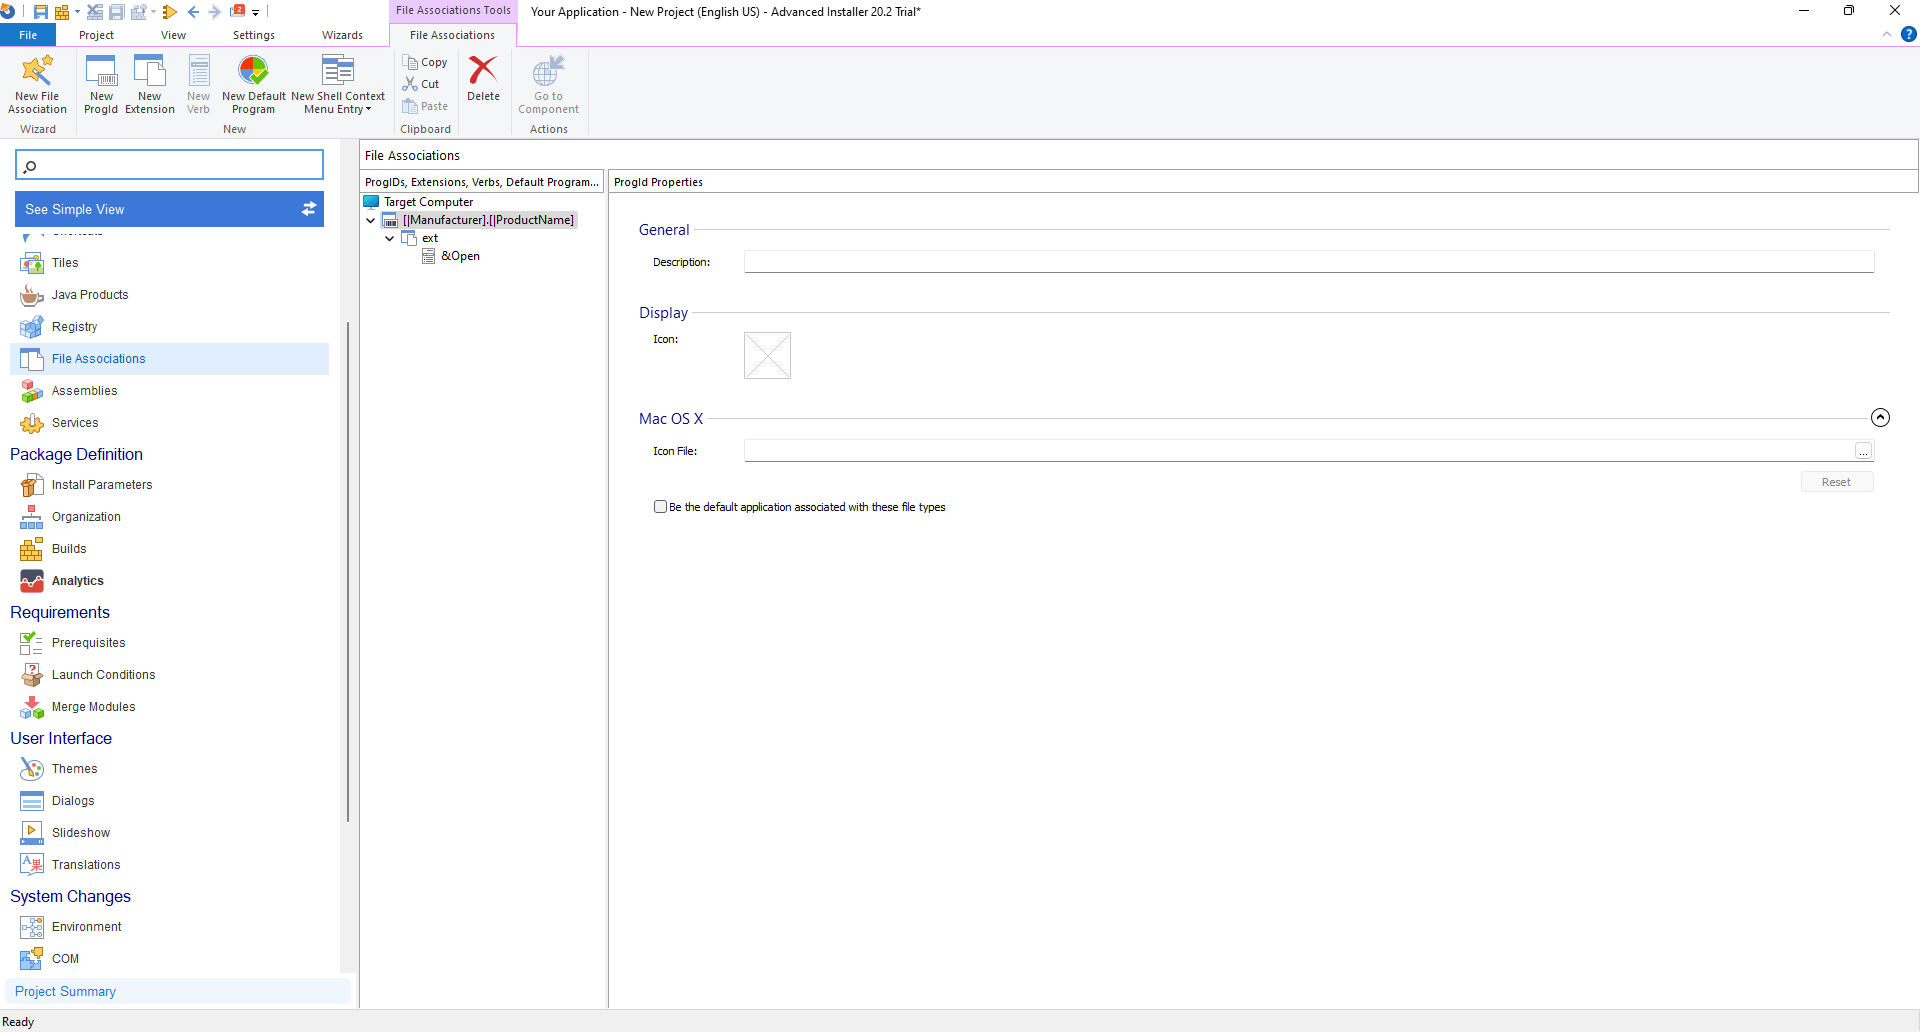
This seemingly small detail can add a touch of professionalism and cohesiveness to your product.
Video

Conclusion

Branding isn't just about what's inside the package; it's about the package itself. By using Advanced Installer, you can craft a visually appealing and professional installation experience. These steps aren't just technical details; they are a vital part of communicating your brand's quality to your users.
Dive into Advanced Installer, and take control of your application's first impression.
