How to Digitally Sign a PowerShell Script - A Step-by-Step Guide
PowerShell scripts are an effective tool for automating tasks, but with great power comes a need for security.
Signing your PowerShell scripts with a digital certificate is essential for ensuring they have not been tampered with and establishing trust with those who use them.
This guide will walk you through the steps of signing a PowerShell script, whether you use a self-signed certificate for internal use or a publicly trusted certificate for wider distribution.
Obtaining Your Certificate

To sign a PowerShell script, you'll need a code signing certificate.
You have two options:
- Purchase a Certificate from a Trusted Certificate Authority (CA)
- Create a Self-Signed Certificate with PowerShell.
While purchasing a certificate from a CA is the preferred method for public-facing scripts, self-signed certificates can be used internally.
The main difference is that self-signed certificates are not trusted by default in most environments, which can result in security warnings.
If you prefer a self-signed certificate, you can create one with the following PowerShell command:
New-SelfSignedCertificate -DnsName "YourDomain" -CertStoreLocation "Cert:\LocalMachine\My"
This command generates a self-signed certificate for signing your scripts.
If you intend to distribute your scripts outside of your organization, it's best to invest in a CA certificate to avoid trust issues.
For internal use, you can generate a PFX certificate, and distribute it across your infrastructure, ensuring all scripts are signed with the same certificate.
Preparing PowerShell and Selecting Your Certificate

Once you have your certificate, the next step is to set up PowerShell.
1. Open PowerShell as an Administrator
Search for "PowerShell" in the Start menu, then right-click the Windows PowerShell app and select "Run as Administrator."
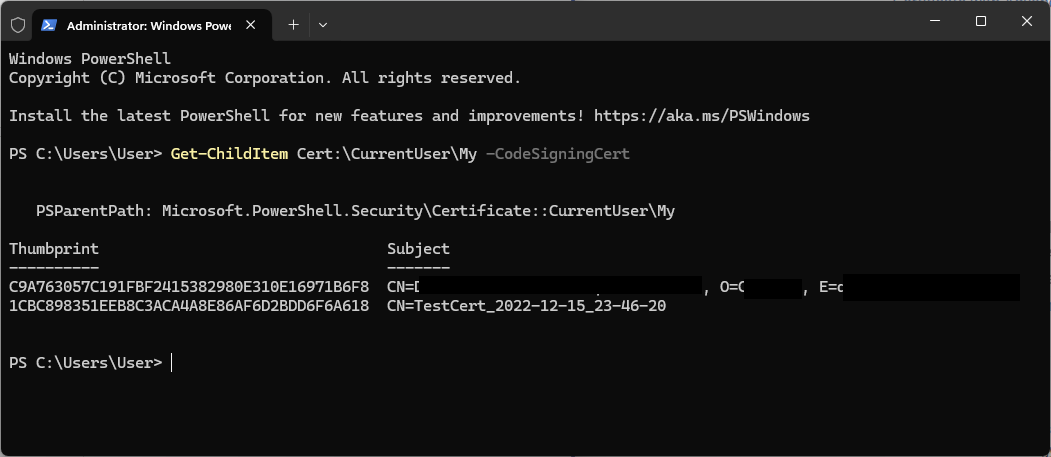
2. List Available Code Signing Certificates
You’ll need to select the correct one for signing if you have multiple certificates. You can list all available code signing certificates with this command:
Get-ChildItem Cert:\CurrentUser\My -CodeSigningCert

3. Select the Desired Certificate
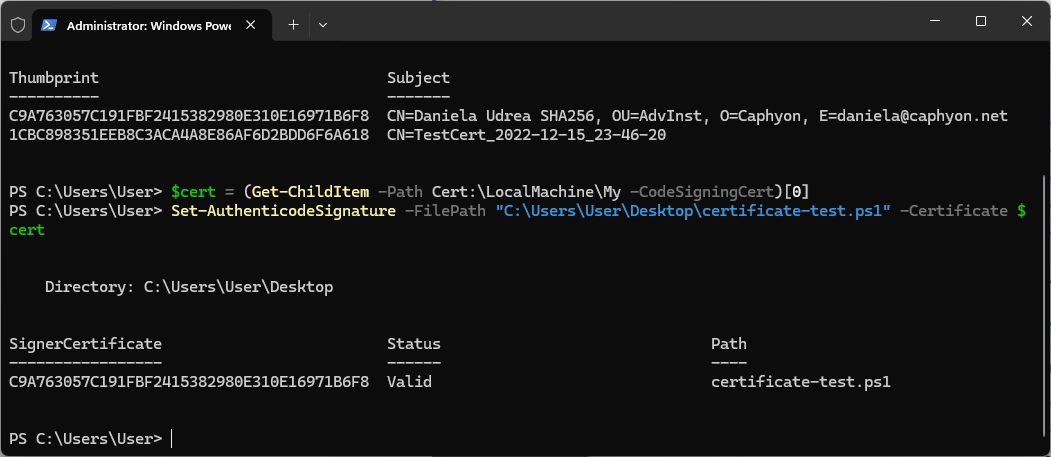
After determining the correct certificate, you can assign it to a variable. For example:
$cert = (Get-ChildItem -Path Cert:\LocalMachine\My -CodeSigningCert)[0]
The [0] in the brackets selects the first certificate in the list. If you want to use the second certificate, you can modify the code to point to [1]. Remember, the first item starts with [0] and not with [1].
Signing the PowerShell Script

With your certificate selected, you can now sign your script. To apply the signature, run the 'Set-AuthenticodeSignature' cmdlet.
Set-AuthenticodeSignature -FilePath "C:\path\to\your\script.ps1" -Certificate $cert

This command signs the script using the certificate you've chosen. To increase security, particularly if your certificate is about to expire, you can include a timestamp in the signature using:
Set-AuthenticodeSignature -FilePath "C:\path\to\your\script.ps1" -Certificate $cert -TimeStampServer "https://timestamp.digicert.com"
The timestamp ensures that the script’s signature remains valid even after the certificate expires.
Verifying the Script Signature

After signing the script, verify that the signature was applied correctly.
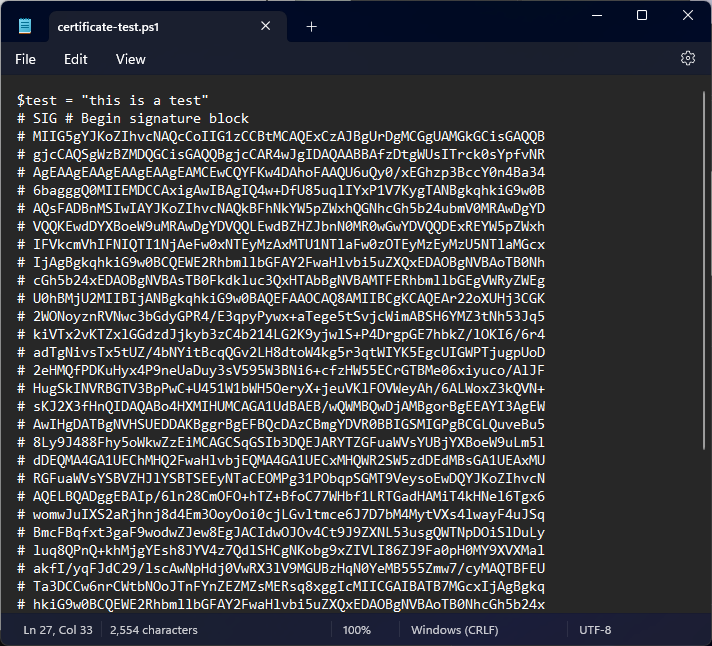
1. Check in a Text Editor
Open the script in a text editor and look for a signature block at the bottom, enclosed by '# SIG #'.

2. Check in File Properties
To view the signature details, right-click the script file in Windows Explorer, select "Properties," and then navigate to the "Digital Signatures" tab.
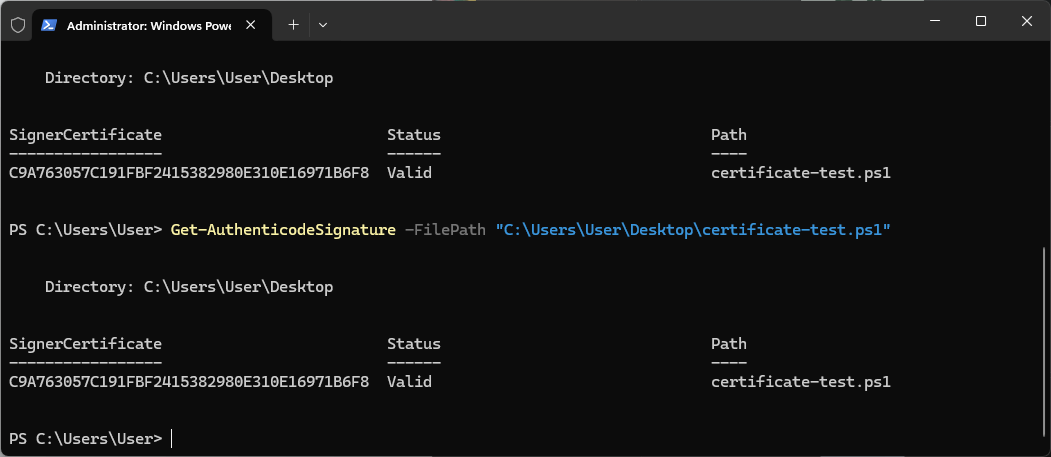
For those who prefer working within PowerShell, use the following command to verify the signature:
Get-AuthenticodeSignature -FilePath "C:\path\to\your\script.ps1"
This command will display the details of the script’s digital signature, confirming that it was signed correctly.

Conclusion

Signing your PowerShell scripts is a crucial step in ensuring their integrity and security.
Whether using a self-signed certificate for internal automation or a publicly trusted certificate for wider distribution, following these steps will help you protect your scripts from tampering and instill trust in your users.
