Do not delete your Windows Installer folder
Lessons I have learned from making many mistakes in my enterprise software packaging newbie (and not only) years.
I have, as you all may, my share of packaging mistakes. And that made me start a series of "Don’t DO IT!" articles based on my extensive experience in the enterprise software packaging world.
Objective: Keeping your machines as clean as possible and deleting unnecessary files from the system. We perform it either by manual cleanup, third-party tools, or custom-designed scripts/apps.
Mistake: Deleting the installer folder, better said C:\Windows\Installer.
Repercussion: C:\Windows\Installer location must not be touched in the cleanup process, otherwise, great consequences will occur.
Let’s see a little more in detail what is actually happening in.
About the installer folder

This is the folder Windows Installer is using to do all the caching for the applications - MSI, MST or MSP.
The installer folder is, by default, hidden by the OS. It’s not so hard to reach it, though, and it is not protected by any extra security measures, for example, taking ownership of the folder.
It means that every time you install an app or a patch in the system, Windows Installer starts automatically a caching process in the C:\Windows\Installer folder of the specific app/patch.
If you ever delete the whole content of the installer folder, every application that was installed via Windows Installer fails to remove itself.
For an application to be removed, the application must know exactly what to remove from the system (files,registry) or what additional Custom Actions must be triggered during uninstall.
Although an application is published on the machine and specific information can be found in the registry, the above-required information can only be obtained from the cached MSI.
OK, you've done it. Now what?

To repair, patch or remove an application that is no longer cached in the installer folder you can try to recache the MSI/MSP or recache the MSI and MST (if the installer contained a transform file). It fails in every case because the application is seen as already present on the machine.
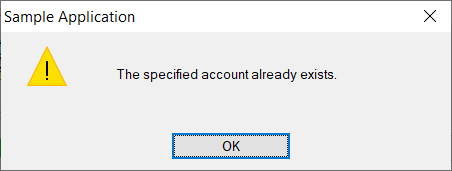
When you use an administration tool like SCCM or Intunes things tend to get a little more complex.
Usually, when an application is created and deployed via SCCM, the detection method is placed on the Product Code of the MSI. The tricky part is that, when you empty your installer folder, the app still appears as installed in SCCM.
The only option made available in the Software Center is for
the user to uninstall the app (only if you did not add a repair command
on your application before you deployed it).
This fails every
time the user attempts it.
THE FIX: In this scenario, the easiest way to fix the problem is to do a full Windows reinstallation.
Allow me to demonstrate

1. Let’s create a simple MSI containing an exe file, a registry, and a simple custom action that, upon install completion, opens up the exe file. After the installation, a cached MSI appears in the installer folder.
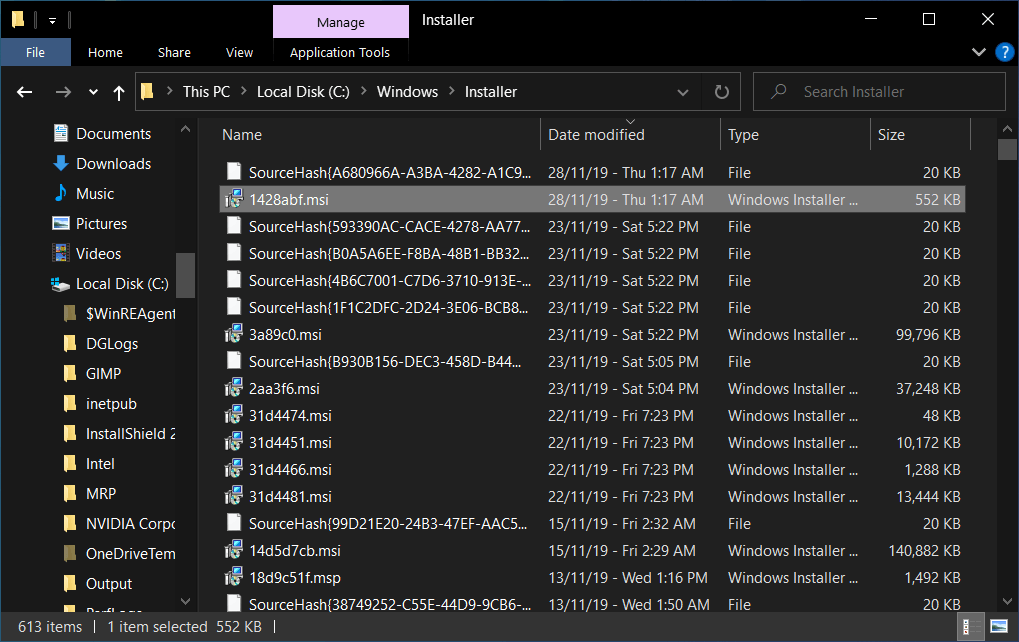
2. With the deletion of the cached MSI from the installer folder and the source MSI removed, when we try to repair the application with msiexec /fus {ProductCode}, this fails.
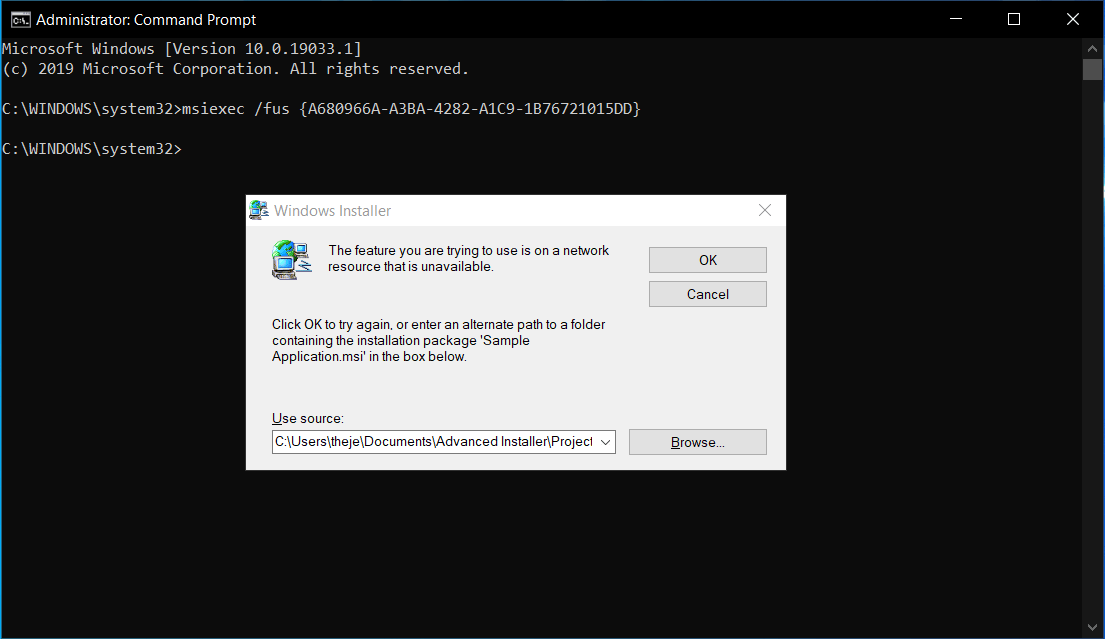
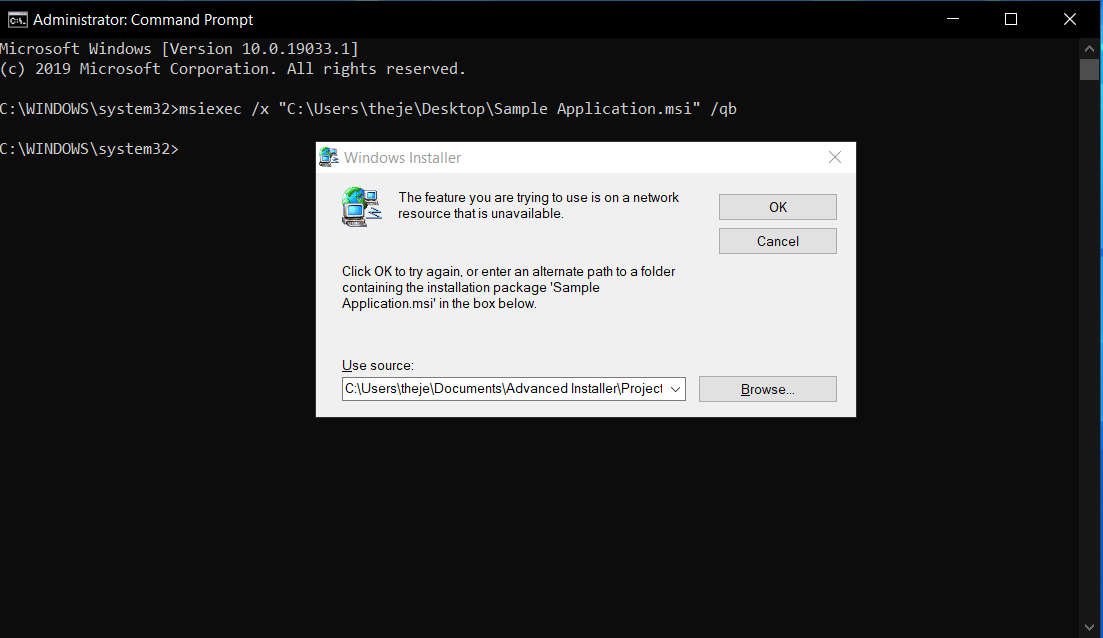
3. Of course, we presume that we don’t have access to the source MSI, so we click "Cancel". We are then presented with:
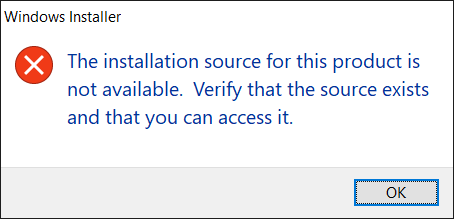
The same thing applies to the uninstall command.
4. A recaching of the application also fails, as stated above. So what is the next solution?
5. Let’s say we find the old media for the MSI and place it in another location and try to uninstall it from there.Unfortunately, this won’t work either.
6. The only way to remove the application at this point is to implement the workaround that we did for Recache MST recaching MST. For this, the steps are:
- Open regedit.exe
- Navigate to HKEY_LOCAL_MACHINE\SOFTWARE\Classes\Installer\Products\
- Search for the product, in our case Sample Application
- Open up the Net key, in our case HKEY_LOCAL_MACHINE\SOFTWARE\Classes\Installer\Products\A669086AAB3A28241A9CB167270151DD\SourceList\Net
- Modify the value from 1 key with the new location where you store
your MSI
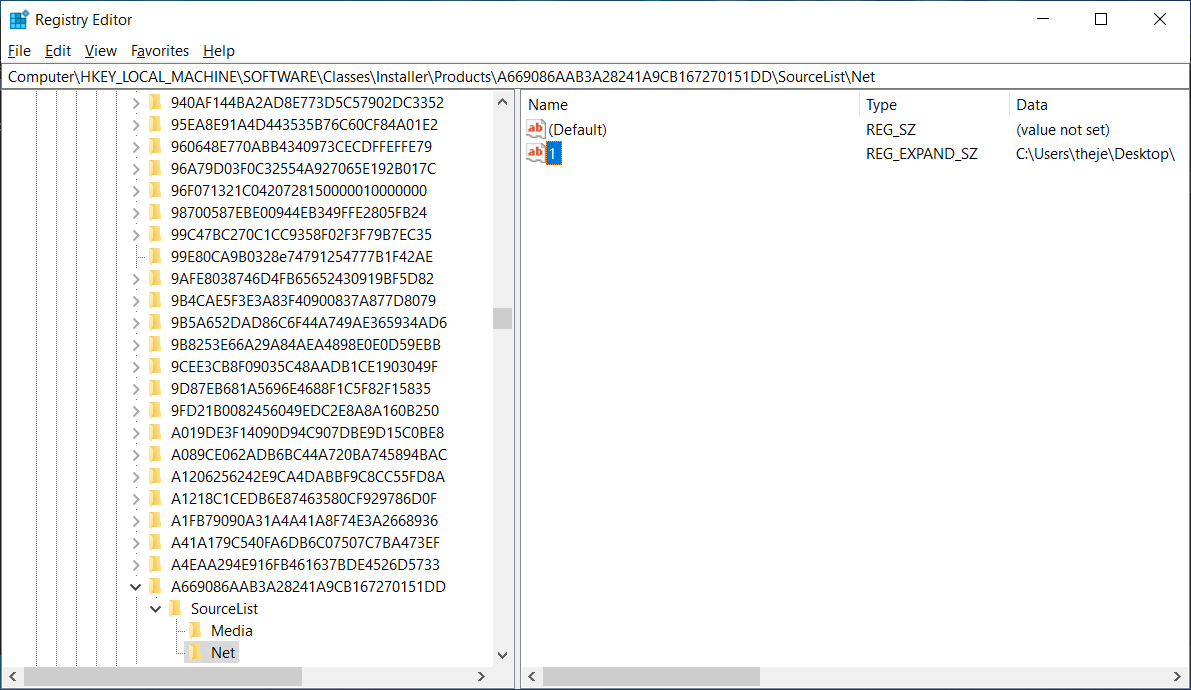
- Perform an uninstall using msiexec /x {ProductCode} .
Don’t delete the installer folder!

I cannot stress enough how important it is not to delete or empty the installer folder. With the above steps we managed to remove the MSI, but you can have so many different scenarios on your machine, either MSI with MST or patches.
Repairing such a mistake involves a lot of time, and it’s almost impossible to have a 100% success rate.
So I am telling you again, this time in caps, DON’T DELETE YOUR INSTALLER FOLDER!
Subscribe to Our Newsletter
Sign up for free and be the first to receive the latest news, videos, exclusive How-Tos, and guides from Advanced Installer.