How to automatically update a Windows Forms Application?
Windows Forms is a UI framework used to create Windows desktop applications. This development platform provides a broad set of features to develop graphically rich and interactive applications, including a visual designer in Visual Studio.
You can easily install Windows Forms applications through setup packages. The challenging part is setting the application to automatically update when new features are available.
In this tutorial, we’ll touch on how to configure automatic updates of a Windows Forms application using Visual Studio.
To get started, you will need the Microsoft Visual Studio Installer Project extension. Check this tutorial if you want to see how to add the extension.
How to Create the Windows Forms Application?

Before we dive deeper into automatic updates, let’s create a Windows Forms application in Visual Studio:
- Go to Files → New Project.
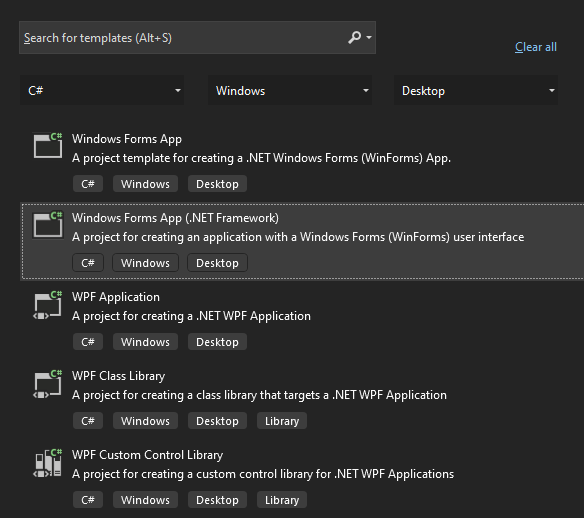
- Set language to C#, platform to Windows and project type to Desktop.
- From the templates list, choose Windows Forms App (.NET Framework) and give it a name. We named it MyApplication.
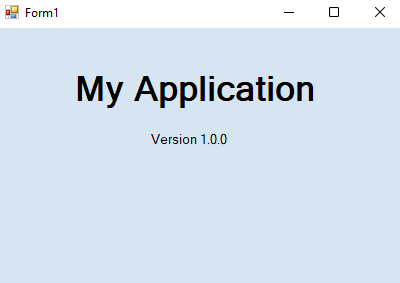
Now, it's time to customize your application. We will consider the version below as being version 1.0.0.
How to Configure Automatic Updates for Your Application?

Once the application is ready, we need to configure the auto-update process. But first, let me go into how this process works before moving to the code section.
The auto-update process requires two files in this example:
1. The MSI file of the updated version of the application.
2. A .txt file that will specify its version number.
Both of them need to be uploaded on a web host for every update.
Every time a user opens the application, it will check for updates. Basically, it checks if the version specified in the .txt file from the web host is different from the current version of the application. If it is, then the MSI is downloaded and the new version is installed.
Now that you know how the auto-update process works, let's get to it.
Right-click on Form → View code and then add the code below.
InitializeComponent();
            WebClient webClient = new WebClient();
            var client = new WebClient();
            if (!webClient.DownloadString("link to web host/Version.txt").Contains("1.0.0"))
            {
                if (MessageBox.Show("A new update is available! Do you want to download it?", "Demo", MessageBoxButtons.YesNo, MessageBoxIcon.Question) == DialogResult.Yes)
                {
                    try
                    {
	     if (File.Exists(@".\MyAppSetup.msi")) { File.Delete(@".\MyAppSetup.msi"); }
                        client.DownloadFile("link to web host/MyAppSetup.zip", @"MyAppSetup.zip");
                        string zipPath = @".\MyAppSetup.zip";
                        string extractPath = @".\";
                        ZipFile.ExtractToDirectory(zipPath, extractPath);
                        Process process = new Process();
                        process.StartInfo.FileName = "msiexec.exe";
                        process.StartInfo.Arguments = string.Format("/i MyAppSetup.msi");
                        this.Close();
                        process.Start();
                    }
                    catch
                    {
                    }
                }
}In this example, we demonstrate the process of updating an application. We start by uploading an archive file (MSI) to a web host for each update. When an update is available, the application will download the archive, extract the MSI file, and proceed to install the update.
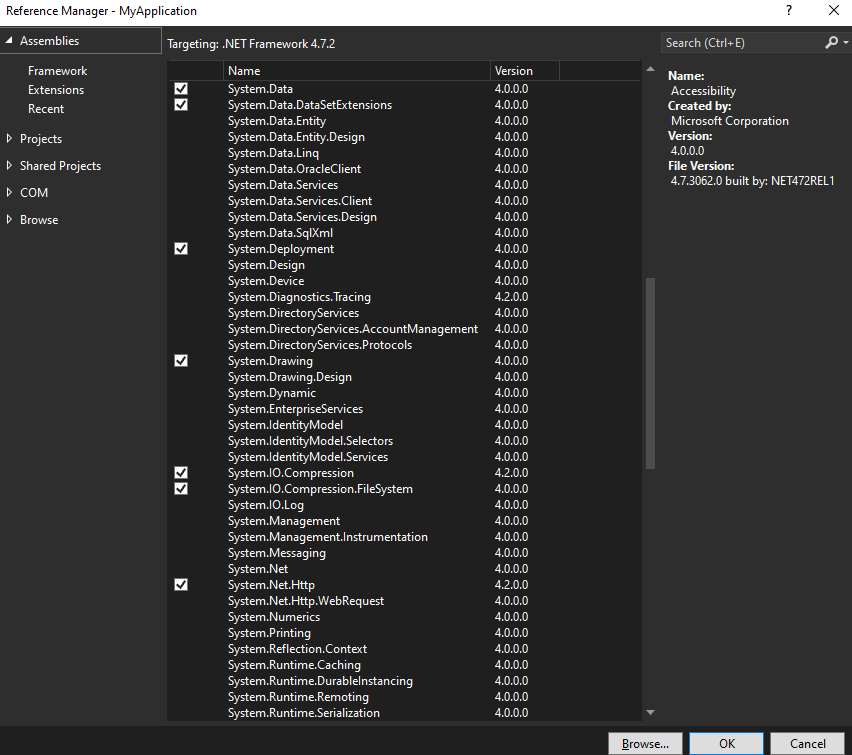
To implement the same approach, it's important to note that you need to include references to both System.IO.Compression.FileSystem and System.IO.Compression.
Here's how you can add these references:
- Right-click on MyApplication, navigate to Add, and select Reference.
- In the Reference Manager, locate and select both System.IO.Compression.FileSystem and System.IO.Compression from the available options.
How to Create the Installer for the Application?

Once you added the code for automatic updates, we need to create an installer package for version 1.0.0 of the application. To achieve this, follow these steps:
1. Right-click on the solution → Add → New Project.
2. Choose Setup Project from the template list.
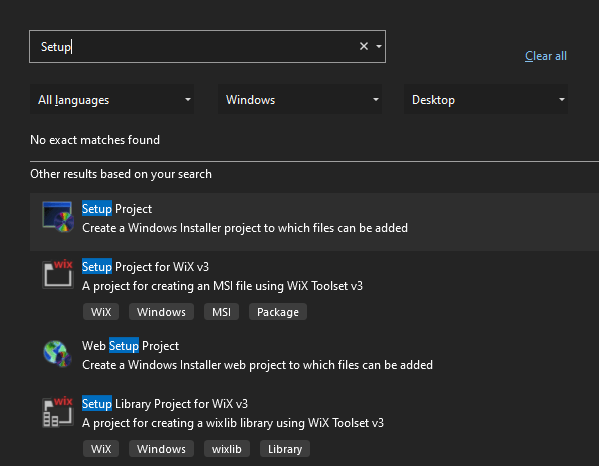
3. Set a name for it and then press the Create button. We named it MyAppSetup.
4. To add the Project output, right-click on the setup project → Add→ Project output.
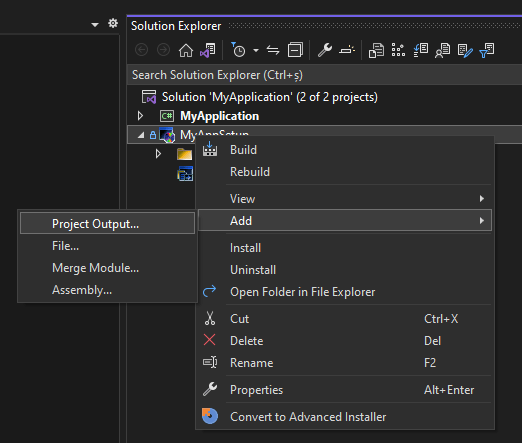
5. In the Add Project Output Dialog, choose MyApplication, select Primary Output and press the OK button.

6. To add a Desktop shortcut, right-click on the Setup Project → View → File System.
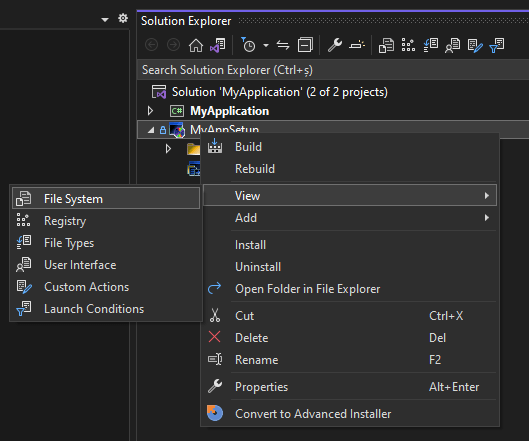
7. Go to the Application Folder and then right-click on Primary output from MyApp → Create Shortcut for Primary output from MyApp.

8. Rename the shortcut and move it to the User’s Desktop folder.
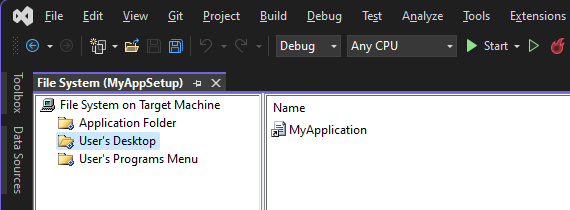
9. Now, build the setup project to create the installer package for version 1.0.0 of our application.
10. Run the MSI and install the application.
How to Provide the Updates for the Application

We have made some improvements to the app, and as a result, we are labeling this as version 2.0.0. This update introduces two additional buttons that were not present in the previous version, expanding the functionality of the application.

To provide the update, follow these steps:
1. Change the assembly version and then rebuild the project. To do this, right-click on MyApplication → Properties and select Assembly Information.
2. A new dialog will open where you can change the version.
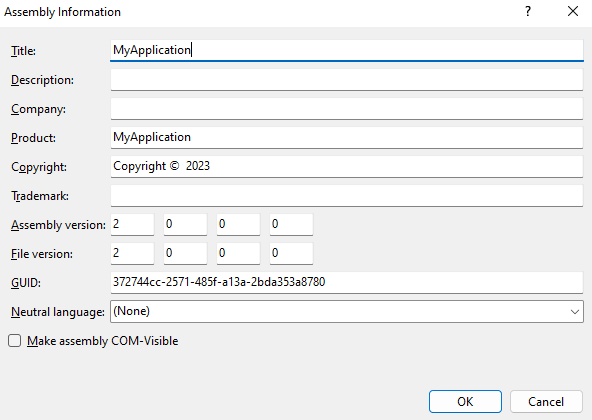
3. Change the Version of the setup project from 1.0.0 to 2.0.0 and set RemovePreviousVersions to True.
4. Then, rebuild the setup project.
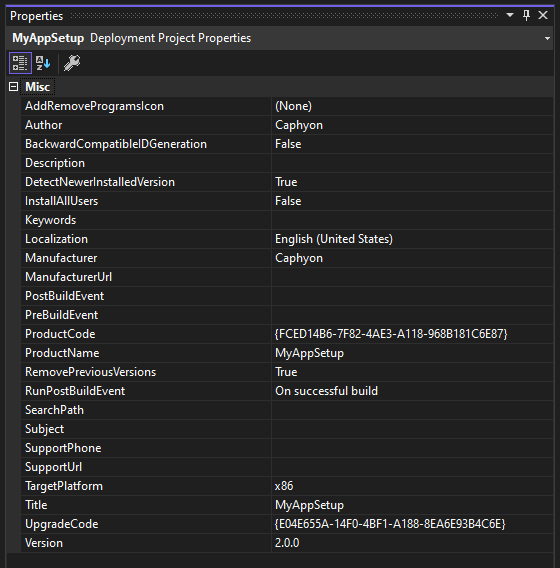
5. Add the MSI file to a zip archive and name it "MyAppSetup".
6. Create a .txt file named "Version" and write "2.0.0" (the update version) in it.
7. Upload both the "MyAppSetup.zip" and "Version.txt" files to the web host.
When a user launches the application, it will automatically check for the latest version available on the web host.
As version 2.0.0 has been uploaded, the application will prompt the user to install the update. If the user agrees, the zip file containing the update will be downloaded. The application will then extract the MSI file from the zip archive and execute it, resulting in the successful installation of version 2.0.0. So, the user will have the updated version of the application, ready to use.
Conclusion


Updating Windows Forms applications automatically can be challenging, particularly when dealing with multiple updates and users using different versions of the application. To simplify the update management process, we recommend utilizing a packaging tool like Advanced Installer. It offers an auto-updater feature that streamlines the update process.
To learn how to configure auto-updates for your application, you can refer to this tutorial video. Additionally, you may find this article helpful for more in-depth information on the topic. By leveraging these resources and tools, you can efficiently manage updates for your Windows Forms application.
