Branding the Suite Installer UI – A Cause-and-Effect Visual Guide
In a previous blog article, we explored Suite Installer, a new feature in Advanced Installer available starting with version 23.0. We discussed how to create Suite Installer applications, discovered the wide range of visual customization options for each bundled application, and presented some practical use cases.
In this article, we’ll provide a side-by-side visual guide to show how each configuration setting is reflected in the Suite Installer UI. We’ll configure settings such as app names, icons, EULA, and images.
By the end of this article, you’ll know how to use these customization settings to design a polished and professional installation experience.
Prerequisite – Setting Up the Suite Installer Application Project

Before customizing the bundle UI, make sure you have a Suite Installer project in Advanced Installer.
If you already have one up and running, feel free to skip to the next section. Otherwise, follow these steps:
1. Launch Advanced Installer.
2. On the Start Page, select the Suite Installer template.

3. Click the [Create New Project] button.
4. Configure the product details on the Product Details page.
This article focuses on branding the Suite Installer UI, not its functionality. To learn how to set properties or conditions for each package, check out our documentation article.
Customizing the UI of Each Bundled Application 

Once you create the Suite Installer project, it’s time to customize how each bundled application appears in the Suite Installer UI.
Let’s see how.
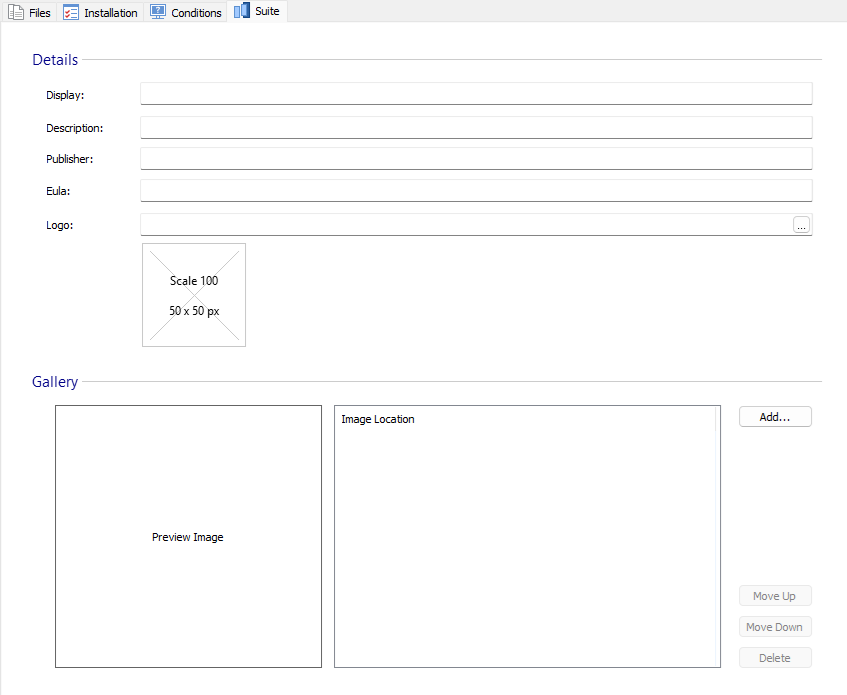
First, go to the Suite Installer tab under the Prerequisites page.

Here you can define the following details for each app:
- The app name that will be displayed in the Suite Installer app.
- A brief description of the app.
- The vendor name.
- The End-User License Agreement (EULA).
- The app logo.
- Gallery images. The first image is displayed within the carousel on the Home tab of the Suite Installer app. Additional images appear in the Screenshoot carousel within the app’s properties.
UI Customization Settings vs Visual Effect

Now, let’s see how each customization appears to the end user.
Main Page

When your users install the Suite Installer app and launch it, they are greeted with the main page, which includes:
- A title bar featuring an icon and a search bar to find a specific app quickly. You can customize this icon via the Product Details page, under the Add or Remove Programs section, by setting the Control Panel icon. It’s recommended to use the same icon for the Suite Installer app shortcut.
- A carousel at the top, showcasing the first image from each app’s gallery.
- A list of bundled apps at the bottom, each with its logo, name, and description.

App Detail View

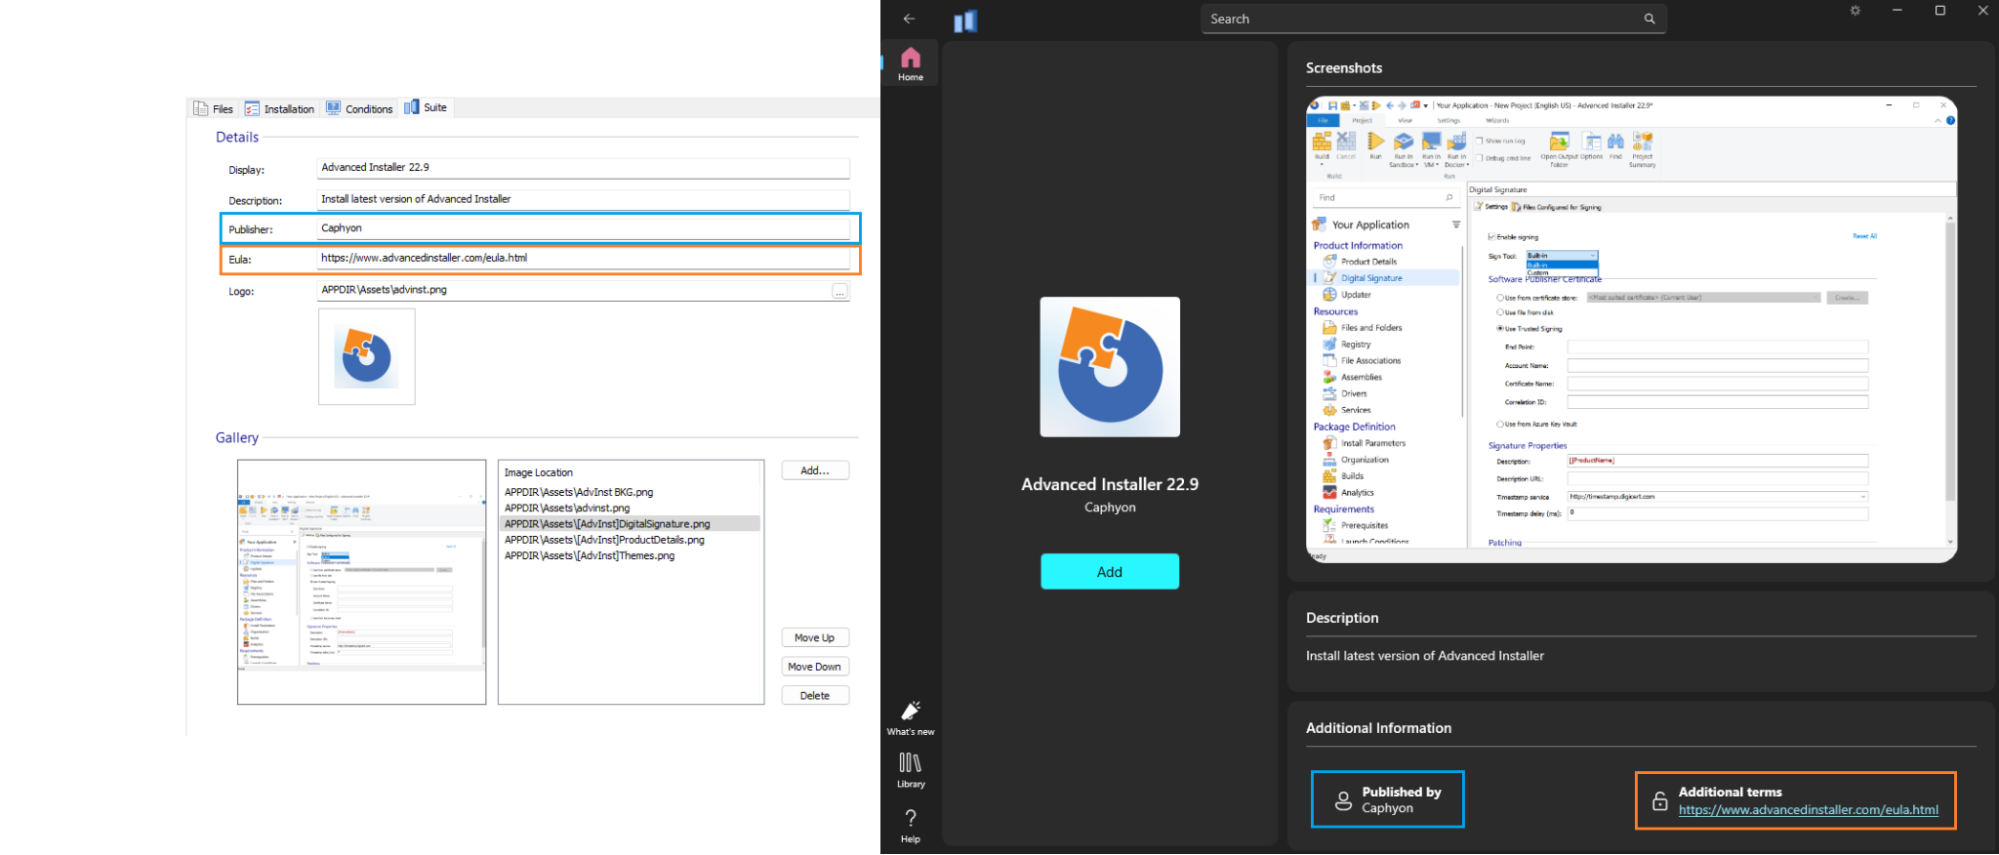
Clicking an app from the list opens its detail view.
This view displays all the information about the app. Unlike the main page, this view includes additional information, such as the publisher name, EULA, and the Add button to install the app.

Library

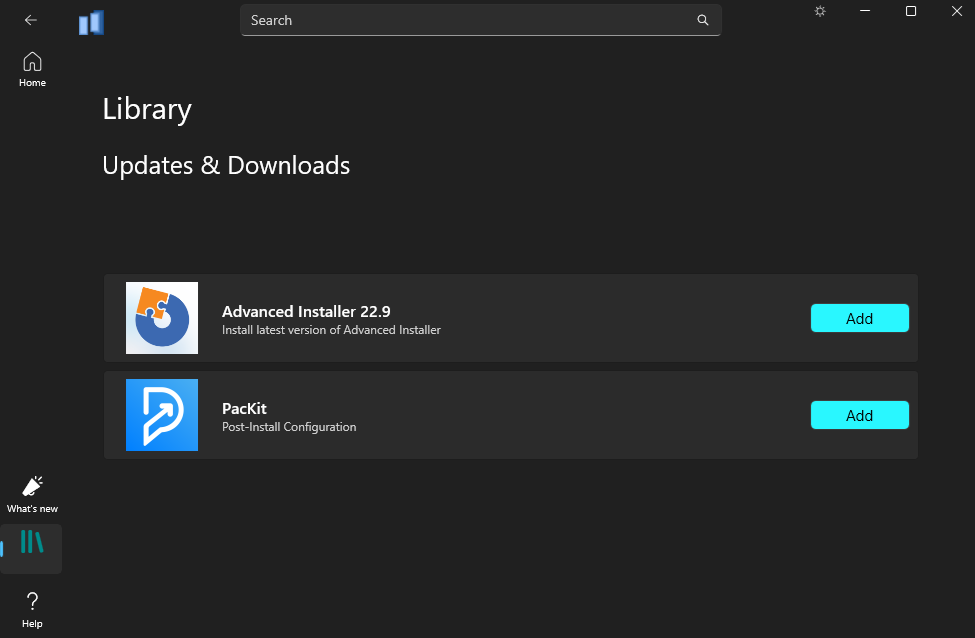
You can navigate to the Library section using the bottom-left corner.
This view presents a compact overview of the applications, to quickly select which one to install. Each app is displayed with its name, description, and an Add button for installation.

Help

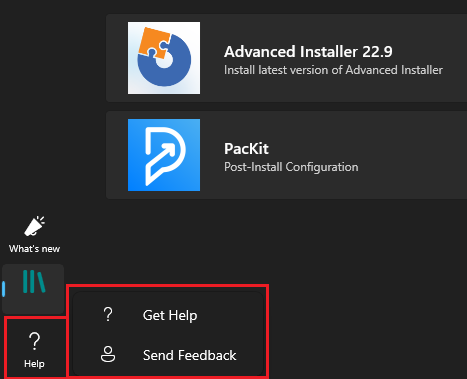
The Help section includes two buttons:
- “Get Help”
- “Send Feedback”

These buttons launch the URLs specified in ARPHELPLINK and ARPURLINFOABOUT properties, which you can edit in the “Product Details” page.

Conclusion

With Advanced Installer, customizing the Suite Installer is both powerful and intuitive. By simply filling a few fields and uploading relevant visuals, you can deliver a clean, branded, and professional installation experience. Advanced Installer will take care of the rest, enabling you to focus on packaging and deploying your apps.
You can explore the Suite Installer’s branding capabilities using the 30-day full-feature trial of Advanced Installer.
Download Advanced Installer Trial for free.
FAQs
Can I visually customize how each app appears in a Suite Installer app created with Advanced Installer?

Yes. Advanced Installer allows you to customize how each bundled app is displayed in the Suite Installer UI, through its dedicated Suite tab, under the Prerequisites page. You can set the app’s name, description, vendor, EULA, logo, and a gallery of images that appear throughout the interface.
Can I add a logo and representative images for each app in the Suite Installer?

Yes. In the Suite tab, you can upload a logo for each app, which will appear next to the app name in the Suite Installer UI. You can also add multiple images to the Gallery, which appear in the carousel on the main page of the Suite Installer and also in the Screenshots carousel inside the app’s detail view.
