How to automatically code sign the MSI with GitHub Actions
In our previous article titled "How to automate the MSI building using GitHub Actions", we saw how you can use Advanced Installer's own GitHub Action to automate the build of your MSI packages.
Advanced Installer supports multiple types of actions that you can use to apply automations with PowerShell or building a Visual Studio Project (aiproj).
If you're curious about how you can take advantage of Advanced Installer's GitHub actions, you can review more scenarios in our Github repository.
The option to digitally sign your package is a key component when working with GitHub Actions.
And that's what we will go through in this article:
- How to Store the Certificate with GitHub Actions?
- How to use the certificate?
- Run the GitHub Action and Achieve Digital Signing
Let's begin with storing the certificate.
How to Store the Certificate with GitHub Actions? 

Unlike Azure Key Vault, Device Guard or local signing on your device, GitHub does not offer the possibility to store your certificates in a secure location. Probably your first thought is "I'll just place them directly on the repository" – but unfortunately, that would be too much of a security risk.
Using GitHub secrets support is a more secure way to store your certificate. Although this support doesn’t allow you to just simply upload your certificate, it does let you keep strings of information hidden within your organization or from the general public – if your repository is public.
To achieve this, we must:
- Encode the certificate into BASE64
- Save the resulted string into the GitHub secret
- Add a new job in the YML file that will rebuild the certificate before the build starts
Encode the certificate into BASE64
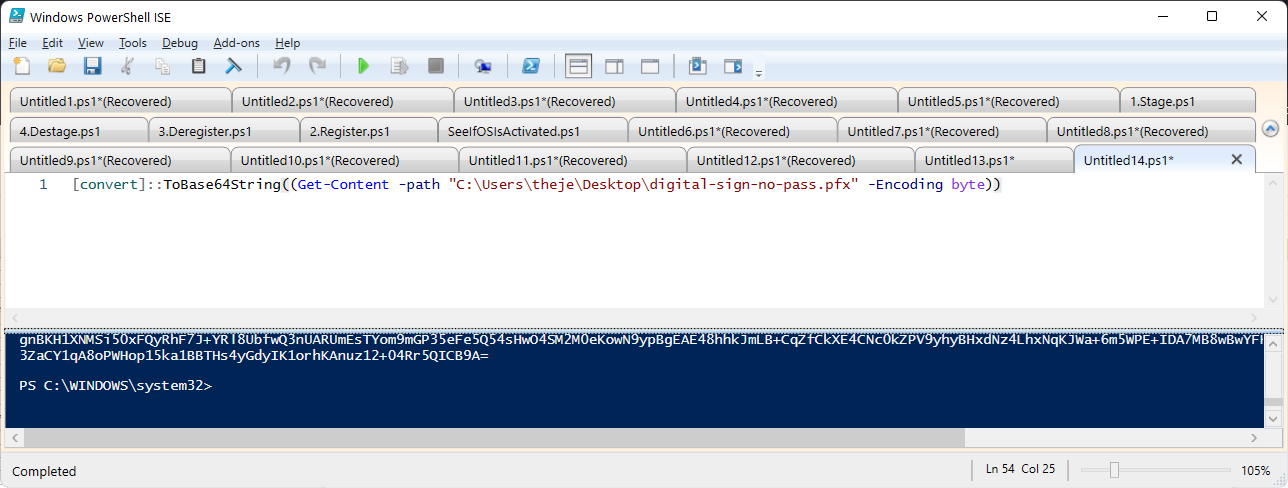
Encoding a certificate into BASE64 is quite simple and Microsoft already offers an answer on how to convert any file in Base64 string format. All you have to do is run the following command-line inside a PowerShell window:
[convert]::ToBase64String((Get-Content -path "your_file_path" -Encoding byte))

Saving the resulted string into the GitHub secret
To do so, open your Github repository, and navigate to Settings>Secrets>Actions.

Now, click on New Repository Secret, give it a name and paste your Base64 string - the one previously created with PowerShell.
Keep in mind that this is the certificate we are going to use to digitally sign the packages that we create with Advanced Installer. This Github secret cannot be seen in any circumstance. The only available option is to update it, but even then, the string will not be shown.
After following the instructions above, your digital certificate should be successfully stored in GitHub.
Now, how do we use it? Let's have a look.
How to use the PFX certificate?

Now that the certificate is securely stored in GitHub, we need to adjust the YML file and add a new job to rebuild the certificate from its Base64 form to the previous PFX form.
You can find an example of an YML file on our GitHub repository.
In addition to the previous piece of code we have to add the following code that will help us with storing and building the PFX certificate:
name: Create PFX certificate
    	id: create-pfx
    	shell: pwsh
    	env:
      	PFX_CONTENT: ${{ secrets.BASE64_PFX_CONTENT }}
    	run: |
      	$pfxPath = Join-Path -Path $env:RUNNER_TEMP -ChildPath "cert.pfx";
      	$encodedBytes = [System.Convert]::FromBase64String($env:PFX_CONTENT);
      	Set-Content $pfxPath -Value $encodedBytes -AsByteStream;
Write-Output "::set-output name=PFX_PATH::$pfxPath";This is a job that runs prior to the actual MSI build. The job runs inside a powershell (pwsh) instance and does the following:
- Creates a variable that stores our Base64 certificate from the GitHub secrets (PFX_CONTENT: ${{ secrets.BASE64_PFX_CONTENT }})
- Encodes the bytes from the Base64 string ([System.Convert]::FromBase64String($env:PFX_CONTENT);)
- Writes the encoded bytes into a new PFX called cert.pfx, which is stored in RUNNER_TEMP
Once the certificate is rebuild on the runner, we can pass it to Advanced Installer via the AIP command line and we can also add the SetSig command to be sure that the Enable Signing options is checked in the AIP:
aip-commands: |
           SetSig
SetDigitalCertificateFile -file "${{ env.PFX_PATH }}"As a precaution, after the package is built with Advanced Installer and the artifact is created, we add another job to delete the previously created PFX certificate from the GitHub runner:
name: Delete PFX certificate
    	shell: pwsh
    	env:
      	PFX_PATH: ${{ steps.create-pfx.outputs.PFX_PATH }}
    	run: |
Remove-Item -Path $env:PFX_PATH;Here is the full code for the YML file:
name: Build AIP and sign
on: [workflow_dispatch]
jobs:
  advinst-aip-build-demo:
	runs-on: windows-latest
	name: Sign Setup Demo
	steps:
  	- name: Check out repository code
    	uses: actions/checkout@v2
  	- name: Create PFX certificate
    	id: create-pfx
    	shell: pwsh
    	env:
      	PFX_CONTENT: ${{ secrets.BASE64_PFX_CONTENT }}
    	run: |
      	$pfxPath = Join-Path -Path $env:RUNNER_TEMP -ChildPath "cert.pfx";
      	$encodedBytes = [System.Convert]::FromBase64String($env:PFX_CONTENT);
      	Set-Content $pfxPath -Value $encodedBytes -AsByteStream;
      	Write-Output "::set-output name=PFX_PATH::$pfxPath";
  	- name: Build and sign AIP
    	uses: caphyon/advinst-github-action@v2.0
    	env:
      	PFX_PATH: ${{ steps.create-pfx.outputs.PFX_PATH }}
    	with:
      	advinst-version: '19.0'
      	advinst-license: ${{ secrets.ADVINST_LICENSE_KEY }}
      	aip-path: ${{ github.workspace }}\digital signature.aip
      	aip-build-name: DefaultBuild
      	aip-package-name: setup.msi
      	aip-output-dir:  ${{ github.workspace }}\setup
      	aip-commands: |
           SetSig
        	SetDigitalCertificateFile -file "${{ env.PFX_PATH }}"
  	- name: Publish setup artifact
    	uses: actions/upload-artifact@v2
    	with:
      	name: setup
      	path: ${{ github.workspace }}\setup\setup.msi
  	- name: Delete PFX certificate
    	shell: pwsh
    	env:
      	PFX_PATH: ${{ steps.create-pfx.outputs.PFX_PATH }}
    	run: |
      	Remove-Item -Path $env:PFX_PATH;
Run the GitHub Action and Digital Sign Your Artifact

Once you name the YML file and set everything up, press the Start Commit button to save the YML file, and then run the action from the Actions page.

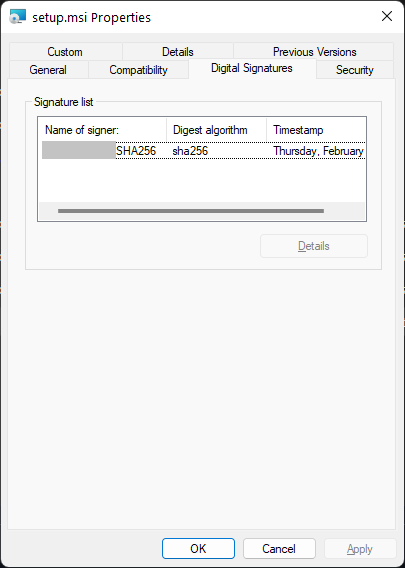
Once a runner is assigned for your action, the resulting artifact should be digitally signed.

Conclusion

As you can see, there are many ways to leverage the use of Advanced Installer's GitHub Actions. From building an MSI using the AIP project to automating the process of digital signing your package.
We hope you found this useful and interesting. Which action would you like us to discuss next?
Subscribe to Our Newsletter
Sign up for free and be the first to receive the latest news, videos, exclusive How-Tos, and guides from Advanced Installer.