How to Generate Updates Configuration File in Azure DevOps pipelines with Advanced Installer PowerShell Automation
With Advanced Installer’s PowerShell automation, you can automatically create the Updates Configuration File –the one placed on your server and used by the Updater to determine if there are any updates available.
In this article, we will show you exactly how Advanced Installer's custom interfaces and Powershell commands can help you generate the Updates Configuration File in Azure DevOps pipelines. But before we jump into the steps - there are some prerequisites needed.
Configure the Azure DevOps

First, you must have already configured Azure DevOps to build the installer. If you haven’t done so yet, you can check the following article for specific details: How-To: Build an Advanced Installer Visual Studio Project from Azure DevOps.
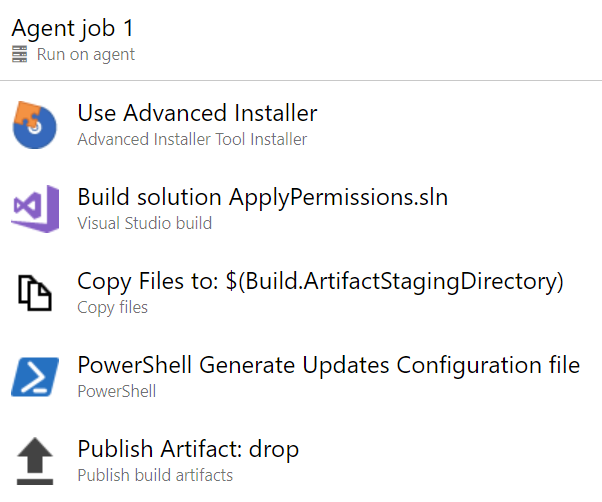
Here’s an overview of the pipeline:

The Advanced Installer Tool Installer will provision the Advanced Installer for the build agent. You can read more about it in the How to: Choose Which Advanced Installer Azure DevOps Task You Need? article.
Make sure you select the Enable PowerShell Automation option as the Updates Configuration File will be created using PowerShell COM:

If no specific version of Advanced Installer is used to create the installer, then leave the Version field empty. When the Version field is empty, then the latest version available will be used.
Azure DevOps plugin requires a license for Advanced Installer so that it can be used.
Here’s how the YAML looks like:
steps:
- task: caphyon.AdvancedInstallerTool.Caphyon.AdvancedInstaller.Tool.AdvancedInstallerTool@1
  displayName: 'Use Advanced Installer '
  inputs:
    advinstLicense: 'YOUR LICENSE KEY HERE'
advinstEnableCom: trueThe next task, Copy Files, is used to copy files to the $(Build.ArtifactStagingDirectory).
This path is the local path on the agent where any artifacts are copied to before they are pushed to their destination. For example: C:\agent_work\1\a
How to generate the MSI or EXE to use the Updates File creation

Here, we copy the .msi or the .exe, depending on the output build defined on your Advanced Installer project.
Have a look at its settings below:


Or, YAML:
steps:
   - task: CopyFiles@2
  displayName: 'Copy Files to: $(Build.ArtifactStagingDirectory)'
  inputs:
    SourceFolder: 'AI Setup ApplyPermissions/AI Setup ApplyPermissions-SetupFiles'
    Contents: '*.msi'
TargetFolder: '$(Build.ArtifactStagingDirectory)'By this point, we have the MSI or EXE that needs to be used for the Updates File creation. The Updates Configuration project is generated using the Advanced Installer PowerShell Automation Interfaces.
How to Configure the PowerShell task

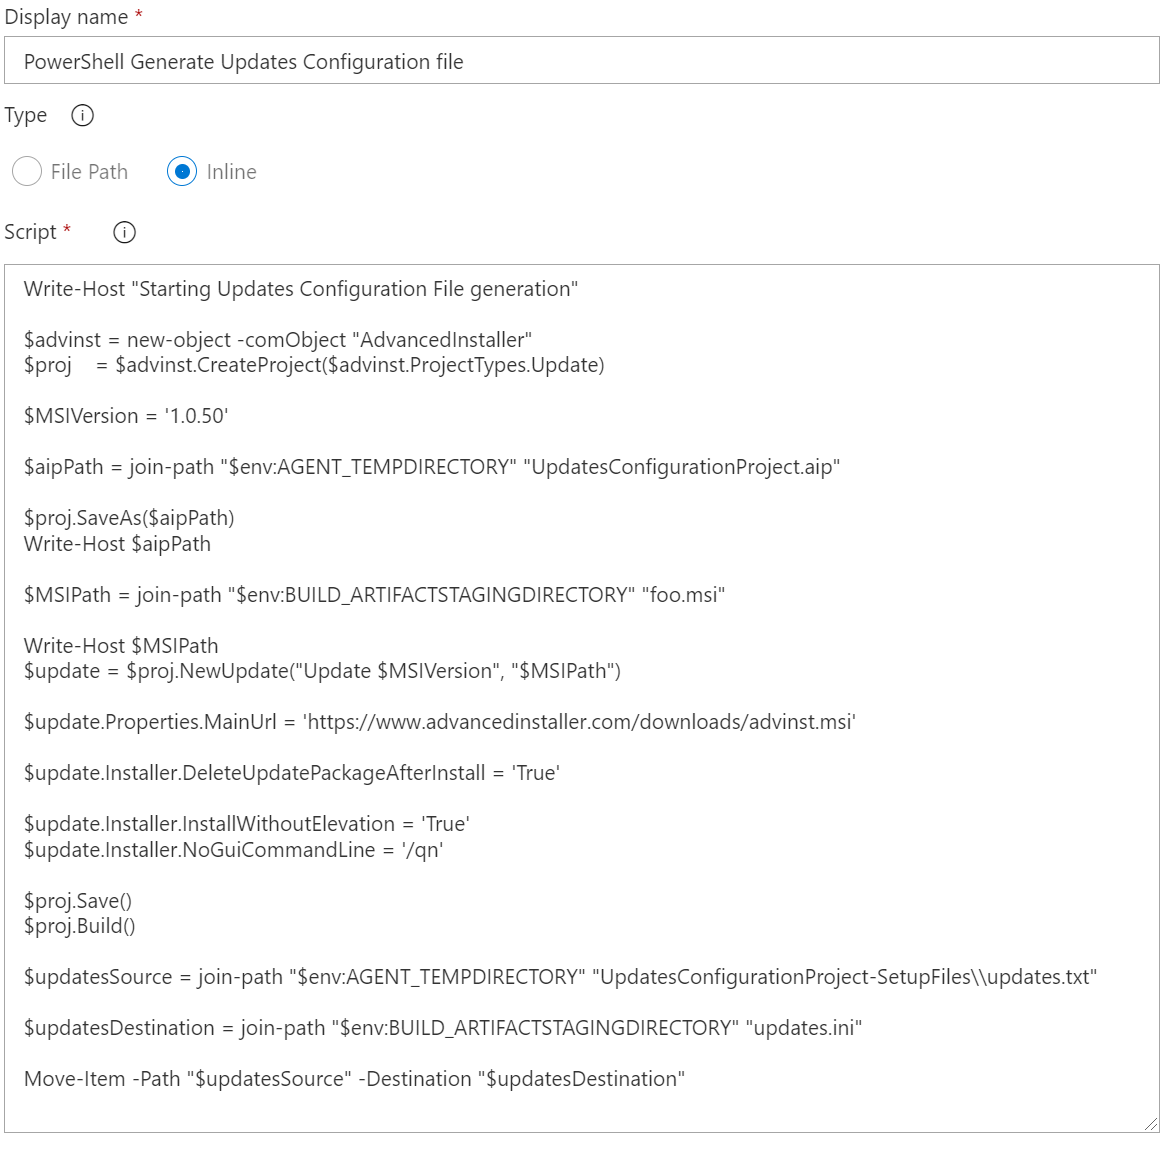
Here’s how the PowerShell task looks like:

Or, its YAML:
steps:
- powershell: |
   Write-Host "Starting Updates Configuration File generation"
   $advinst = new-object -comObject "AdvancedInstaller"
   $proj    = $advinst.CreateProject($advinst.ProjectTypes.Update)
   $MSIVersion = '1.0.50'
   $aipPath = join-path "$env:AGENT_TEMPDIRECTORY" "UpdatesConfigurationProject.aip"
   $proj.SaveAs($aipPath)
   Write-Host $aipPath
   $MSIPath = join-path "$env:BUILD_ARTIFACTSTAGINGDIRECTORY" "foo.msi"
   Write-Host $MSIPath
   $update = $proj.NewUpdate("Update $MSIVersion", "$MSIPath")
   $update.Properties.MainUrl = 'https://www.advancedinstaller.com/downloads/advinst.msi'
   $update.Installer.DeleteUpdatePackageAfterInstall = 'True'
   $update.Installer.InstallWithoutElevation = 'True'
   $update.Installer.NoGuiCommandLine = '/qn'
   $proj.Save()
   $proj.Build()
   $updatesSource = join-path "$env:AGENT_TEMPDIRECTORY" "UpdatesConfigurationProject-SetupFiles\\updates.txt"
   $updatesDestination = join-path "$env:BUILD_ARTIFACTSTAGINGDIRECTORY" "updates.ini"
   Move-Item -Path "$updatesSource" -Destination "$updatesDestination"
displayName: 'PowerShell Generate Updates Configuration file'Before configuring the PowerShell task in Azure, we recommend testing it locally on your machine.
The last step is to Publish build artifacts. It is used to publish build artifacts to Azure Pipelines or a Windows file share.
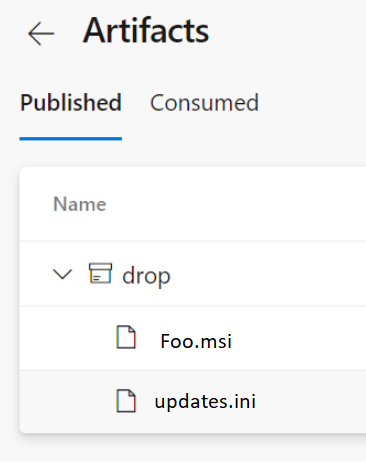
The drop location should have the artifacts we’ve produced:

And we're good to go!
Now, you can use both .msi and its .ini file to publish the update to your users.
Conclusion

Azure DevOps pipelines is a powerful service to help you automate your build, release, and test-management tasks. With Advanced Installer, Azure DevOps pipelines will be able to generate the Update Configuration File for you. If you have a Build type of Update, we hope this article was helpful when it comes to generate update configuration files and commit changes. Did you find this useful? Comment below what you'd like us to cover next.
Subscribe to Our Newsletter
Sign up for free and be the first to receive the latest news, videos, exclusive How-Tos, and guides from Advanced Installer.