How to correctly set the install folder in Wix
When creating an installer, it is crucial to prioritize the setting of the installation directory. This directory, often referred to as the "install path," represents the specific location on the user's computer where the application will be installed.
Typically, a package specifies a default install path. However, it is essential to provide users with the flexibility to browse and select a custom install path during the installation process. You can accomplish this by including a user-friendly interface that enables straightforward selection of the chosen installation directory.
If you are interested in how to correctly set the install path for an MSI created with WiX Toolset, this is the article you need.
In this tutorial, we’ll show you how to define a default install path and how to let the user select a custom install path from the user interface for a Windows Forms application.
Keep in mind that for this tutorial, we used the WiX Visual Studio extension to create the setup project. So, it’s important to make sure you have it installed.
How to define the directory structure?
First, we have to add the directory definition for the setup project. This directory will serve as the default installation path specified in the user interface. To accomplish this, we must make modifications to the Product.wxs file, similar to the provided sample below.

You have to use the Directory element to define the directories and describe the hierarchy of folders on the target machine. We used the following elements in our example:
- TARGETDIR - which is the root of all directory structures and it is present in every Wix project.
- ProgramFilesFolder - a predefined property that references the Program Files folder on the user’s machine and resolves to C:\Program Files. On a 64-bit machine, it resolves to C:\Program Files (86).
- MYAPPDIR - which creates the application’s folder under Program Files.
The default path after adding the above elements will be C:\Program Files\DemoApp. As you can see, the install folder ID must be all in uppercase characters to make it a public property. Thus, it will be passed from the UI to the execute sequence when the user modifies the default install path.
How to add the WixUIExtension?
Now, let’s add the option that allows the user to change the default install location from the user interface.
Since Wix does not provide a built-in user interface (UI) by default, we need to add a reference to the WixUIExtension library. This library stores some built-in dialog sequences including the WixUI_InstallDir dialogue set.
This set has a dialogue, namely InstallDirDlg, that allows users to choose the directory where the product will be installed. To add the extension, follow the next steps:
1. Go to the setup project (DemoAppSetup in our case) → right-click on the setup project → Add reference.

2. In the opened dialogue, navigate to the Wix Toolset folder → Bin folder.

3. Select WixUIExtension.dll → click Add → click OK.
After completing the steps, you should find the extension in the References folder.

How to use the WinUI_InstallDir?
Once the WixUIExtension is referenced, we can use the WixUI_InstallDir functionality.
Follow the steps below to correctly configure the installation path:
1. Set the value for the WIXUI_INSTALLDIR property. This value should correspond to the ID assigned to the directory where the user will specify the installation location. In our case, the ID is MYAPPDIR.
<Property Id="WIXUI_INSTALLDIR" Value="MYAPPDIR" />
2. Reference the WixUI_InstalDir.
<UIRef Id="WixUI_InstallDir" />
When you run the MSI, a series of dialogs will appear, including the InstallDirDlg, which allows the user to choose a custom installation path.

How to set the install folder in Advanced Installer?
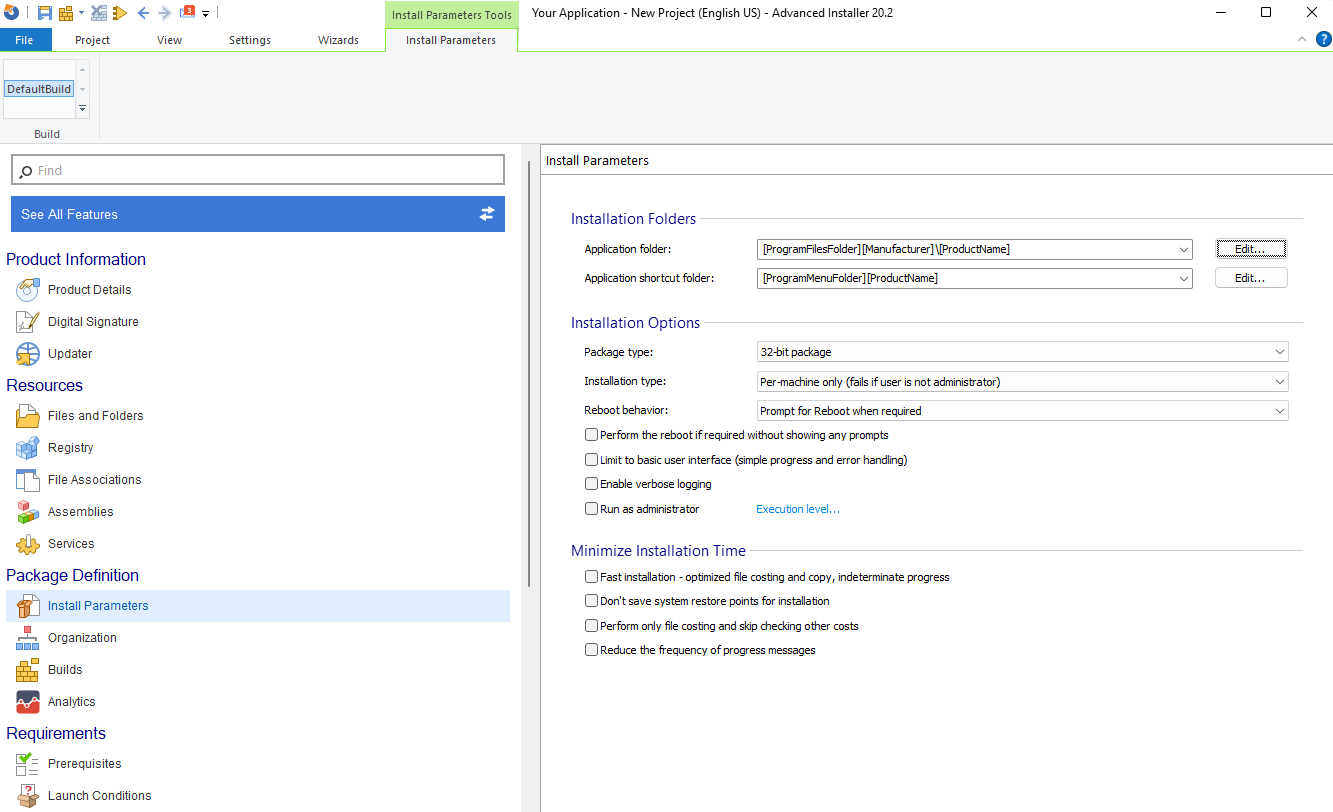
When working with Advanced Installer, it is essential to understand how the default installation folder, also known as the Application folder, is configured. This folder location is initially defined in the Install Parameters view (Product Files\Manufacturer\Product Name).
However, if you need to make any modifications, Advanced Installer offers a user-friendly graphical interface that allows you to easily change the default installation folder as required.

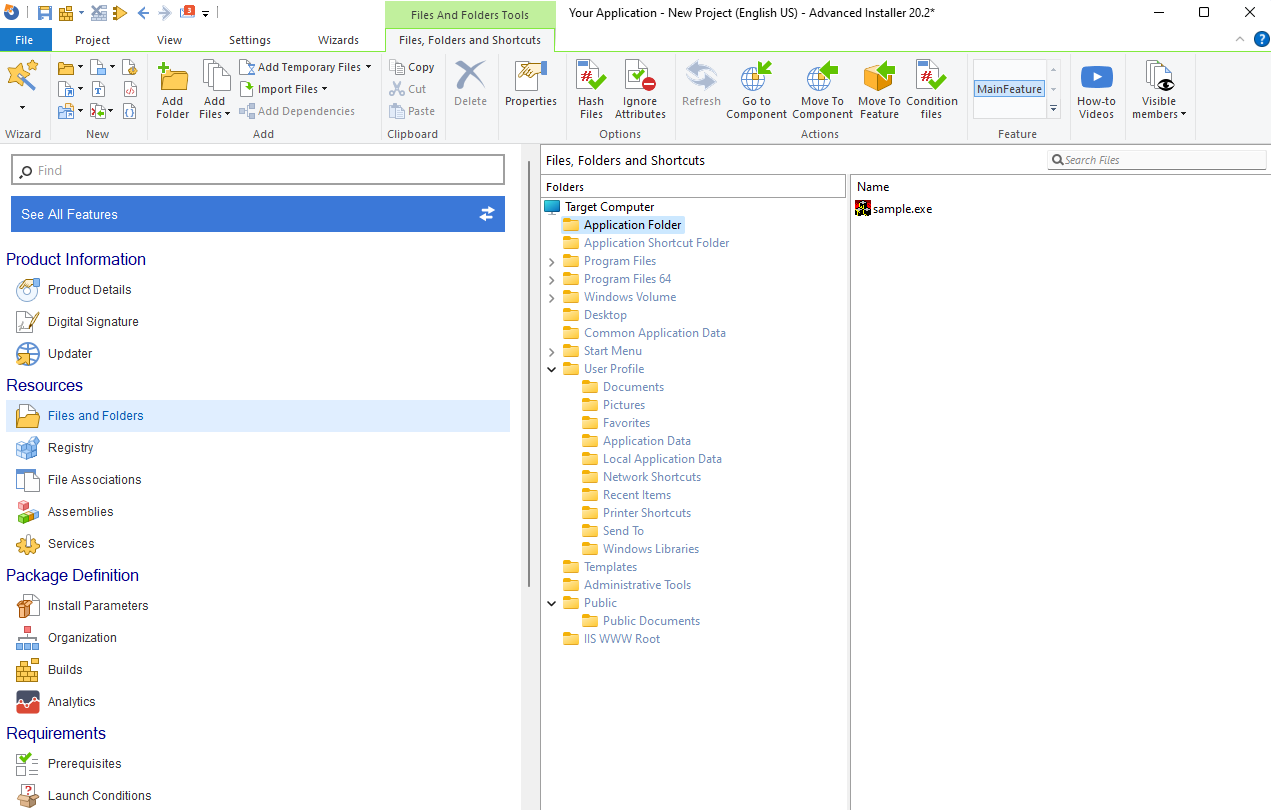
The Application folder is usually the main installation folder. You can add the files and folders under this folder.

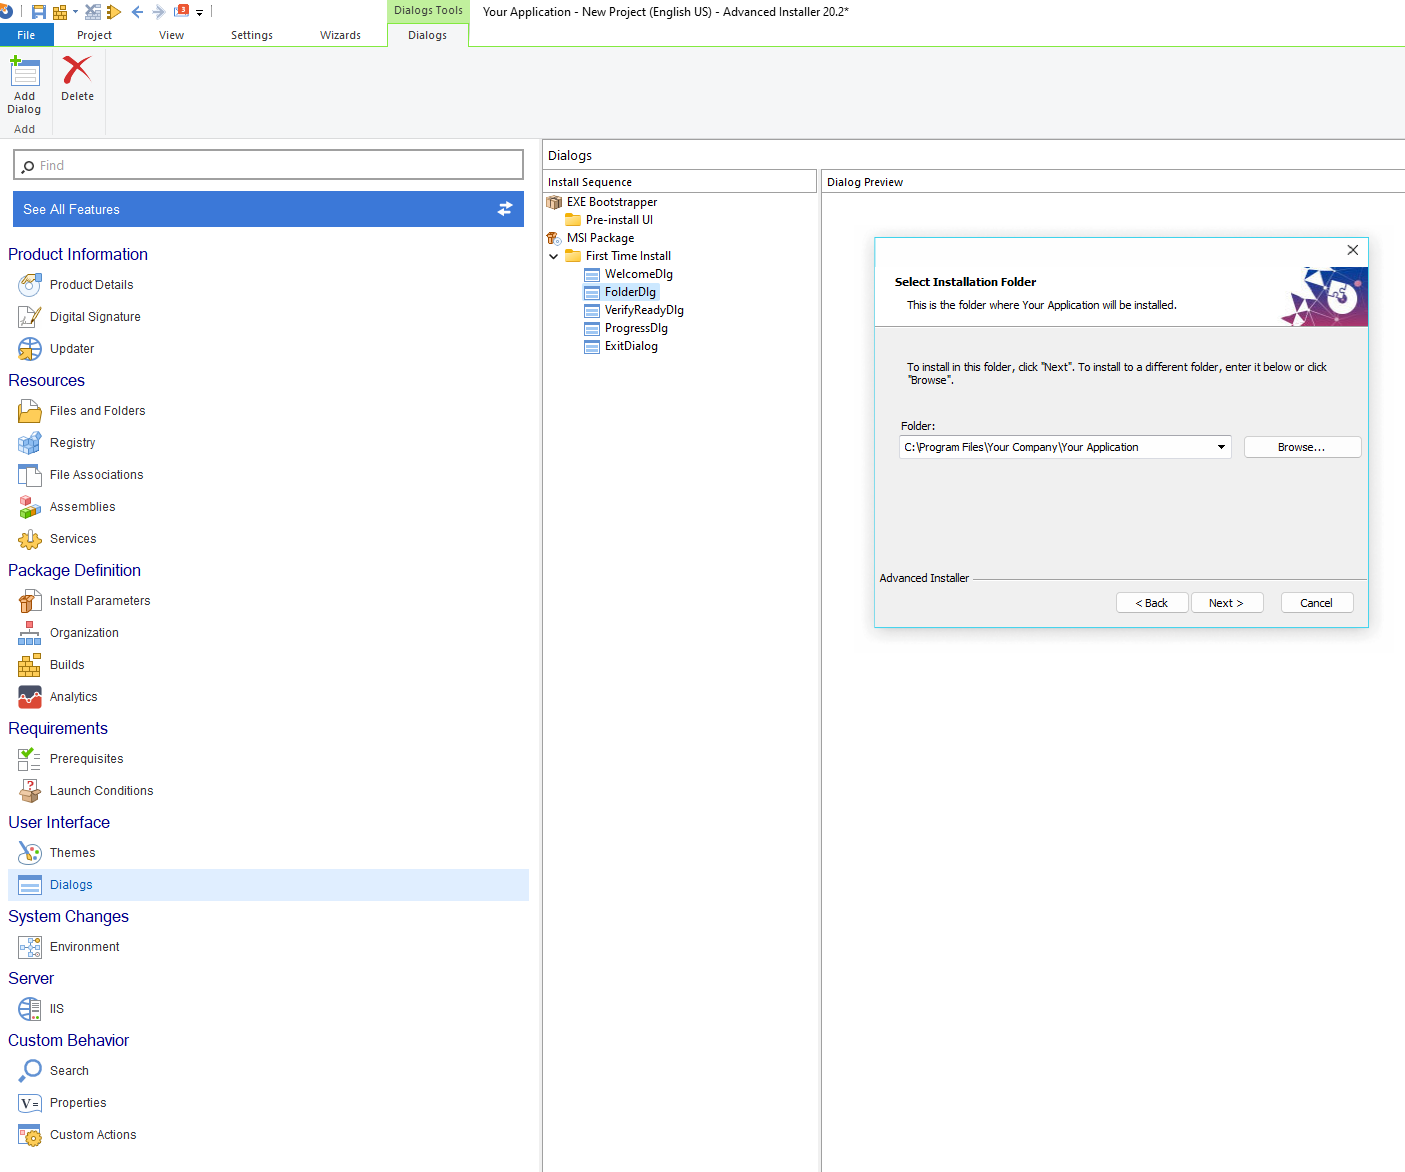
If you wish to allow users to customize the installation path, no additional configuration is necessary. By default, the installer includes the FolderDlg dialogue, which presents the current path of the Application Folder and enables users to modify it during the installation process.

Conclusion
Setting the installation path correctly for an installer package created with WiX requires quite several steps. You have to edit the XML file and use an additional extension to let the user choose a different install path from the UI.
In contrast, when using Advanced Installer, the process is much simpler. The default installation path is automatically set, and you can effortlessly modify it through the intuitive user interface. Additionally, the installer includes the FolderDlg dialog by default, which allows users to modify the installation path if necessary. With Advanced Installer, you can streamline the installation path configuration without the need for extensive manual adjustments.
