How to configure an Advanced Installer build step in a TeamCity pipeline
When developing software, the codebase is always growing, making it difficult to navigate. Software engineers use continuous integration (CI) technologies like TeamCity to address this.
TeamCity is a popular Java-based Continuous Integration solution for easily creating automated pipelines.
It enables you to combine the source code from two distinct Version Control Systems (VCS) into a single build, as well as automate portions of the testing process to reduce the need for manual testing.
We already showed you “How to configure an Advanced Installer build step in a Jenkins pipeline” and now we will go through how to do it in a TeamCity pipeline.
Now let’s see how you can figure Advanced Installer build steps in a TeamCity pipeline.
1. Install the plugin for TeamCity


We are proud to announce the official Advanced Installer plugin for TeamCity. Before we start configuring Advanced Installer in the TeamCity pipeline, download the latest version of the plugin from our GitHub releases archive. Make sure to choose the advinst-teamcity-plugin-<ver>.zip asset.
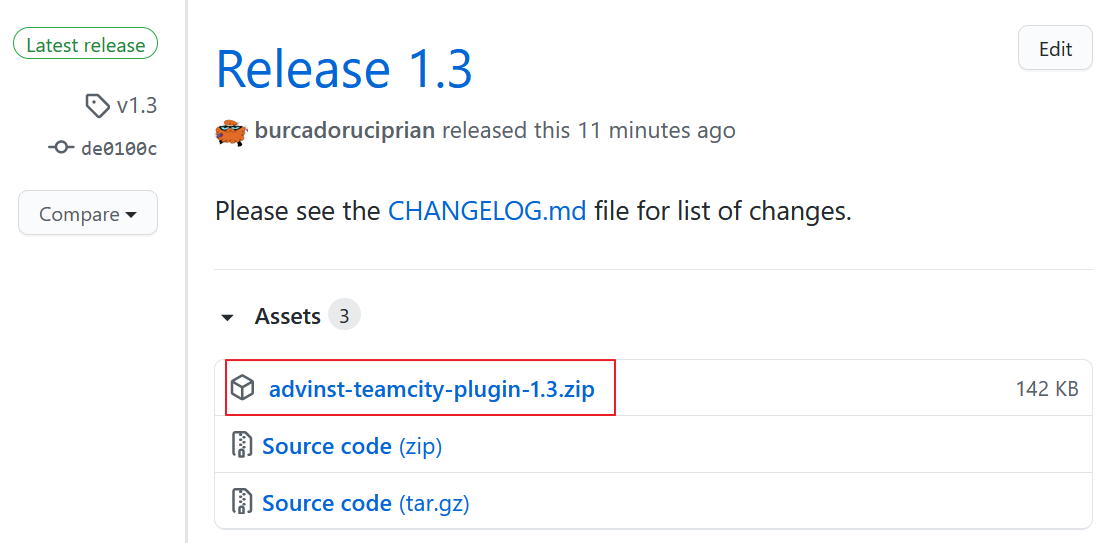
To install the previously downloaded ZIP file, navigate to the TeamCity Administration -> Plugins List section and use the Upload plugin zip button.

2. Install the Advanced Installer tool

Switch to the Administration -> Tools section, use the Install Tool button, and select Advanced Installer from the dropdown list.

Next, you will be prompted to choose which Advanced Installer version you want to install. Select one and click Add.
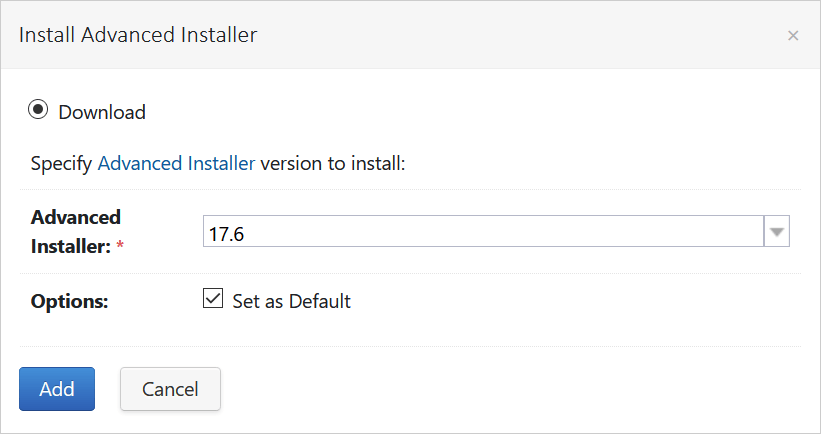
The Set as Default option means that this particular version of the tool will be used by default in a new Advanced Installer build step.
In cases where you need to use different versions of the tool in your pipelines, you can add them by using the Install Version button.
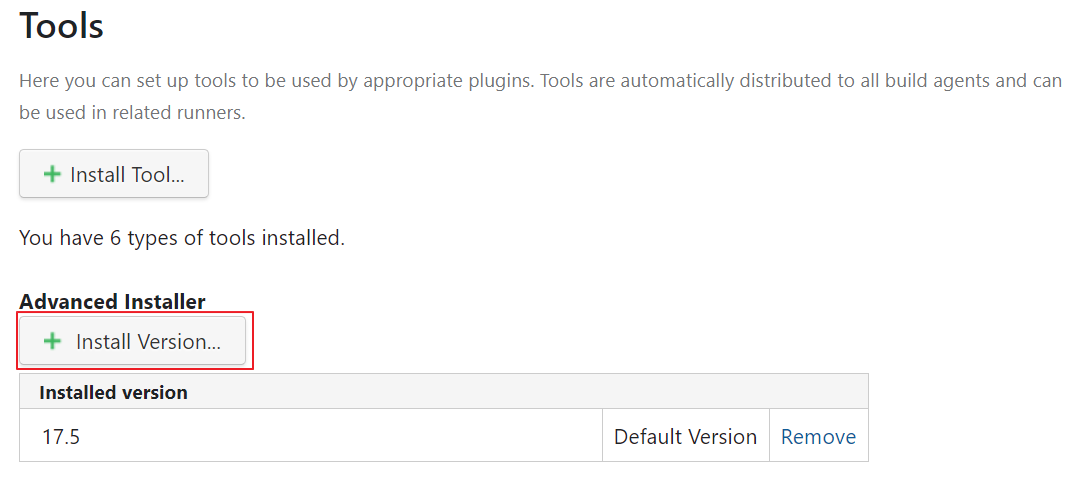
After you complete these steps, you will notice that the Advanced Installer tool is available in the pipelines.
3. Build an Advanced Installer project as a pipeline step

Now that the Advanced Installer tool is configured, we will use it to build an Advanced Installer project file (AIP) as part of a pipeline. To add a new build step, go to the Build Steps section of your project configuration and use the Add build step button.
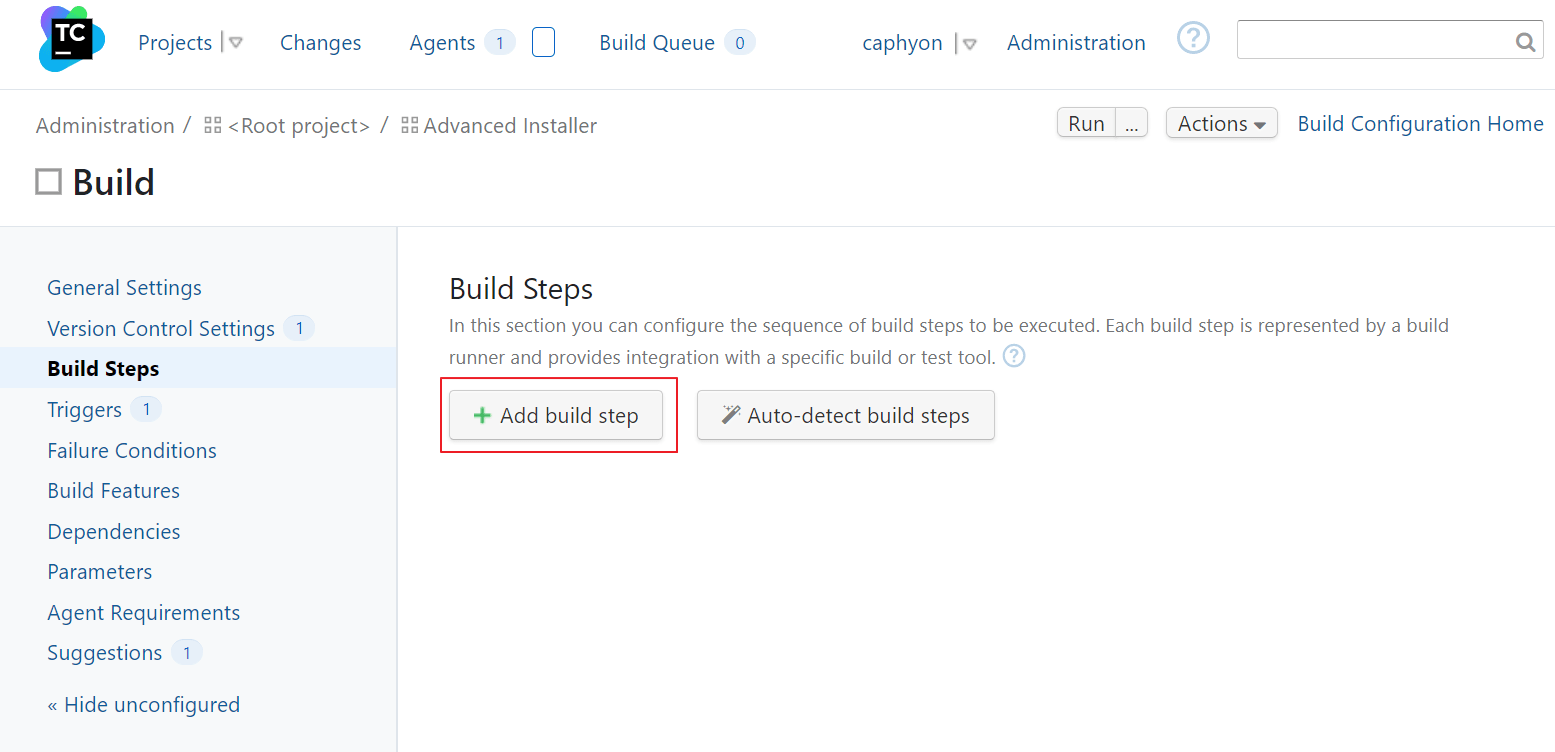
Select the Advanced Installer option from the drop-down list.
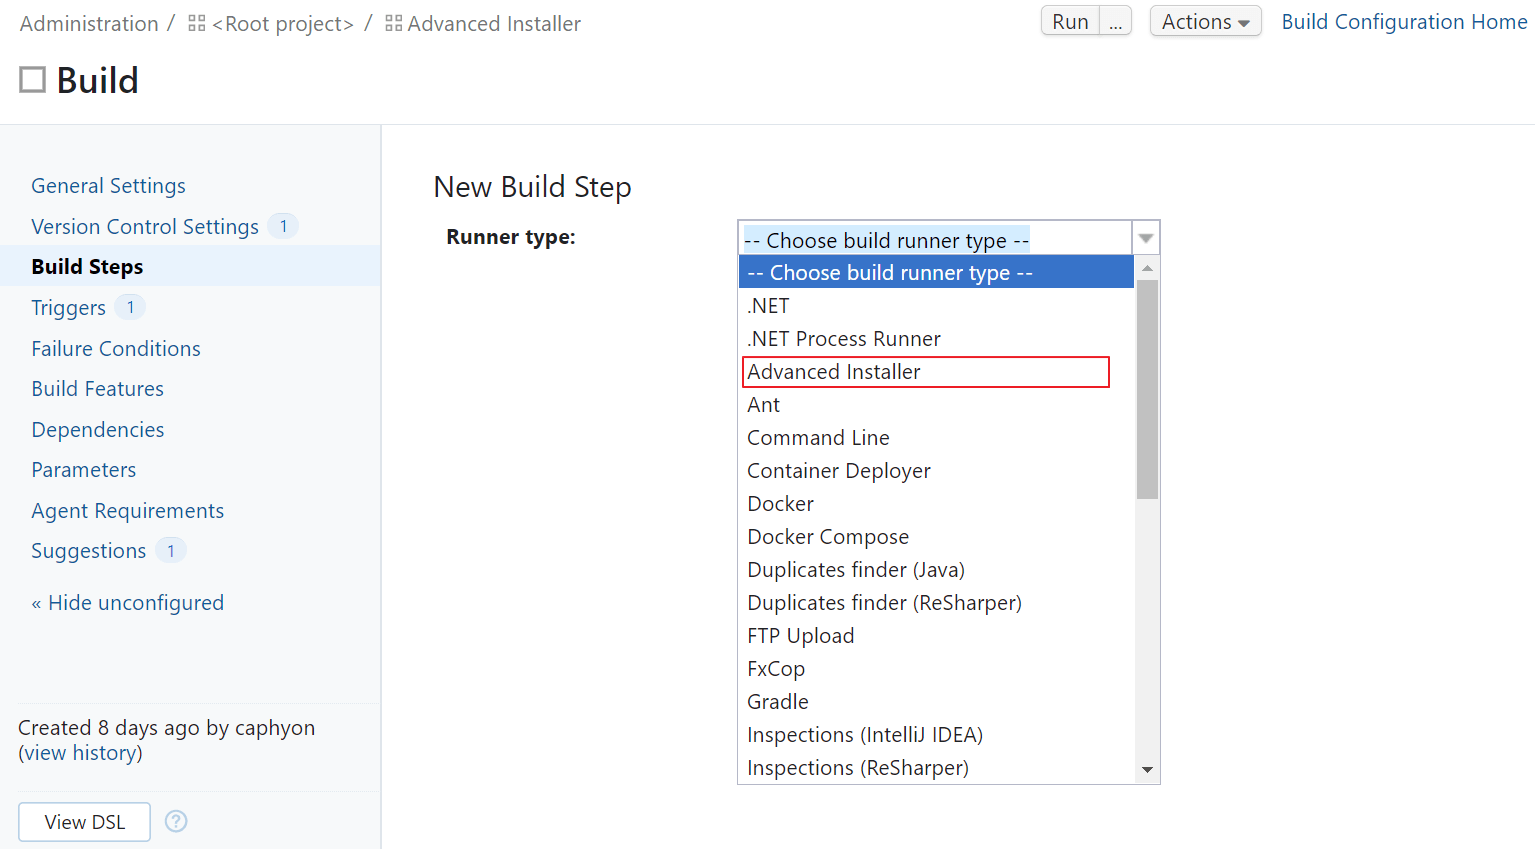
Aside from the default TeamCity options which are common to all the steps, an Advanced Installer build step has three main sections:
- Advanced Installer Tool
- Plugin Run Type
- Advanced Installer Project Settings
Let's take a look at each of them.
3.1 Configure plugin run type

The plugin has two operating modes that offer flexibility and accommodate all usage scenarios.

3.1.1 Deploy Advanced Installer tool

In this scenario, the plugin will:
- Deploy Advanced Installer
- Register it using the provided License ID
- Enable PowerShell support, if specified.
This option is helpful when using Advanced Installer from PowerShell scripts or directly from the command line.
After the Advanced Installer tool deployment, the advancedinstaller.tool variable will hold the full path.
3.1.2 Deploy the Advanced Installer tool and build the project

In this scenario, the plugin will:
- Deploy Advanced Installer
- Register it using the provided License ID
- Enable PowerShell support, if specified.
- Build the AIP configured in the Advanced Installer Project section
Now, let’s configure the Advanced Installer tool.
3.2 Configure the Advanced Installer tool 

In this section, we will choose a version from the list we configured in the previous step and provide your License ID to register on the build agent.

3.2.1 Choose version

Choose a version of the tool from the drop-down list. If none is selected, the default version will be chosen.
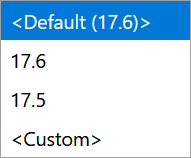
The last item on the list is <Custom>. By using this option, you can specify your own path to an Advanced Installer root directory on the build agent. This is useful when you're using the same agent and you want to skip the tool setup when executing the pipeline.
3.2.2 License ID

In this field, you should enter the License ID you received when you purchased your Advanced Installer license.
Providing a license is not necessary for our freewareSimple project type.
We offer Free Advanced Installer License for bloggers and Open-Source projects. Also, feel free to share this with your community members.
3.2.3 Enable PowerShell support

By enabling this option you will be able to use Advanced Installer from a PowerShell script. This support relies on a COM interface registered on the agent during the pipeline.
If you are referencing an Advanced Installer version prior to 17.7, the agent needs to run with elevated privileges to register the COM interface. Versions 17.7 and later do not have this restriction.
3.3 Configure Your Advanced Installer Project 

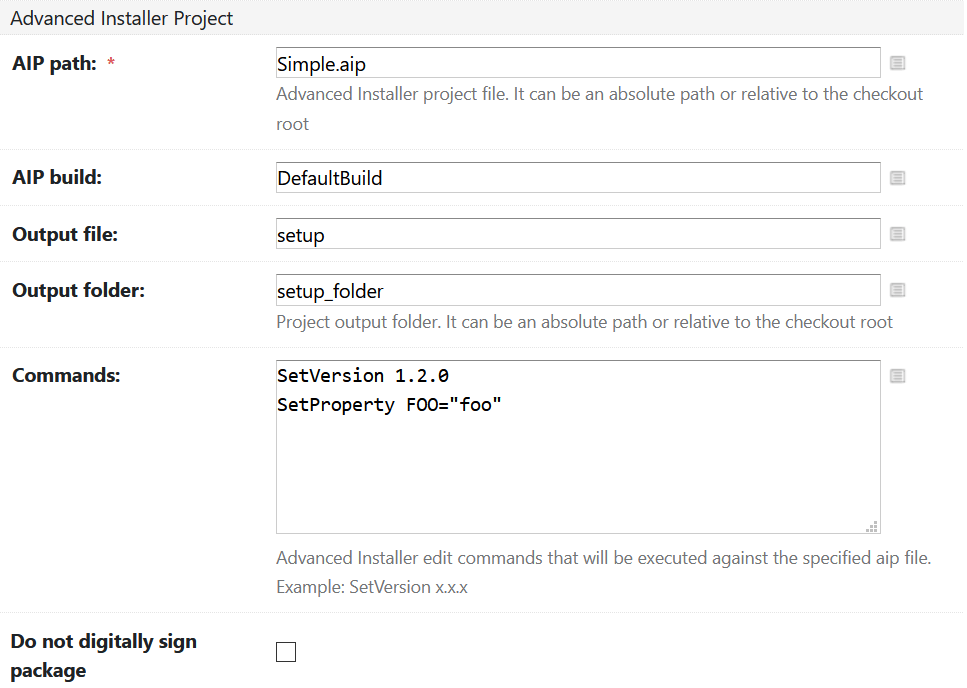
Now let’s see how to configure the Advanced Installer project file to be built during the pipeline.
- AIP Path holds the path project file. This field is mandatory.
- AIP Build holds the project build to be executed. If the field is empty, the Default Build project will be performed.
- The Output file and Output folder fields are where you can configure the project output.
- In the Commands field, you can enter a list of commands supported by the Advanced Installer command-line interface.
- The Do not digitally sign package option will force skip the digital sign step, even if it is configured in the project. This option is useful when debugging build scenarios.
Conclusion

Now you know how to set up an Advanced Installer build step into your TeamCity pipeline.
If you are a Jenkins user, check out our tutorial to see how to configure the Advanced Installer build step in a Jenkins pipeline.
Don’t forget about the Free Advanced Installer License for bloggers and Open-Source projects. More info here.
Subscribe to Our Newsletter
Sign up for free and be the first to receive the latest news, videos, exclusive How-Tos, and guides from Advanced Installer.