Auto updating an application using GitHub
Release management and version control go hand in hand when delivering quality software, whether you are a solo developer or part of a development team.
In today’s article, I present a solution to automate and manage your product release versions directly from your installer's package, using GitHub as a software hosting provider.
As GitHub is a widely used repository, Advanced Installer created an integration with the GitHub platform - “GitHub integration for the Updater”. This integration supports you in automating your product update releases through your installer.
This article is intended for those who are already familiar with GitHub and
use it daily to manage and release their products.
The "GitHub integration for the Updater" feature combines our Updater’s functionality with GitHub’s support of releasing products through its REST API integration
If you are new to Advanced Installer's Updater functionality, I recommend that you first get familiar with how the Updater works.
Advanced Installer offers free licenses for Open-Source projects.
Find more details here.
If you are part of the Open-Source community, don't hesitate to share
this information with your colleagues.
How the GitHub integration works with the Updater in
Advanced Installer


Supposing that everything is clear regarding the Updater, let’s dive in and understand how Advanced Installer's Updater and GitHub work together.
To integrate the "Updater" with “GitHub”, we need to go through the following steps:
- Go to the "Updater" page.
- Under the "Updater" section, select the "Check for updates using Advanced Updater" option.
- Select the "GitHub integration" option.
- In the "Updates Configuration file URL" field, input the URL to the "configuration file".
What goes into the "Updates Configuration file URL" field?

The last option mentioned above often creates confusion for users who sometimes don't really know what they should input in the "Updates Configuration file URL".
Let’s sort this one out.
As I mentioned, the Updater’s functionality makes use of the GitHub’ Release API and is done over HTTPS from https://api.github.com.
The first thing to note is that the data is sent and received as JSON format. Taking this into account, every HTTPS request made to the API will return a JSON file as a response - which will be interpreted by our "Updater" tool as shown in the following example.
Let's say we these specific repositories:
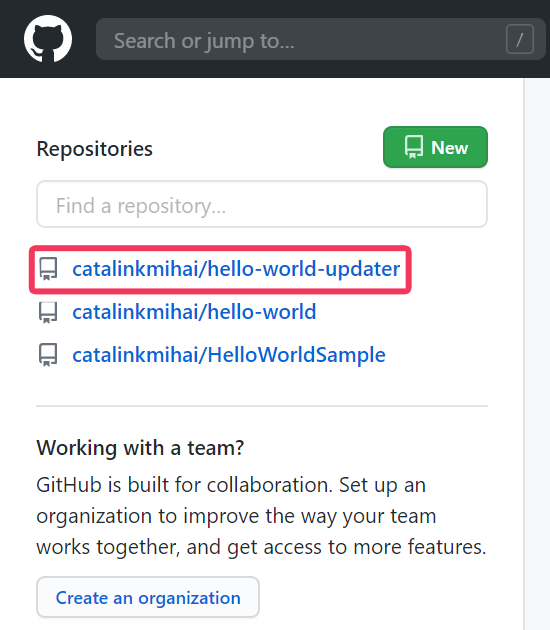
In this example, we use the “hello-world-updater" repository, which has only one release.
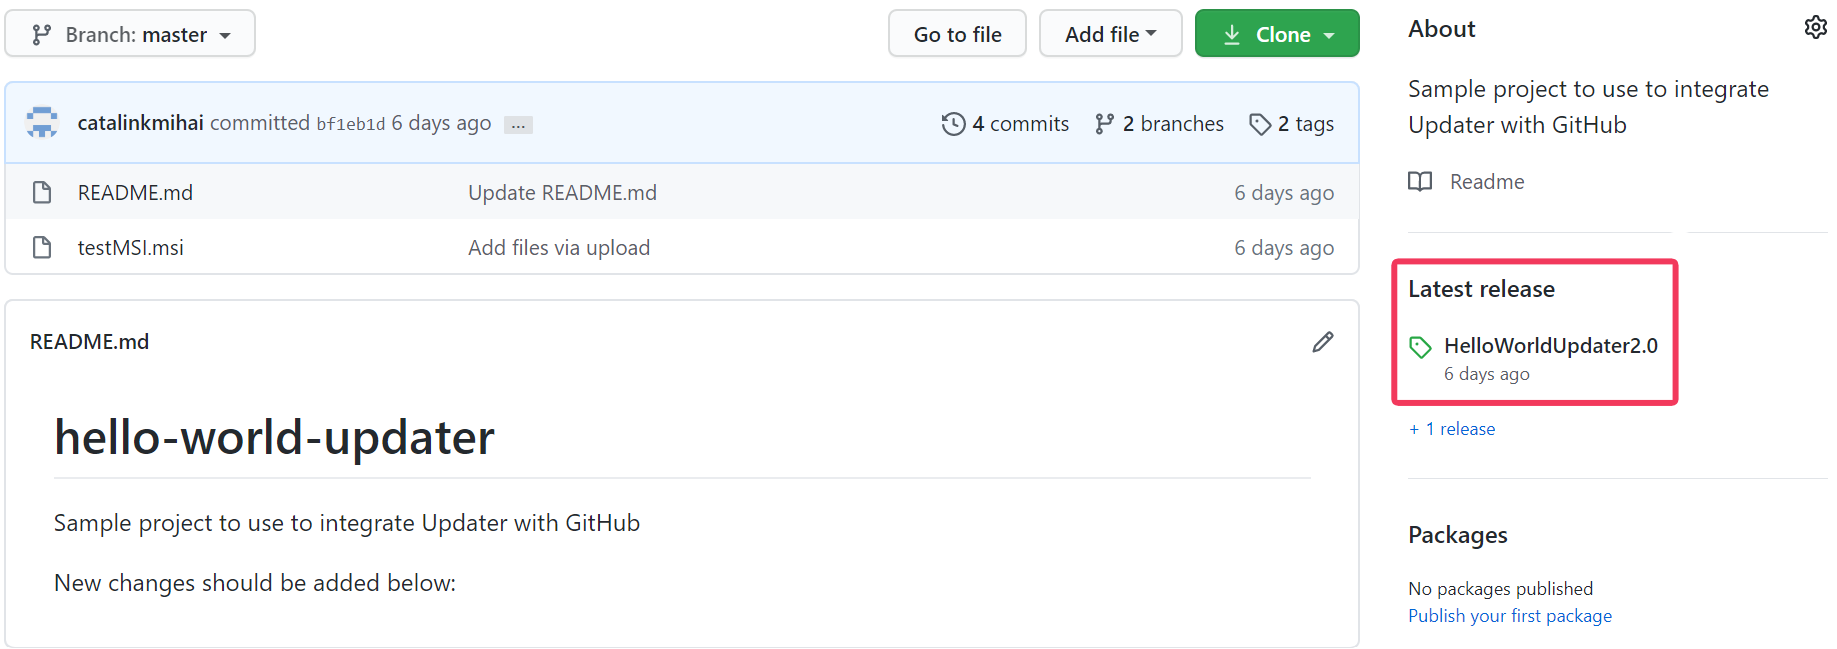
To access the release’s information through the API, we can proceed as follows:
- Open a new tab in your web browser and access the following link:
https://api.github.com/repos/<username>/<repository_name>/releases
In our case, the link looks like this:
https://api.github.com/repos/catalinkmihai/hello-world-updater/releases
where:
<username> = catalinkmihai
<repository_name> = hello-world-updater
- When accessing the link, the following response appears:

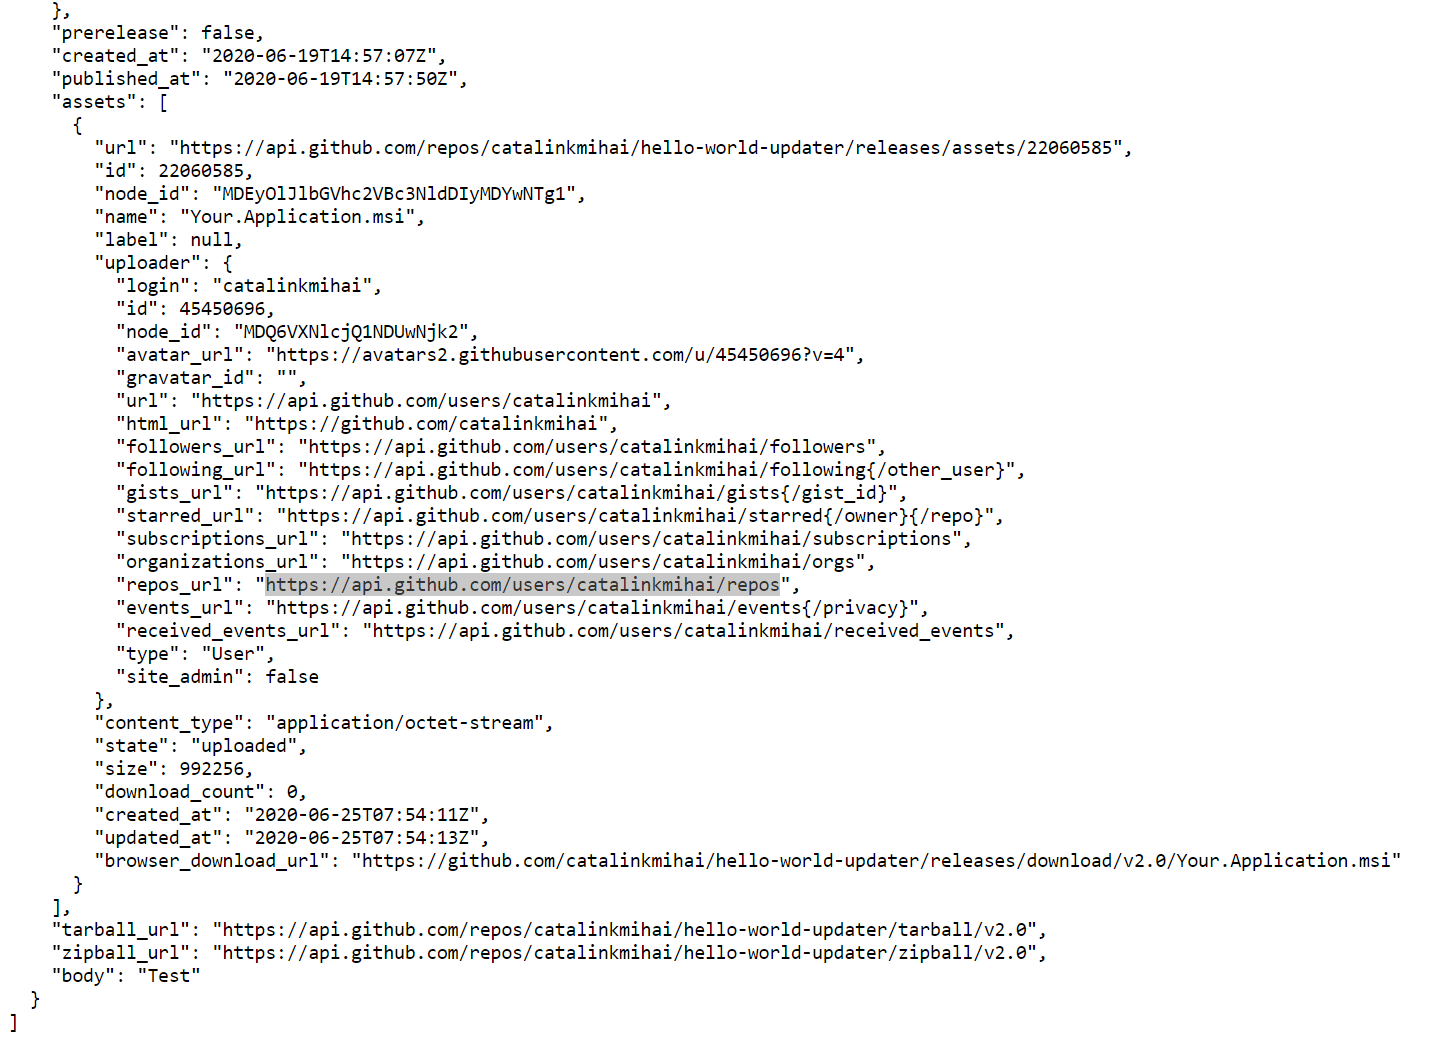
As you can notice, the configuration file generated through the GitHub’ API is not the same as the one generated by the "Updates Configuration File" project:
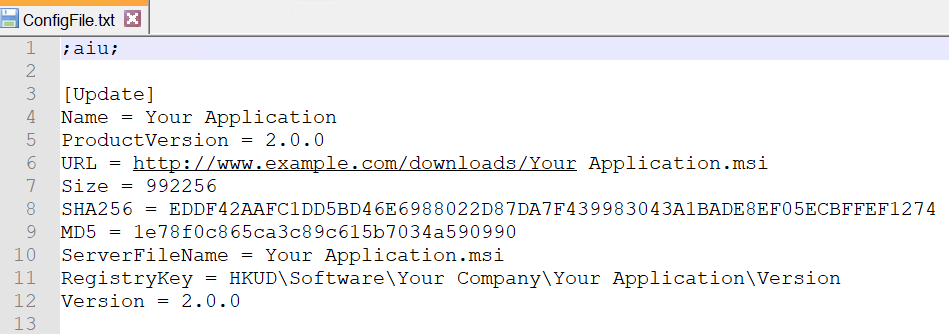
In order for the Updater tool to interpret the fields returned by the request, we have to map them to the current fields used in the Configuration File.
Here’s how the GitHub Release API fields are mapped to the Updates Configuration File fields:
- node_id" - Update section name (Update key)
- "item" - "Name"
- "tag_name" - "Version"
- "published_at" - "ReleaseDate"
- "assets\browser_download_url" - "URL"
- "assets\size" - "Size"
- "asset\name" - "ServerFileName"
- "body" - DescriptionHtml, FeatureHtml, EnhancementHtml, BugFixHtml
For a better understanding of how mapping works, check our
documentation from the website.
We can see, for example, that the "tag_name" field, returned by request, is mapped to the "Version" field, which is generated by the "Updates Configuration File" project.
Don’t forget to take into consideration that your release “Tag” field must contain a higher version than the already installed application.
Managing the Updater Through GitHub: Step by Step Guide

Now that we understand how Advanced Intaller's GitHub integration works with the Updater, let’s see how to manage it through GitHub.
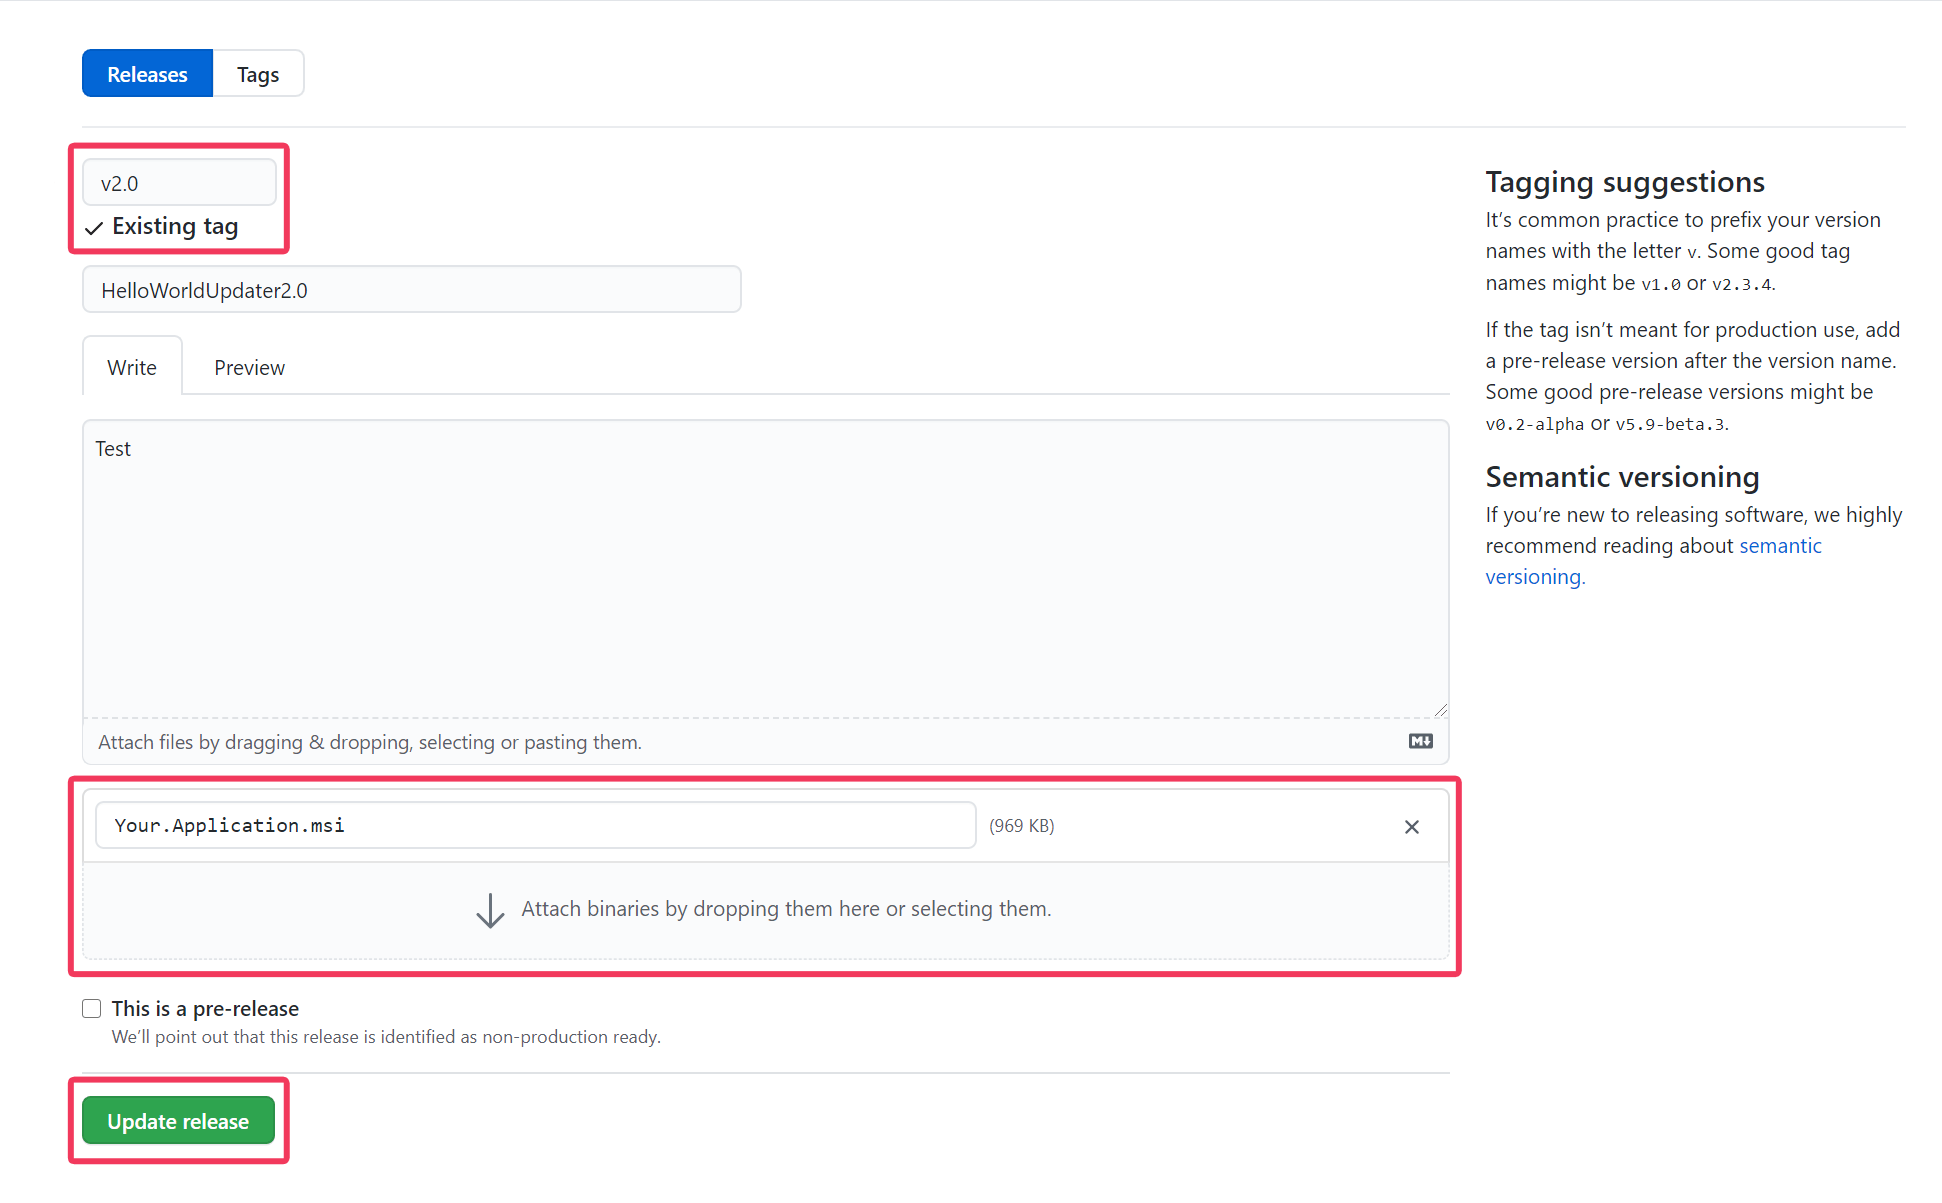
- Go to your GitHub account and create a new repository that only has one release. *Let's remember how important it is for the "Tag" field to be higher than the already installed setup. For instance, if we are going to install version 1.0.0 of our product, the "Tag" should have a higher value (e.g. v2.0).
- Open Advanced Installer and create a new project.
- Go to the "Updater" page and select the "Check for updates using Advanced Updater" option.
- Select the "GitHub integration" option.
- In the "Updates Configuration File URL" field, insert the
following: https://api.github.com/repos/<username> ...
>/releases

- Build the project.
- Install the package.
- Go back to the "Product Details" page and increase the "Version" (e.g. 1.0.0 --> 2.0.0).
- Rebuild the project. When asked to generate a new ProductCode, please select "Generate New".
The generated package should now be added as an "Asset" to our earlier created "Release".
To do so, go to Repository --> select your Release --> "Edit Release" --> and add the earlier built package as an asset:

After the built package has been added, click on Update Release.
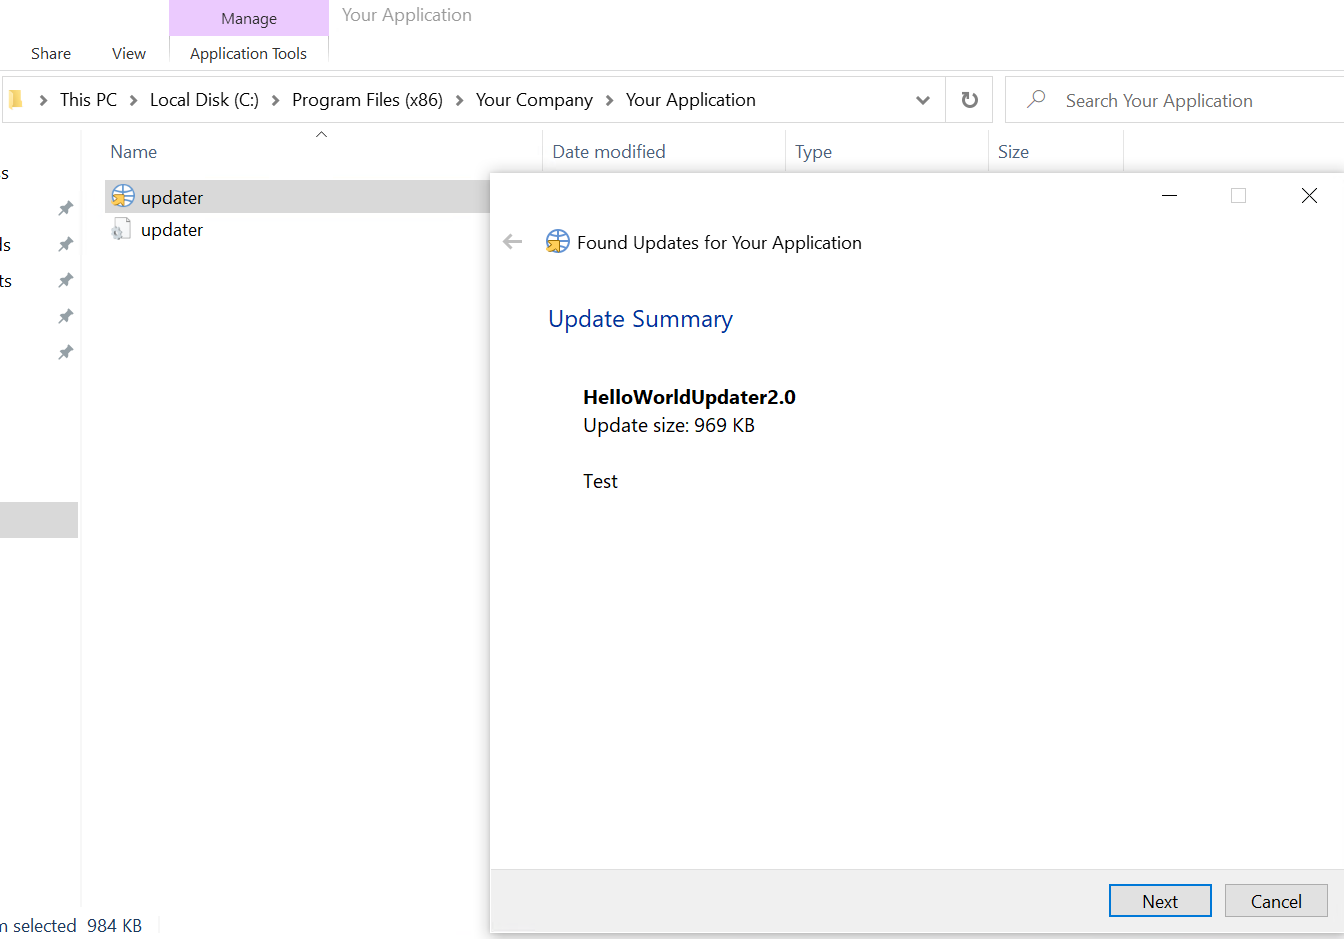
Once you've updated the release's version, go to the first version's installation folder and double click on the "updater.exe" tool.
Notice that the Updater detects the newer version that is ready to be downloaded and installed.
Conclusion

Once you've completed these steps, you should be set and you will have a more seamless and automated solution for your product releases using GitHub.
This feature has been one of the most requested ones from our users to streamline the management of product releases. Our team worked to deliver a comprehensive feature that reduces the effort of developers using GitHub by automating application updates distribution.
I hope you found this article useful! If you have any questions regarding the article, don’t hesitate to leave a comment below.
Also, don’t forget to subscribe to our blog for more application packaging industry news, and check our user guide for updates.
Subscribe to Our Newsletter
Sign up for free and be the first to receive the latest news, videos, exclusive How-Tos, and guides from Advanced Installer.