Remove Files that are not part of the original setup

The following article uses options that are available starting with the Professional edition and project type.
There are scenarios when at package uninstall you also need to unintall files created by your application after the original package was installed.
In the current sample, we will show how to configure the Uninstall Wizard to unininstall these kind of files and folders.
1. Create project

After launching Advanced Installer, you will be presented with a dialog where you can choose the type of the project you want to create.

Select Professional and press the Create Project button. The new project has been created and from now on you will edit it.
![]() Save the project and give it an appropriate name - let's say "Remove Files That
Are Not Part of the Original Setup" for this example.
Save the project and give it an appropriate name - let's say "Remove Files That
Are Not Part of the Original Setup" for this example.
2. Enter product details

Now you can see the main view split into two panes. In the left pane, you can see all the options you have to edit in your current project, grouped in categories.
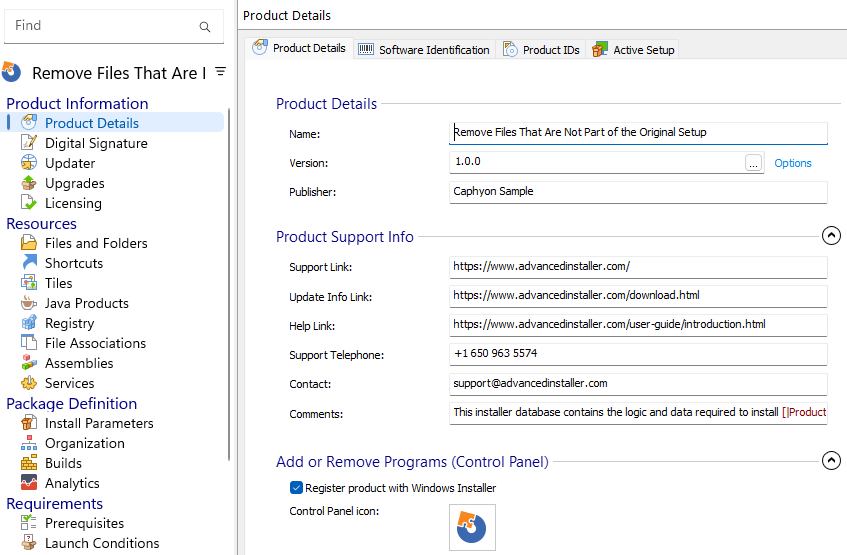
![]() Switch to “Product
Details” page to set the information seen by the user for your installation
package. Fill the fields in the right pane with the corresponding data.
Switch to “Product
Details” page to set the information seen by the user for your installation
package. Fill the fields in the right pane with the corresponding data.

The information from this view will be displayed in the Control Panel.
3. Launch Uninstall Cleanup Wizard

The next step is to add to the project the files and/or folders that compose your application.
![]() Select “Files and Folders” from the
“Resources” menu on the left pane.
Select “Files and Folders” from the
“Resources” menu on the left pane.
Let's assume that your application will create certain files in Application Data folder - C:\Users\<username>\AppData\Roaming\Your App Data and also some *.tmp temporary files in the Windows Temporary Folder - C:\Users\<sername>\Local Settings\Temp\Your App Temp.
These files are not part of the original setup they should also be uninstalled along with your main package. To achieve this you need to use the Uninstall Cleanup Wizard.
In the Files and Folders page right click on the Temporary\Your App Temp subfolder and select Uninstall Cleanup.
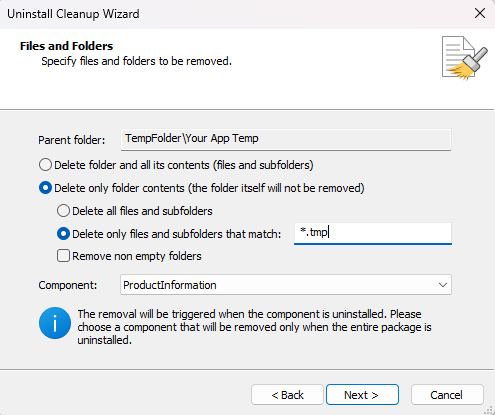
A wizard will be displayed:

Configure Delete only folder contents - Delete Only files and subfolders that match : ".tmp". In this way only files with .tmp extension will be remoed from the folder.
In the component field select a component that will be removed only when the entire package will be uninstalled.
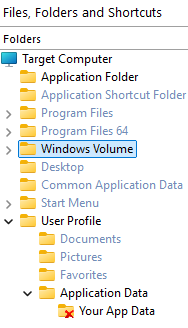
After finishing the wizard a file removal operation will be displayed in the folder:

Next step is to use the Uninstall Cleanup Wizard for Application Data\Your App Files folder. In Files and Folders page right click on this folder and select Uninstall Cleanup .Configure the wizard to delete the folder and all its contents:

There are cases when the user wants to keep the files created by the application even after the Suninstall. The Uninstall Cleanup Wizard lets you select to prompt the user if he wants the cleanup :

After the wizard is completed the folder removal operation will be displayed in Files and Folders page:

4. Build and install

When running the current sample, the application will be installed along with the File Removal and Folder Removal operations created at the previous steps.
Once the application is uninstalled the temporary files from C:\Users\<sername>\Local Settings\Temp\Your App Temp and the files created by the application in C:\Users\<username>\AppData\Roaming\Your App Data will be deleted.