Condition file installation based on user language selection

The following article uses options that are available starting with the Professional edition and project type.
It is common to encounter situations where a file with the same name needs to be installed based on specific conditions. In our case, we will demonstrate how to conditionally install a file with the same name based on the language selected by the user during installation. We will provide users with the option to select their preferred installation language, and the appropriate file will be installed accordingly.
Of course, the condition for the file installation can be based on the result of a search operation, a custom action, or any other criteria you may need. In our case, we will use the language selected by the user during installation as the condition.
1. Create project

After launching Advanced Installer, you will be presented with a dialog where you can choose the type of the project you want to create.

Select Professional and press the Create Project button. The new project has been created and from now on you will edit it.
![]() Save the project and give it an appropriate name - let's say "Condition File
Installation Sample" for this example.
Save the project and give it an appropriate name - let's say "Condition File
Installation Sample" for this example.
2. Enter product details

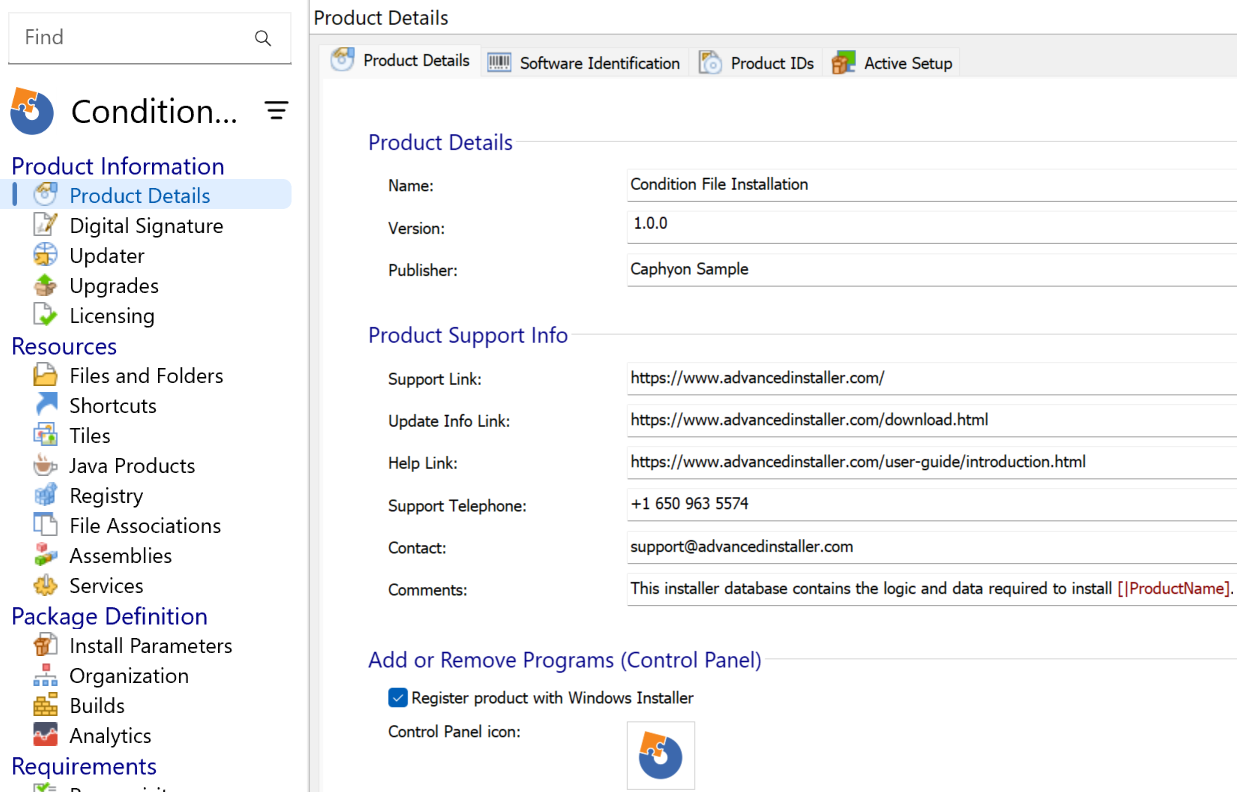
Now you can see the main view split into two panes. In the left pane, you can see all the options you have to edit in your current project, grouped in categories.
![]() Switch to “Product
Details” page to set the information seen by the user for your installation
package. Fill the fields in the right pane with the corresponding data.
Switch to “Product
Details” page to set the information seen by the user for your installation
package. Fill the fields in the right pane with the corresponding data.

The information from this view will be displayed in the Control Panel.
3. Add files and folders to your project

![]() Select “Files and Folders” from the
“Resources” menu on the left pane.
Select “Files and Folders” from the
“Resources” menu on the left pane.
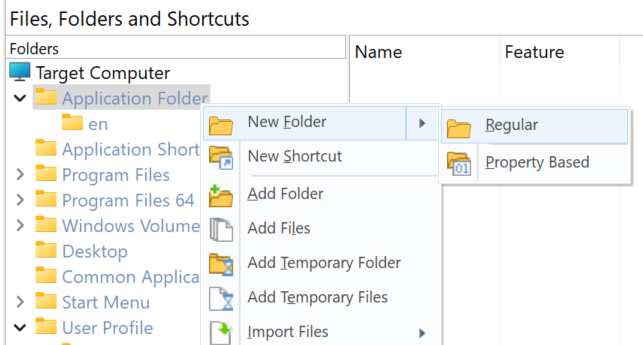
By default we cannot place 2 files with the same name in the same folder. In this case, we will create a dedicated folder for each file:

Once we've created the folders it is time to add the files.
![]() Click on the toolbar button and select the files
of your application, or use the drag-and-drop to add resources from
the disk to the project.
Click on the toolbar button and select the files
of your application, or use the drag-and-drop to add resources from
the disk to the project.
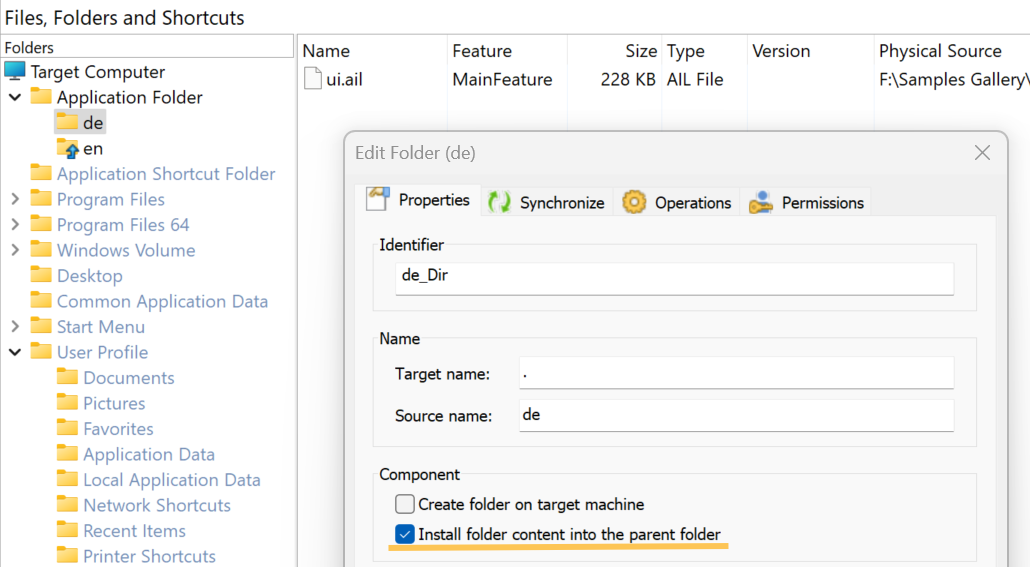
As it is configured now, the installer will create dedicated folders on disk for each file. However, we need to install files in the parrent directory and only a single file. To install files in the parrent directory, we can enable the Install folder content into the parent folder flag from the folder properties.

Once the option to install folder content into the parent folder
is enabled, an arrow icon
appears on the folder.
4. Create the multi language package

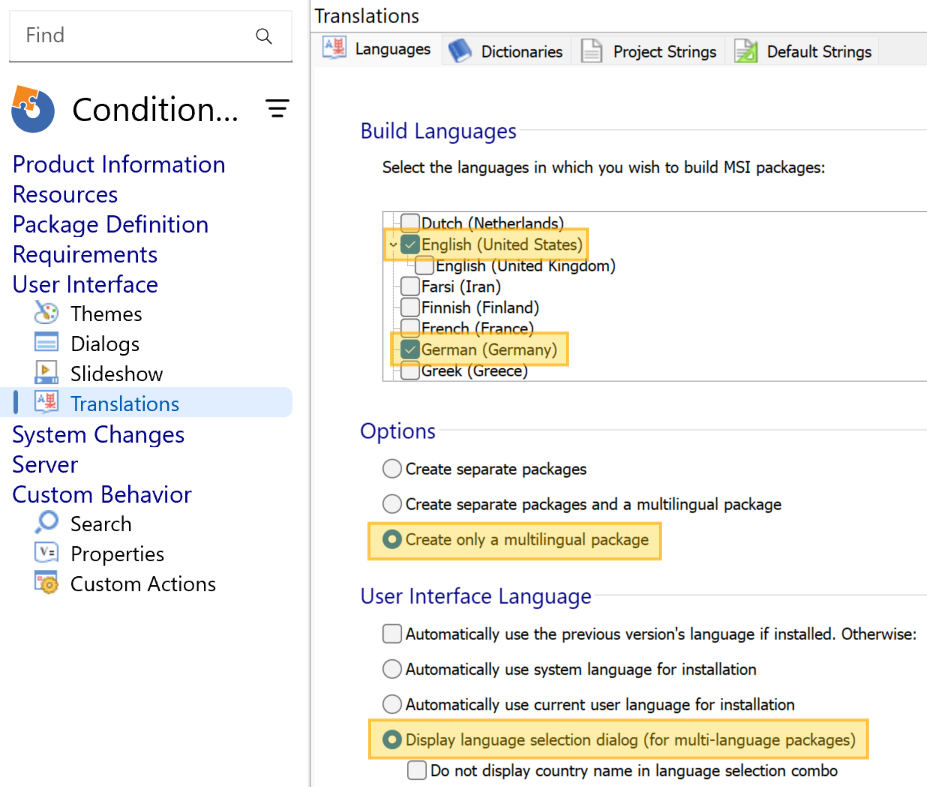
In the Translations view we can add other languages to the package.
In our case, we'll add the German and configure the setup to display the language selection dialog at the begining of the installation. Based on the selected language, the corresponding file will be installed. Use the below image for guidance:

5. Condition file installation

So far we haven't configured the setup package to condition the file installation. We've only added resources and created the multi-language setup.
To condition the file installation you can take advantage of the component properties. Through the condition field we can condition the file installation. Use the ProductLanguage property to condition the file installation. The setup will automatically set at runtime the ProductLanguage accordingly:

A component is a "container" for one or more resources associated with the application
install. Such resources are files and registry keys. The Setup package does not work
directly with resources e.g. files, registries, instead it works with features and
components to decide what files should be installed or not.
6. Build and install

If you build and install the resulted setup package, you will notice that only one file will be installed, based on the selected language.