Validate user input for password complexity
The following article uses options that are available starting with the Enterprise edition and project type.
There are cases where validating user input is essential. In our scenario, we'll validate the user's password for complexity, as it will be used to create a secure login on the machine (e.g., the user's password).
To meet security standards, the password should:
- Be at least 8 characters long
- Include at least one special character
- Include at least one uppercase letter
- Include at least one digit
Advanced Installer can be configured to enforce these password complexity requirements to
ensure user input meets the necessary security criteria.
1. Validate password
To validate the user input, we will use a custom action, in this case we'll use a powershell custom action.
Advanced Installer provides predefined support for integrating custom actions and
supports a wide range of custom actions written in C++, .NET, DTF C# or scripting languages such as
PowerShell.
Before diving into Advanced Installer, ensure that your code is able to validate the password complexity. Once the code has been tested and everything is working as expected, we can start working on the integration with the installer.

In case the password does not meet the security standards, our code will successfully detect:

Here's the snipped code that performs this check, feel free to make any changes to match your scenario:
# Function to check password complexity
Function Check-PasswordComplexity {
    param (
        [string]$Password
    )

    # Define the regex patterns for the password requirements
    $LengthPattern = "^.{8,20}$"
    $SpecialCharPattern = '[!@#\$%^&*()_+={}\[\]:;"<>?,./\\|]'
    $UpperCharPattern = '[A-Z]'
    $DigitPattern = '\d'

    # Check each requirement
    $LengthCheck = $Password -match $LengthPattern
    $SpecialCharCheck = $Password -match $SpecialCharPattern
    $UpperCharCheck = $Password -cmatch $UpperCharPattern
    $DigitCheck = $Password -match $DigitPattern

    # Check if all requirements are met
    if ($LengthCheck -and $SpecialCharCheck -and $UpperCharCheck -and $DigitCheck) {

				Write-Host "Password meets the security standards." -BackgroundColor Green

    } else {

        Write-Host "Password does not meet the security standards. Make sure your password is:"

        if (-not $LengthCheck) {
            Write-Host "- at least 8 characters long" -BackgroundColor DarkRed
        }
        if (-not $SpecialCharCheck) {
            Write-Host "- includes a special character" -BackgroundColor DarkRed
        }
        if (-not $UpperCharCheck) {
            Write-Host "- includes an upper-case character" -BackgroundColor DarkRed
        }
        if (-not $DigitCheck) {
            Write-Host "- includes a digit" -BackgroundColor DarkRed
        }
    }
}

$Password = "test"
Check-PasswordComplexity -Password $PasswordSince everything is working fine outside the installer, we are ready to integrate our checking in the project.
2. Create project
After launching Advanced Installer, you will be presented with a dialog where you can choose the type of the project you want to create.

Select Enterprise and press the Create Project button. The new project has been created and from now on you will edit it.
![]() Save the project and give it an appropriate name - let's say "Validate User
Input Sample" for this example.
Save the project and give it an appropriate name - let's say "Validate User
Input Sample" for this example.
3. Enter product details
Now you can see the main view split into two panes. In the left pane, you can see all the options you have to edit in your current project, grouped in categories.
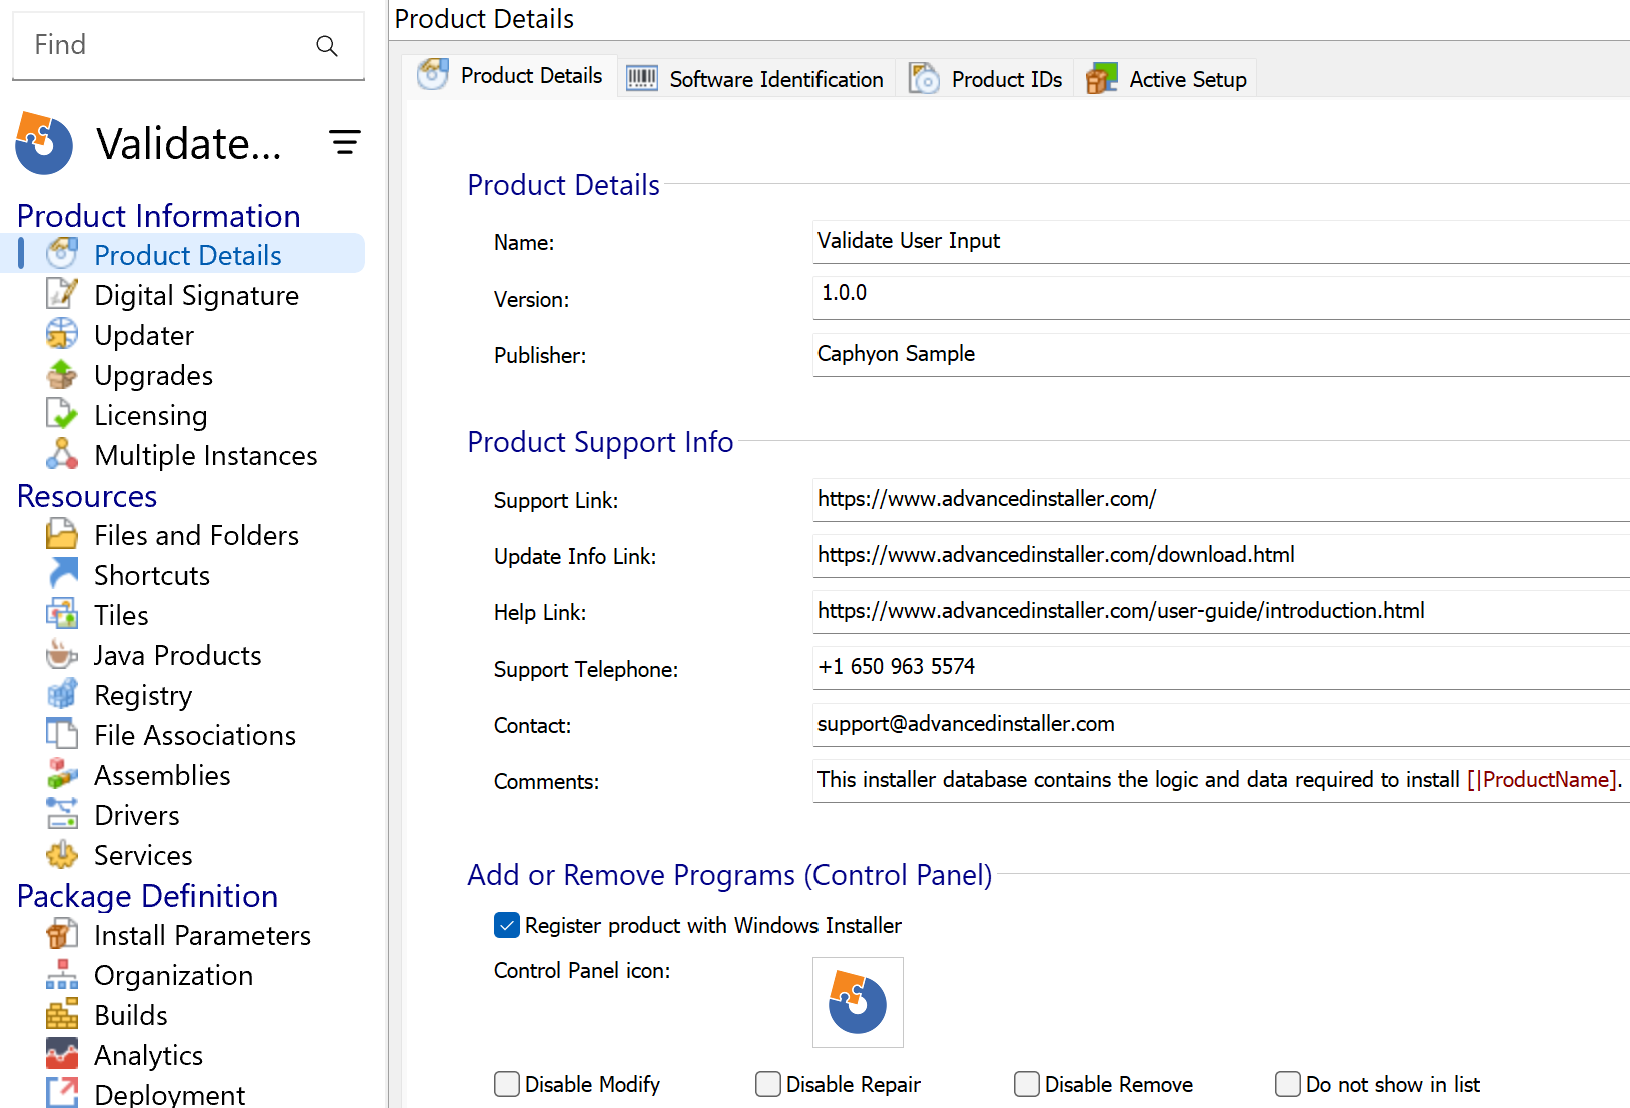
![]() Switch to “Product
Details” page to set the information seen by the user for your installation
package. Fill the fields in the right pane with the corresponding data.
Switch to “Product
Details” page to set the information seen by the user for your installation
package. Fill the fields in the right pane with the corresponding data.

The information from this view will be displayed in the Control Panel.
4. Set Theme
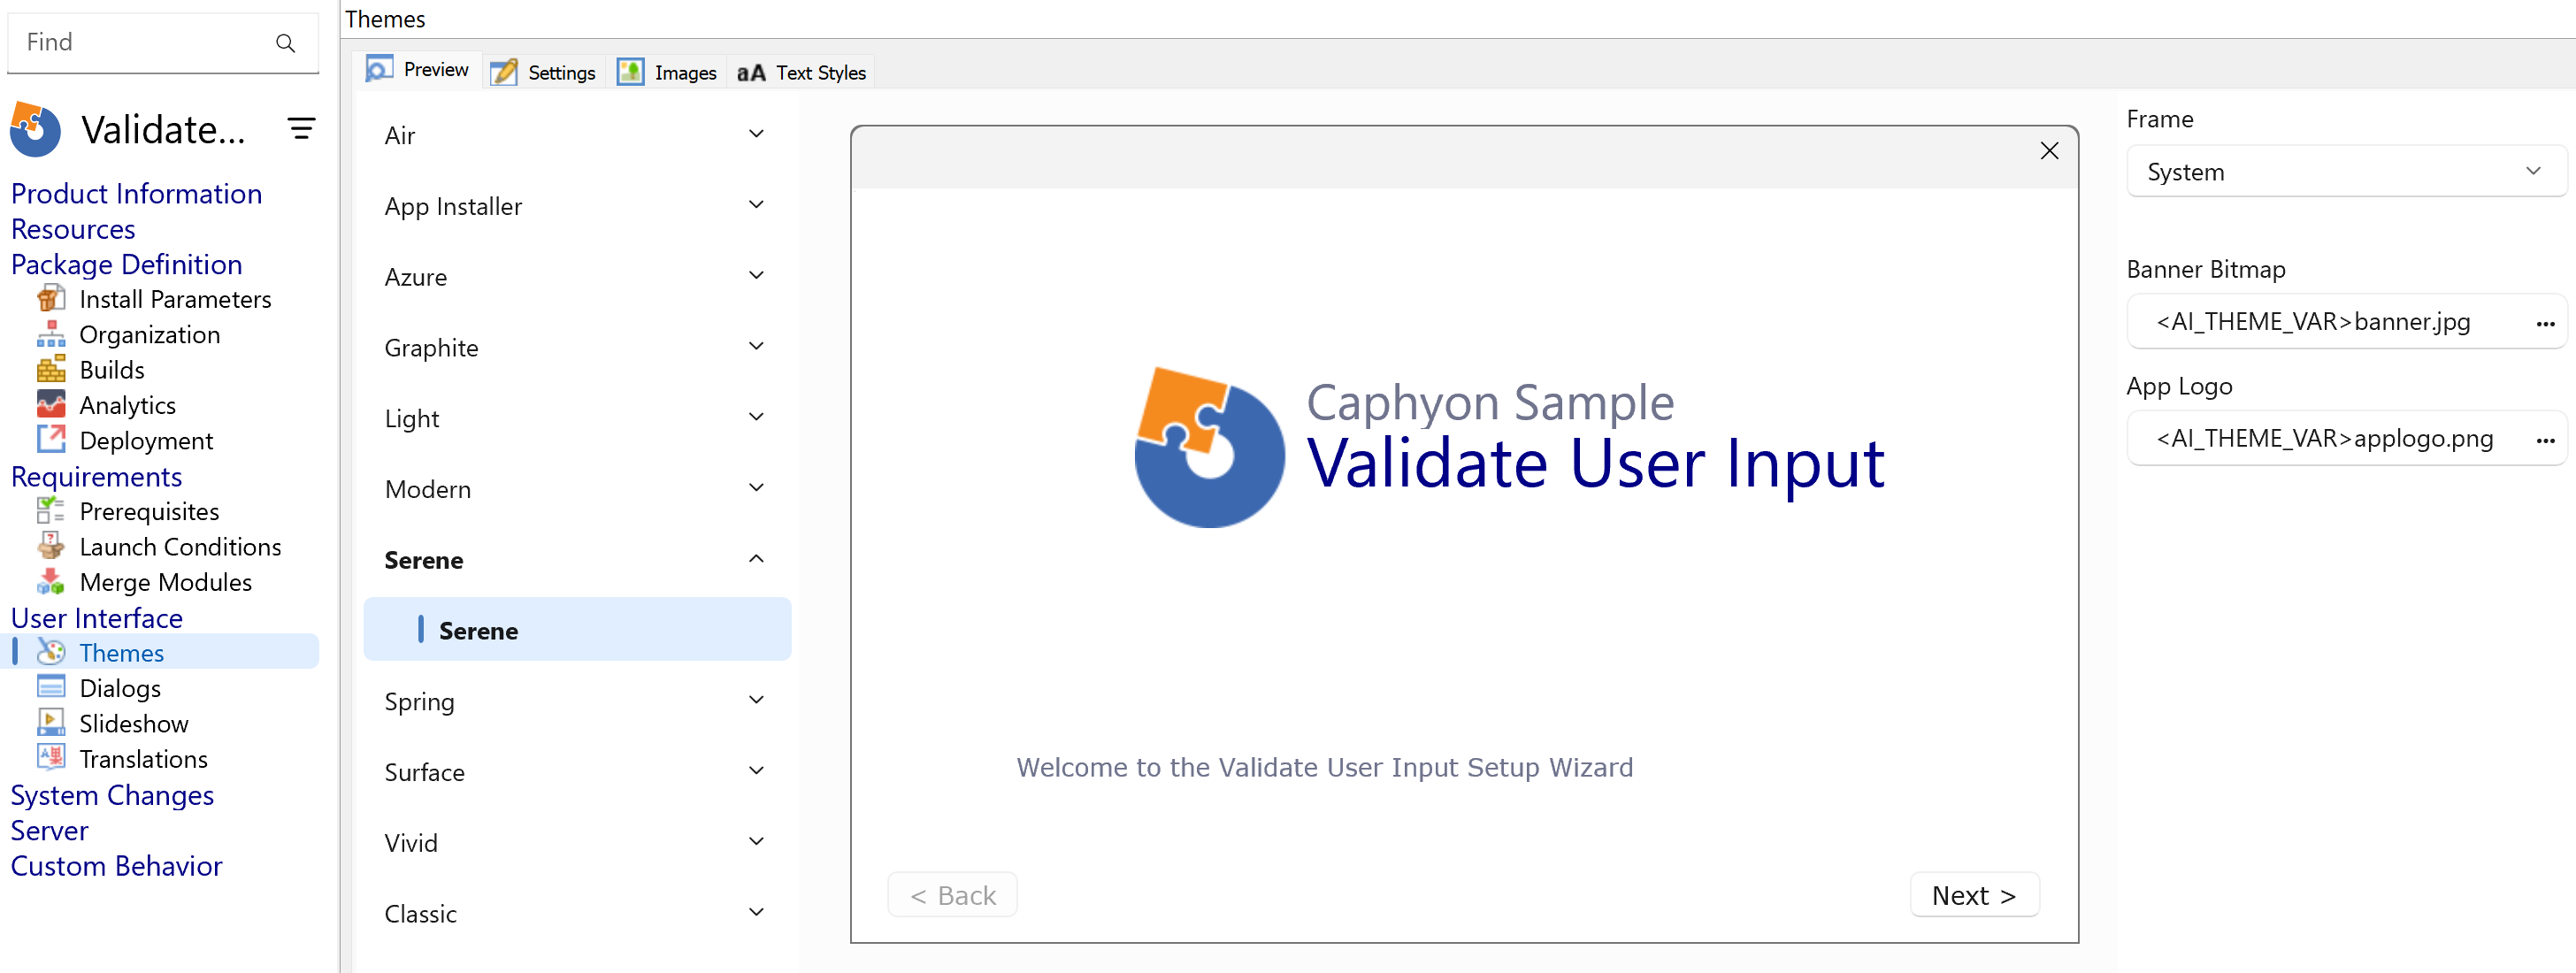
Since we are about to customize the dialogs to capture the user input, we need to select first the Theme for the installer. Advanced Installer comes with a predefined themes and variations which you can choose from. In the Themes view feel free to chose the one that is more suitable for your design.
If you change the theme for the installer later, any customizations made to the
dialogs will be lost. The dialogs will revert to the default ones provided by the new
theme.
For the current sample, we will select the Serene theme:

5. Configure the Custom Action
Select the Custom Actions view from the left menu and from the list of custom actions, add the PowerShell inline script as a custom action without sequence. This will allow us to execute the custom action on the Validate Password control as a published event.

To inform the user that the password does not meet the security check, you can use the message box custom action.
He's how the costom action that handles the user check looks like:

6. Create the dialog that will capture user input
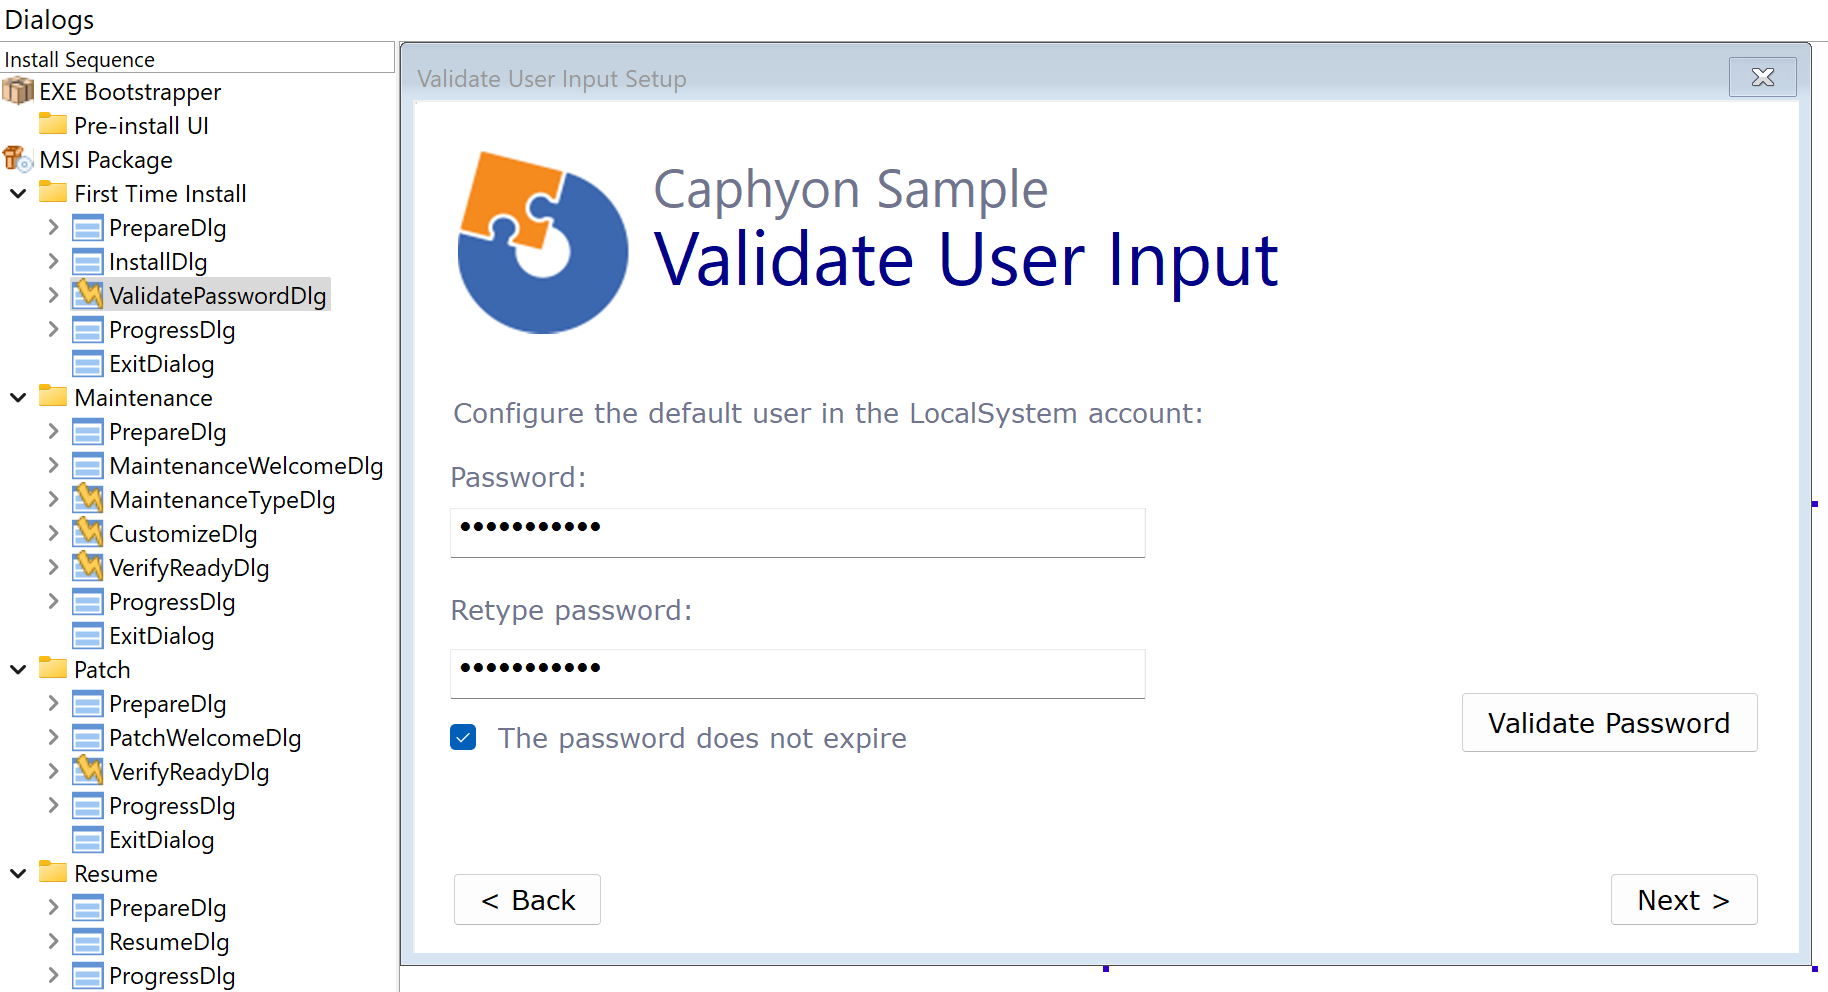
Select the Dialogs view from the left entry. Basically you need to add a new dialog or change an existing dialog to match your design. In the current example, I've added a new dialog and started adding installer controls based on scenario:

Here's how the dialog that captures the password looks like:

We can see the the following UI elements:
- Password: edit box where the user is asked to input the password
- A second field for the password so that we can check the password is well know by the user. In case the password is not the same, an error will be displayed to the user
- Validate Password which is a push button that will execute the custom action that handles the password validation
We'll conditionally enable the Next control based on the result of the password check.

To keep things more clear, we'll add a dedicated push button to execute the custom actions that handle the password check and informing the user if the password is strong enough or not.

Here is the full custom action code that handles the password complexity check:
#Requires -version 3
Param()

# When testing or debugging your script, you can quickly display a message box
[System.Reflection.Assembly]::LoadWithPartialName('System.Windows.Forms')


# Function to check password complexity
Function Check-PasswordComplexity {
    param (
        [string]$Password
    )

    # Define the regex patterns for the password requirements
    $LengthPattern = "^.{8,20}$"
    $SpecialCharPattern = '[!@#\$%^&*()_+={}\[\]:;"<>?,./\\|]'
    $UpperCharPattern = '[A-Z]'
    $DigitPattern = '\d'

    # Check each requirement
    $LengthCheck = $Password -match $LengthPattern
    $SpecialCharCheck = $Password -match $SpecialCharPattern
    $UpperCharCheck = $Password -cmatch $UpperCharPattern
    $DigitCheck = $Password -match $DigitPattern

		AI_SetMsiProperty PASS_STRONG ""

    # Check if all requirements are met
    if ($LengthCheck -and $SpecialCharCheck -and $UpperCharCheck -and $DigitCheck) {

				Write-Host "Password meets the security standards."
				AI_SetMsiProperty PASS_STRONG "true"

    } else {

        Write-Host "Password does not meet the security standards. Make sure your password is:"

        if (-not $LengthCheck) {
            Write-Host "- at least 8 characters long"
        }
        if (-not $SpecialCharCheck) {
            Write-Host "- includes a special character"
        }
        if (-not $UpperCharCheck) {
            Write-Host "- includes an upper-case character"
        }
        if (-not $DigitCheck) {
            Write-Host "- includes a digit"
        }
				AI_SetMsiProperty PASS_STRONG "false"
    }
}

# Example usage:
#[System.Windows.Forms.MessageBox]::Show($Password)

$Password = AI_GetMsiProperty USR_PASSWORD
Check-PasswordComplexity -Password $PasswordIn the above custom action, the PASS_STRONG property is set if the password complexity passes the requirements or fails. We'll use this property to conditionally display some informative messages to the user:
- informative message when the password does not meet the complexity
- informative message when the password does not match
- informative message when the password pass the complexity requirements
7. Build and install
If you build and install the resulted setup package, you should notice the user selection being displayed in the edit box control:
