Creating Suite Installations

Starting with Advanced Installer 23.0, the recommended approach for
building suite installers is described in the Creating Modern, Store-Like Suite
Installers article.
This tutorial will explain how to create a single bundle installation for multiple applications, in this case just three, but you can have as many as desired. This way your users will have a simpler UX during the installation, as you will give them the option to download a single setup package and use that to install all your applications.
For this example we will consider you have three applications, one is a license manager and the other two are separate applications that you deploy to your users. The licenses manager would be used by all users to manager their credentials in your other two applications.
To proceed further on you must already have built your individual setup packages for the
three applications mentioned above. Download our set of sample
projects for this tutorial to get a closer look. Important, you must
first open and build the projects from the three sub-folders found in the sample in order to
be able to build the main project called “Suite Installation“.
The following article uses options that are available starting with the Enterprise edition and project type.
1. Create the project

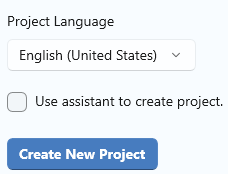
First step is to create a new empty Enterprise project, without using the wizard. If Advanced Installer is not currently running, launch it by double-clicking a desktop icon or selecting it from the “Start“ menu. When the application starts, you will see a dialog where you can choose “Installer Project” - “Enterprise” project type.

Don't forget to untick the option “Use Assistant to create the project.“, as we said, for this project you need to start with an empty project, so you can skip the wizard.

2. Setup your suite installer product details

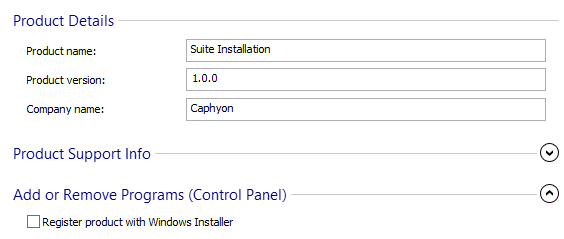
In “Product Details“ page you must configure the information from groups “Product Details“ and “Add and Remove Programs(Control Panel)“. The most important step here is to make sure you untick the option “Register product with Windows Installer“.
Disabling this option you will make sure that your bundle installer will never appear listed in Control Panel, list of installed applications. There you will only see the real applications that the bundle will install, each with its separate entry. Lets see how you add those applications in the project.

3. Add your setup packages

To to add the packages to the project, just go to “Prerequisites“ page, where you need to add each package as a prerequisite scheduled during Main Package. This will result in having a new feature created for each package in the Organization page. By setting conditions on the features (explained later in this tutorial) you will be able to control which applications get installed or not.

After you add the packages, you can select each one of them and continue configuring it from the right side pane. There you have three tabs, “Files“, “Installation“ and “Conditions“. Each of these tabs contains important settings that you must define.
In “Files“ tab you must define the location of yor package an other related information. In “Installation“ there is a very important area that needs to be customized, that is the “Command Line“. This command line get passed to your packages when the bundle installer will execute them. The most important thing is to set the application to install silently, this is easy. For MSI packages the command line is /qn and for EXE packages built with Advanced Installer it is /exenoui /qn.
Please note that if you have an EXE built with another tool, not Advanced Installer, then you
must set the command line as documented for that tool.
In the below image you can see an example command line. It starts with the "/qn" option to specify this is a silent installation, then sets the property APPDIR with the value of the parent installation folder, and at the end it sets another property from the installer, that is configured to store a port number in this example.

In “Conditions" tab you must select the option "Always install prerequisite" for all packages, be it MSI or EXE.
4. Create a custom selection dialog

First of all, you should see by now that our samples use the Graphite theme, but the same applies to other themes too. You can change the installer theme from “Themes“ page, “Preview“ tab.
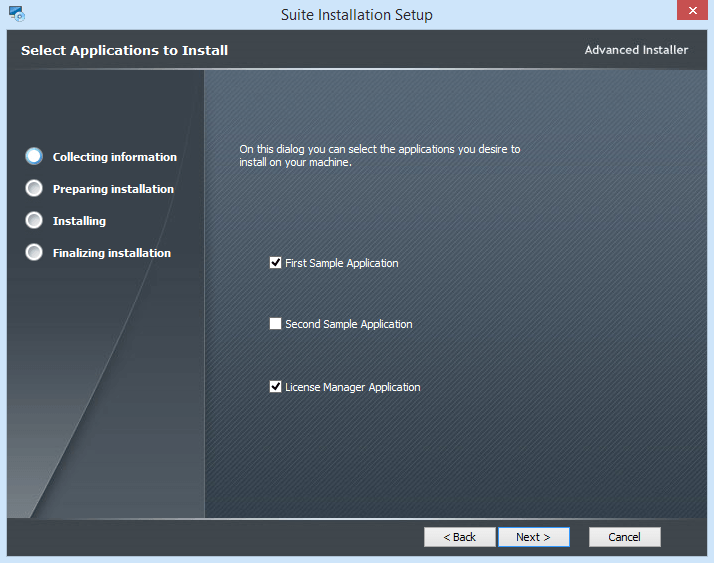
Since your suite installation will install three different applications, you might want to let the user select which application to install. This is an optional step, which you may skip if you want your users to always install all applications.
In this step we will show how to create a new installer dialog with custom controls on it, in this case simple checkboxes, based on which the suite installer will decide which application to install or not. First you should remove the “FolderDlg“ predefined dialog from the list, as this dialog is not useful for suite installations, this can be done from Dialogs page.
Now you can create a new empty dialog on which you can add the desired texts and checkbox controls, from our toolbox, to get a dialogs similar with the one from below. You should also inspect the sample project attached for a better insight.

Each checkbox has attached a property to it, visible in the right side pane from Advanced Installer when you select the checkbox control. This property must be set as an install condition for the corresponding feature, in Organization page, as you can find it set in the attached sample project.
5. Additional Install Options

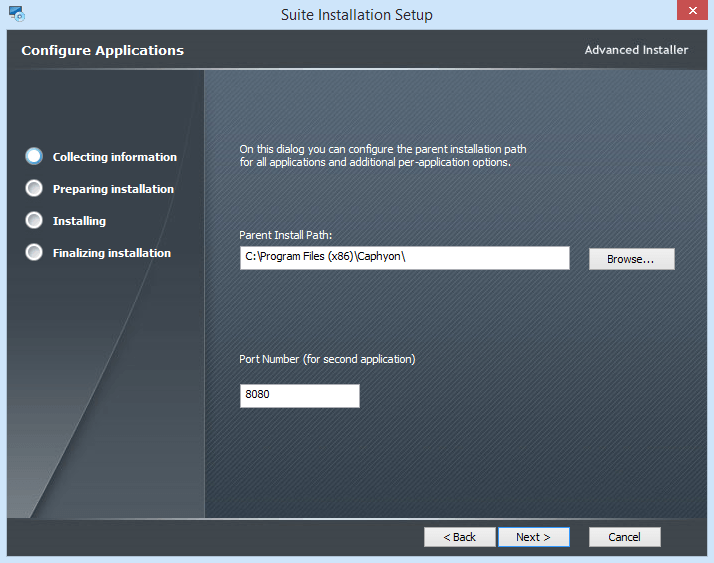
In Dialogs page you can create and chain as many new dialogs as desired. This way you can show certain dialogs only if a specific application is selected to be installed, or you can hide/show, enable/disable UI controls from the dialogs.
In the below image there is an example of capturing the parent install path for all applications. We say it is the parent install path, because at the end of this path we instruct the application to create their own sub-folder, by adding this folder in the command line set. For example for the second application we create the sub-folder “SecondFolderApp“, as you can see in the screenshot from step 3.
Also, we capture the port number for the second application and pass that through the command line too. As you can see all parameters required by the actual installers are passed in their command lines. There is no other way to pass information from the suite installation to the independent installer packages.

6. Configure Output Package

To have your suite installation be a single package you must go to Builds page and set the package type to “Single EXE setup(resources inside)“, this will make Advanced Installer generate a single EXE as ouput that your users can download.
Another important configuration, you must enable the option “Run as administrator“ from “Install Parameters“ page. This option is important as it will ensure your applications inherit the elevated credentials from the bundle installer, so they can install accordingly. Having this option disabled might lead to failed installations.
7. Build Project

![]() Build and run the project to test it.
Build and run the project to test it.
Now that you have finished configuring the project you can build the bundle. Advanced Installer will build a single EXE package which in turn contains all your applications, be it MSIs or EXEs, and will silently install them based on the user selections.