How to install a Windows service through an MSIX package.

This tutorial will guide you step-by-step in creating an MSIX package that installs a Windows Service. Also, here you can find a .zip file that contains a sample Windows Service and an Advanced Installer .AIP project configured to build an MSIX package that installs it.
1. Create project

The first step is to create an MSIX project.
- Launch Advanced Installer.
- Create a new MSIX Package project from Start Page.

The New MSIX Package Wizard will be launched, assisting you to configure the project settings.
2. Add the service executable file

The next step is to add the service executable file to your project.
Go to Files and Folder page and click on Add files toolbar button or just drag and drop the service executable from Windows File Explorer.
3. Declare the service

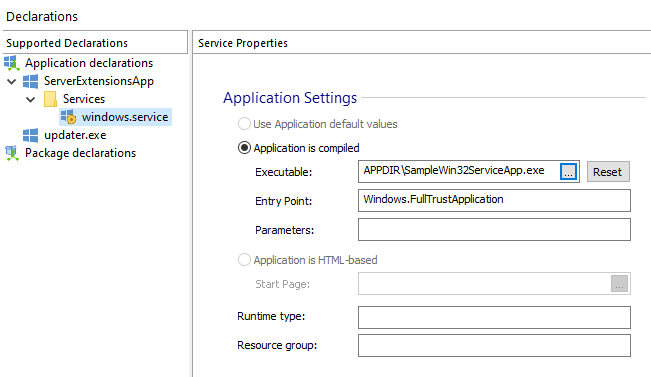
For MSIX projects, Windows services can be configured in Declarations page.
Click on Add Application Declaration toolbar button and select Service type declaration.
Pick the Executable (the service file), enter the Entry Point (mandatory).
For desktop applications, the Entry Point is always
Windows.FullTrustApplication.
You can also configure the other applications settings for your service such as Parameters, Runtime type, Resource group, etc.

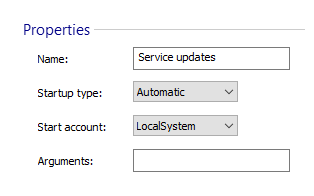
In the Properties field enter the desired service Name, choose the Startup Type and Start Account and enter Arguments for the service (optionally).

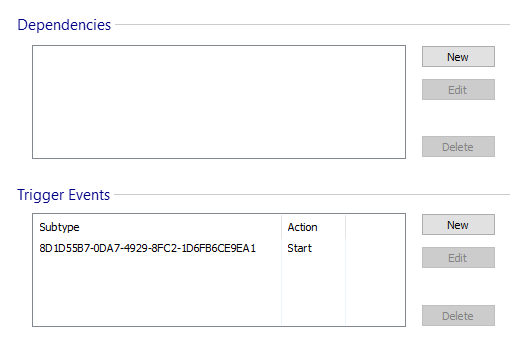
Also, dependent services and custom trigger events can be specified:

4. Build the project

Go to Builds page and press the Build toolbar button in the ribbon or F7 key to create your package.