Repackaging using VMware vSphere

The following article uses options that are available starting with the Architect edition and project type.
The tutorial shows how you can use VMware vSphere (v6.0 or higher supported) and the Advanced Installer Repackager to repackage a legacy installer.
1. Configuring VMware vSphere

To begin repackaging, the two core components of vSphere must be configured properly.
- ESXi - the virtualization platform where you create and run virtual machines.
- vCenter - the service with which you manage hosts connected to a network and pool host resources.
We support connections to a single ESXi host as well as to a vCenter Server or to
any other virtualization platforms that share the vSphere API.
The feature can only be used if the machine on which you are running Advanced
Installer has a Windows 8 or higher operating system.
For more information about VMware vSphere configuration see the VMware
docs.
2. Launching the Repackager

Open Advanced Installer and go to New > Project Category > Convert > Repackage Installation to start the Repackager wizard.

3. Setting up the Repackager

After you select what installer you want to repackage, you can begin configuring the operation.
The package information from the installer is displayed here. You can also configure multiple applications to be repackaged at once, use "Additional packages" link to add them. For more information about this tab see this page.

3.1 Edit a virtual machine profile

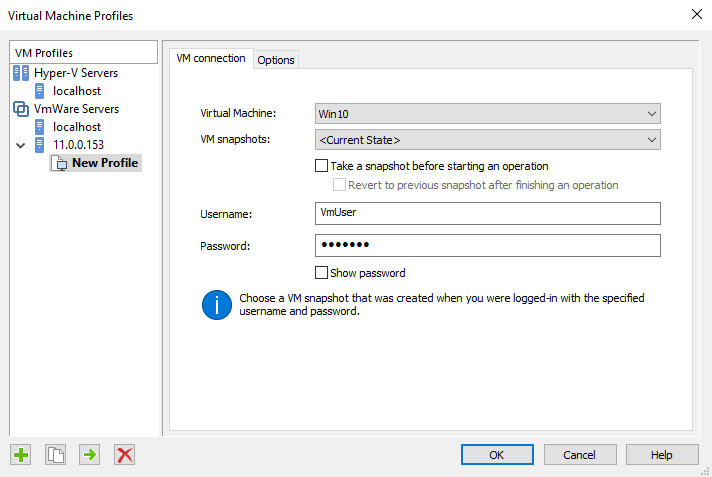
Select/configure a virtual machine profile by pressing on the down arrow on the "Start in VM" button and selecting "Edit Virtual Machine profiles."

3.2 Select the virtual machine host

1. Right-click on VMware Servers and select from the drop-down “New Server Connection.”
- Server address & port: set the address and port of your vSphere server
- Username: vSphere server username
- Password: vSphere server password
2. Right-click on the server connection and create a profile by selecting “New Profile.”
3. Select the “Virtual Machine” and “VM snapshots” you want to use for repackaging.
4. Enter the Username and Password of the select Virtual Machine for automatic login.

4. Repackaging using vSphere

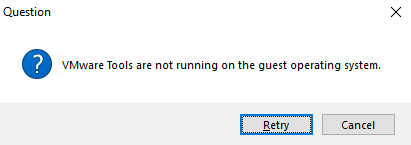
VMware Tools must be installed and running on the virtual machine operating
system.
If the virtual machine has not started or VMware tools are not installed/running, you get the following dialog.

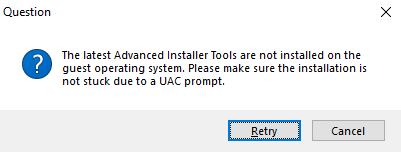
Advanced Installer Tools are installed or begin running before the repackaging
operation starts.
If Advanced Installer tools are not installed, you get the following dialog.

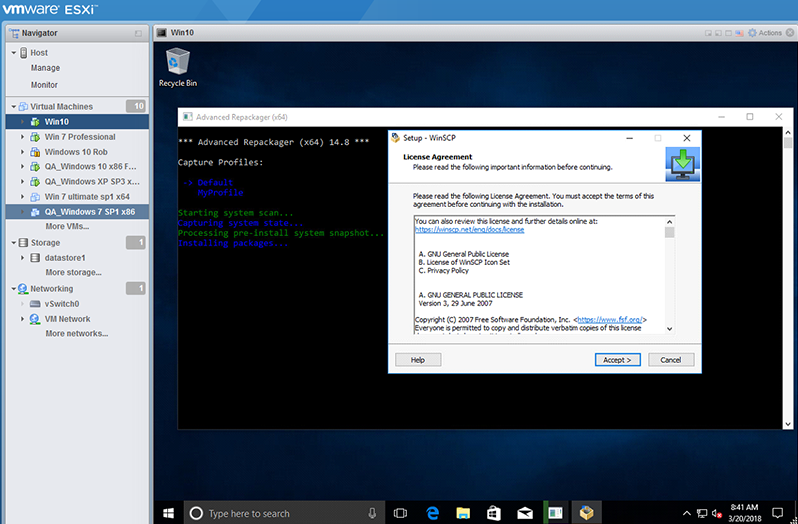
After both tools are installed and running, the repackaging operation begins. The Repackager takes an initial system snapshot, and a snapshot after the package was installed, this way it detects all the changes done by the installer and capture the resources.

5. Package installation

The package is launched, and after the installation is complete, the system is scanned again for changes.
The result is saved as a session under History and as a .rpk file on the disk.
Press "Continue in Advanced Installer" to make the final touches on the newly repackaged installer.

6. Import results

Press the button to import the installation capture results, into the new Advanced Installer project.
7. Customize the project

After importing the installation capture results, you should review the Advanced Installer project and adjust it to your new package deployment needs.
8. Run project

![]() Build and run the project to test the newly created installer.
Build and run the project to test the newly created installer.