Project Options Dialog

In this dialog you can edit project options like paths, project type, caching and path variables.
Project Type Tab

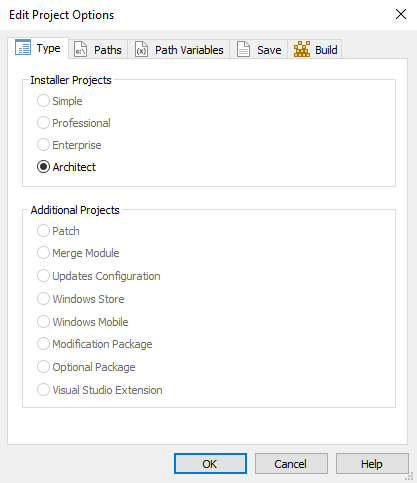
This tab allows you to change the type of project.
By default, the current project type is displayed. If you want to modify it, simply select the desired project type.
The allowed conversions are:
- Simple to Professional, Enterprise or Architect
- Professional to Enterprise or Architect
- Enterprise to Architect

Note that this change is irreversible.
Below there is a short video to visually discover this functionality:
Project Paths Tab

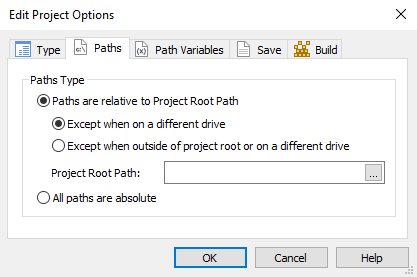
This tab allows you to define how the paths used in the project are handled.

To access the Project Options Tab, on the top pane select
Home and click on Options.
Every file or folder you specify in the project has a source path assigned to it, which is saved in the project file. The path can be stored in two forms:
- as an absolute path (example: "C:\MyApplication\MyResources\Images\MyPicture.jpg")
- as a relative path (example: "Images\MyPicture.jpg")
Having an absolute path for each file allows you to move the project file (.AIP) anywhere on your disk (even on different partitions). The application will still be able to find all the files. But the project file cannot be moved to a different computer, unless you have the files in the exact location (and drive) as on the original computer.
With relative paths, you can easily move all the files used in your project to a different computer. Relative paths are relative to the “Project Root Path”. This can be user-specified and by default it is the path to the folder containing the project file.
Not all the files from a project can use relative paths. For example, files on another partition or drive must use absolute paths. Alternatively, paths outside the “Project Root Path” can also be stored as absolute.
Project Path Variables Tab

In this page you can modify the path variables settings for the project.

Don't use path variables

By default the project will not use path variables.
Automatically convert using existing path variables.

When a file is added it is automatically converted to a path variable without any user prompts.
Prompt for each file that can use path variables.

When a file is added the user is prompted to choose whether he wants to convert it to a path variable.
Project Save Tab

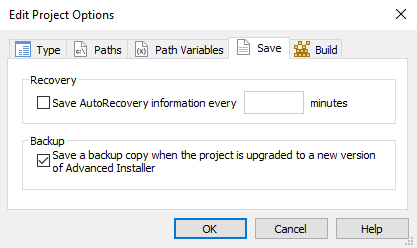
In this page you can customize the project save options.

Save AutoRecovery information

AutoRecovery option is only available for saved
projects.
This option enables the auto-save of the project. The autosaved project will be located on disk, next to the saved project, under ProjectName.autosave.aip name.
A time interval (in minutes) for the AutoRecovery can be specified (the default is 5 minutes).
Backup

Advanced Installer automatically creates a backup copy of projects that where previously saved using an older verion. If you have your project under source control you may disable this option.
Project Cache Tab

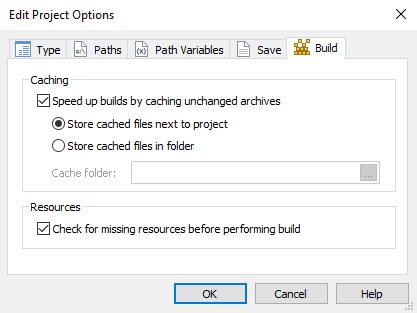
This tab allows you to change the project's caching options.

Caching

To speed up the build process, Advanced Installer will store and reuse the archives it creates. Next time an archive with the same(unchanged) content will be required by a build process, the stored archive will be reused.
Enabling cache

You can enable caching in your project archives by selecting the “Speed up builds by caching unchanged archives” check-box.
Store cached files next to project

A sub-folder is created in the project folder; and will be used for caching.
Store cached files next in folder

This option allows you to specify a particular folder to be used for caching.
Disabling cache

You can disable caching in your project by unselecting the “Speed up builds by caching unchanged archives” check-box.
When disabling the cache, the cached files are deleted.
Reusing archives

Advanced Installer has reduced to a minimum the number of compressing tasks to improve the build performance. For that, it relies on source files dates and size to decide whether the cached archives can be reused by the current build operation.
If the source files are changed, the stored archive will be removed and rebuilt.
In order to perform a clean build without reusing cached archives,
you can use the “/rebuild” command-line or the Rebuild
context menu button from the Builds
page.
The OS does not guarantee that the file dates are updated in real
time so there might be situations when the cached archives are used even
if a source file content has been modified (without changing its dates
and size). You should always rebuild the project for your release
deployments to make sure that the newest source files are
used.
Resources

Check for missing resources

"Check for missing resources before performing build" makes sure that pre-build events have the required resources.