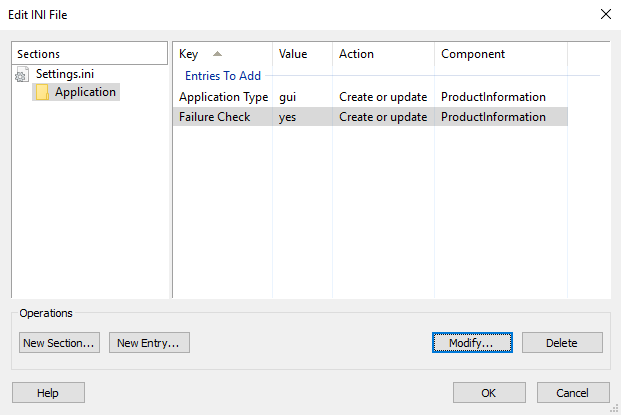
Edit INI File Dialog
Windows uses INI files to configure application settings. With the help of Advanced Installer’s dedicated Dialog, you can edit an INI file by adding, removing and modifying file sections and entries.

Add a section
Use the , the “New...” tree context menu item or press the Insert key while the focus is in the “Sections” panel.
Windows Installer only takes into considerations INI entries (not sections). Empty sections will
be discarded when this dialog is closed.
Add an entry to an INI file
Use the , the “New...” list context menu item or press the Insert key while the focus is in the entries panel (right panel). The new entry will be added to the selected section. If there are no sections, a default one will be created for you.
Modify a section or an entry
Use the , the “Modify...” tree/list context menu item or press the Space key while the item you want to edit is selected. The Edit INI Entry Dialog will be displayed for editing entries.
The section names are Formatted Type fields, so you will be
able to edit them using the Edit Formatted Type Dialog.
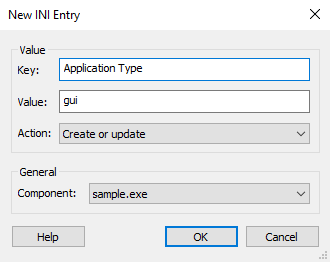
Edit INI Entry Dialog
In this dialog, you can change the Key, Value, and attributes of a single INI entry. The "Key" and "Value" fields' contents can be localized.

The key and value are Formatted Type fields,
so you will be able to edit them using Smart Edit Control.
Value
Action
This combo box allows you to specify the action taken during the installation of this INI entry. The available options are:
- Create or update - the entry will be created if it doesn't exist or it will overwrite the existing entry.
- Create only if it doesn't exist - the entry will be created only if it doesn't already exist.
- Create or append comma separated - the entry will be created if it doesn't exist or the specified value will be appended to the specified key.
- Remove entry - removes the key specified in the Key field.
- Remove tag from entry - removes the value specified in the Value field from the key specified in the Key field.
For example, let's consider this INI:
[Example]
        Key0=Value0
Key1=Value1;Value2;Value3After you use the "Remove entry" option for Key0, the INI will look like this:
[Example]
Key1=Value1;Value2;Value3For this new INI, using the "Remove tag from entry" option for Value2 in Key1 will result in this:
[Example]
        Key1=Value1;Value3