How to Brand Installers for Partners and Customers

When collaborating with partners or customers, it's essential to customize the installer to reflect their specific branding. In addition to branding, there may be other specific differences required for each partner or customer, necessitating further customization to meet their unique needs and preferences.
This customization might include unique dialogs, icons, product names, company names, and additional files tailored to each partner's or customer's needs.
1. Steps to Configure the Installer for a Partner or Customer

1.1 Initial Configuration

The first step is to configure the installer for a particular customer or partner.
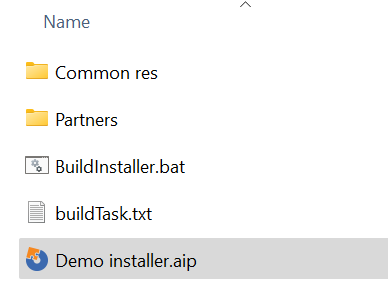
For example, you might end up with the following structure:

The partners will have the following structure, depending on the specific differences between them:

The differences between partners include the banner and dialog images used in the dialogs, a unique EULA for each customer, and even a specific SQL script for each customer.
Start by configuring the installer for a particular customer, say Customer A.
Here’s what the Product Details view looks like:

1.2 Customize the UI Theme

Adjust the UI theme to match Customer A's branding:

1.3 Utilize Global Path Variables

Let's assume we've finished setting up the installer for Customer A. Now, we need to find a way to quickly brand the installer for Customer B.
For this, you can take advantage of the Global Path Variables.
2. Creating a Global Path Variable

To be able to easily convert paths and make resources pointing from one customer to another, here is what you need to do:
1. Create a global path variable that will point to each customer and contain the branding information:

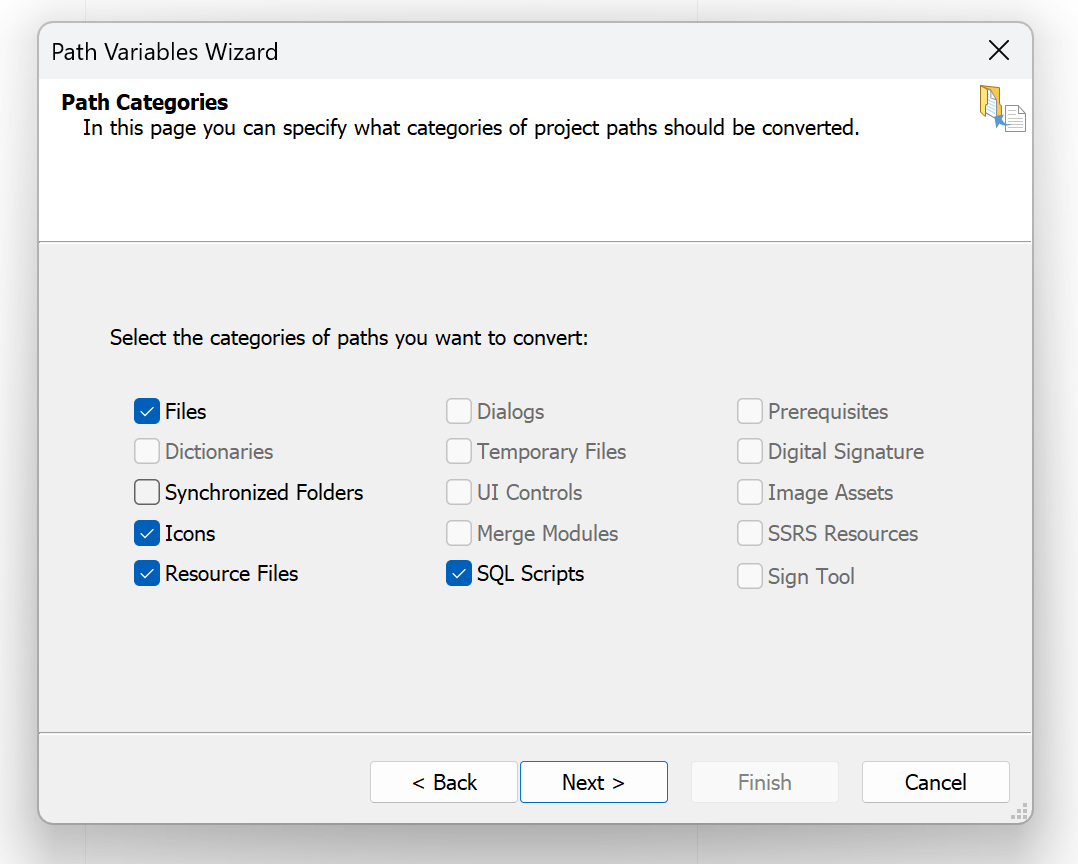
2. Run the Convert Paths wizard to update the files’s path through the property:

3. Select the files that will have their paths updated for each customer:

Make sure to go through each dialog for each category of the paths that you’ve
selected to convert.
So far, we've configured a project that creates an installer for Customer A, but it's also set up to support customization through the command line.
3. Setting Up Command Line Customization

For running all commands at once, we’ll create a file of commands:
;aic
SetProperty Manufacturer="Company A"
SetProperty ProductName="Product A"
SetProperty APPDIR="C:\new install path"
UpdatePathVariable -name CustomerBranding -value "D:\Sample projects\Branding installer\Partners\Customer A" -valuetype Folder -global
Build
Save
By using the UpdatePathVariable command, we’ll be able to point to the specific resources for each customer and update its value when we need to generate a new installer for a different customer.
We’ll set the properties related to ProductName and Company name, and everything else that is specific to each customer, like dialogs, bitmap, logos, and any other resources, will be updated through the global path variables.
To improve the build experience, I always create the following .batch file:>
setlocal
cd /d %~dp0

set workingDir=%cd%
set advInstPath="%advancedinstaller.com%"

%advInstPath% /execute "Demo installer.aip" buildTask.txt

start %windir%\explorer.exe "%workingdir%\Demo installer-SetupFiles" Starting with Advanced Installer v22.0, a dedicated environment variable named
ADVINST_COM is created to store the path of the
AdvancedInstaller.com tool. If multiple versions of
Advanced Installer are installed, this environment variable will contain the path of
the latest installed version. This variable can be used in scripts to conveniently
call command lines.
In the current directory, I run the command file against the project file. The changes between customers are specified within the command file.
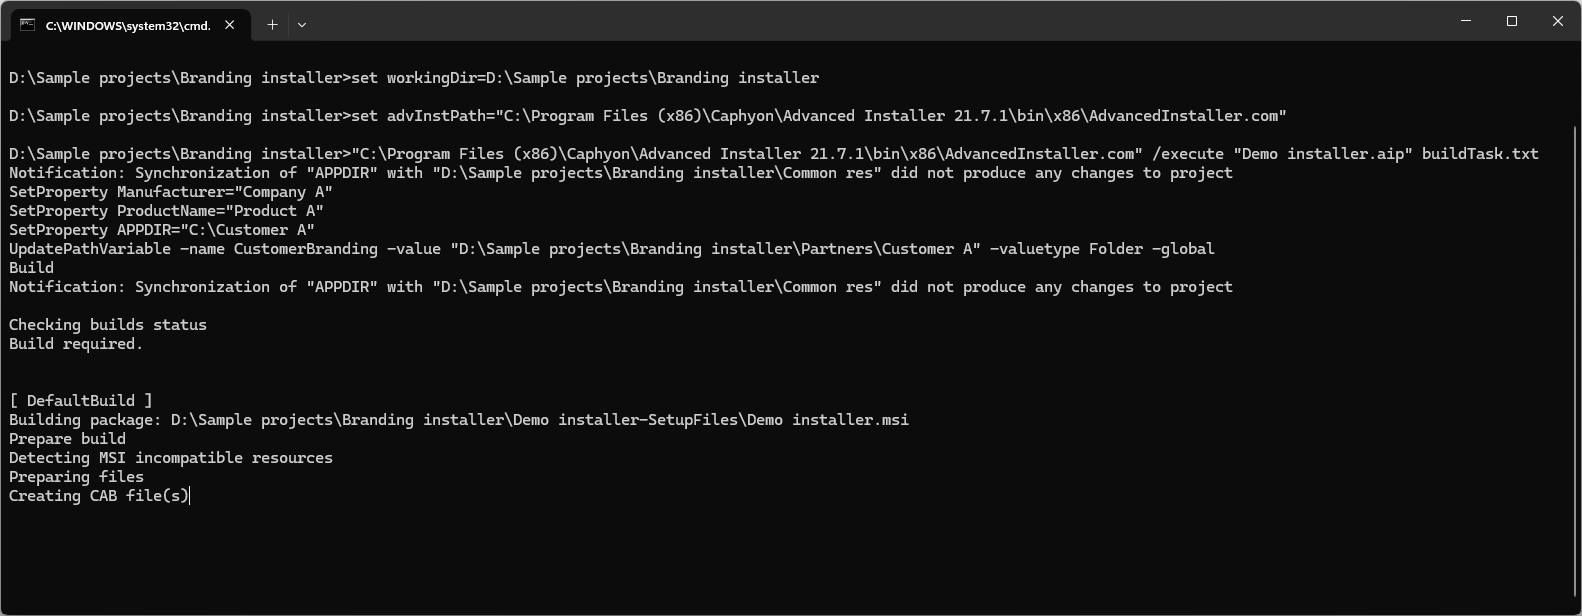
The execution of my project will create the following output in the console:

So, with a few commands, I was able to generate an installer specific for each customer or partner.
Of course, the files specific to each customer—such as dialog bitmaps, logos, EULA, SQL scripts, etc.—will need to have the same name for each customer.
4. Automating Installer Creation - Outcome

With just a few updates to the build task file, we can create installers automatically by simply pointing to and providing different values for our variables.

5. Conclusion

Customizing installers for different partners or customers involves more than just branding; it requires adapting to their specific needs and preferences.
By utilizing global path variables and command files, you can efficiently manage these customizations, ensuring each installer is tailored accurately and consistently.
This approach simplifies the process, saves time, and ensures all customer-specific elements are correctly integrated.