How to Add Custom Prerequisite to Your Project Using WiX Toolset

After creating a software application, the next step is to create an MSI installer for it.
To create a setup package using WiX, you can follow the instructions in this article: How to create an MSI installer with WiX
Once the MSI file is generated, it’s time to add the prerequisites that the application needs to run properly.
Adding Prerequisites with a Bootstrapper Project in WiX

To include prerequisites, you have to create an EXE bootstrapper. This bootstrapper will handle both:
- The installation of the main MSI package
- The installation of the prerequisites
To add a Boostrapper project to our solution, follow these steps:
- 1. Right-click on our solution.
- 2. Select "Add" → "New project…".
- 3. Choose "Bootstrapper project for WiX v3".

Configuring the Bootstrapper

The Bootstrapper project, like the MSI setup, is also defined in XML.
As previously mentioned, we need to define both packages that the bootstrapper will install under the "Chain" node.
We can either do this separately or use a PackageGroupRef (Package Group Reference).

Now, we have to define the PackageGroupRef, which should be added under a Fragment node, as it follows:
<Fragment>
      <PackageGroup Id="MyAppInstaller">
         <MsiPackage
            DisplayName="SetupProjectWix"
            Visible="yes"
             Cache="yes"
            Compressed="yes"
            ForcePerMachine="yes"
            Permanent="yes"
            Vital="yes"
            SourceFile="path/to/msi" />

         <MsiPackage
            DisplayName="SamplePrerequisite"
            Visible="yes"
            Cache="yes"
            Compressed="yes"
            ForcePerMachine="yes"
            Permanent="yes"
            Vital="yes"
            SourceFile="path/to/msi"  />
      </PackageGroup>
</Fragment>
In this example, we define basic properties, such as the display name, whether the setup is installed per machine, and the location of the MSI files.
Adding the custom prerequisites using Advanced Installer

If you prefer a more user-friendly option, Advanced Installer provides predefined support for prerequisites and a wide range of predefined options you can add to your package, such as .NET, .NET Core, Microsoft SQL Server, MySQL, Adobe products, Java, Python, Microsoft Office, Visual Studio, etc.
To simplify the process, we will use the Advanced Installer Visual Studio extension. This extension integrates seamlessly with your Visual Studio environment, allowing you to create and manage installer projects directly within the IDE.
You can download and install the extension from the Visual Studio Marketplace.
Once installed, you can add an Advanced Installer to your solution by right clicking on the solution → "Add" → "New project…" → select "Advanced Installer project"

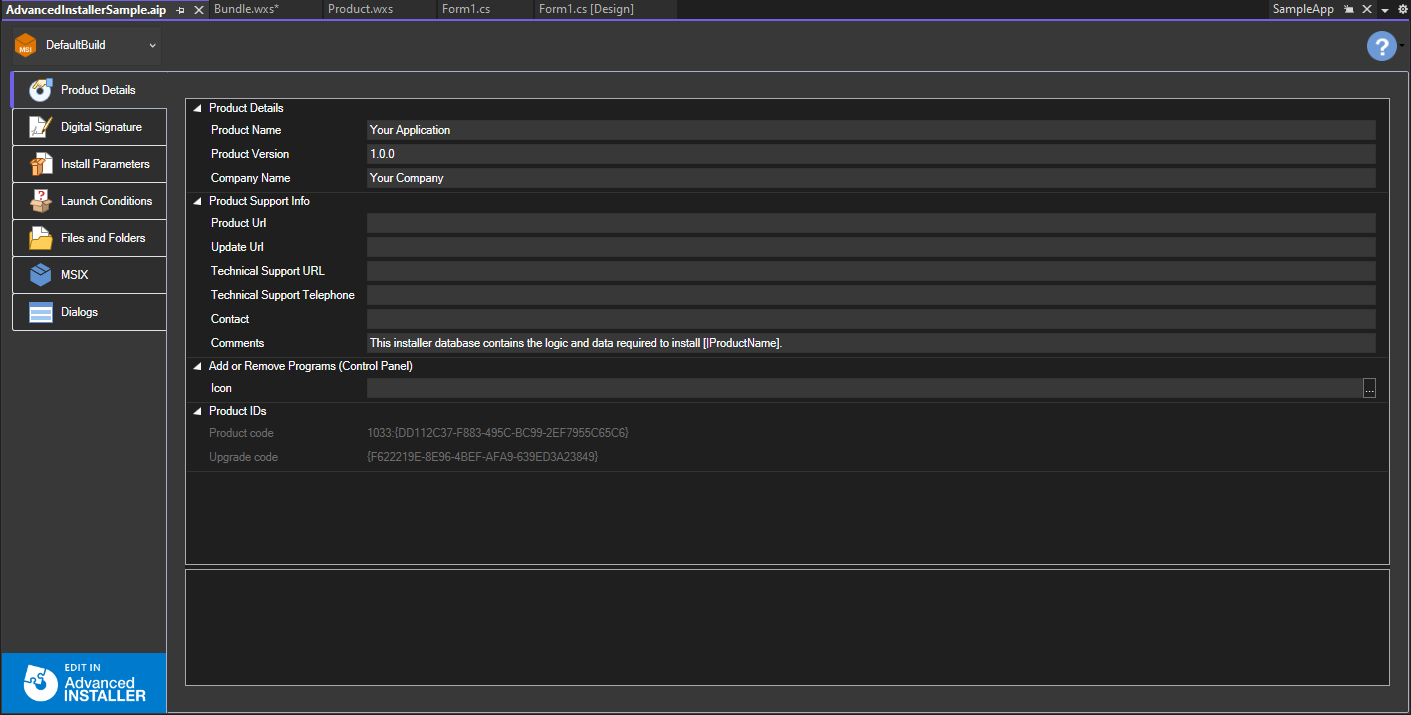
We notice that, unlike WiX, Advanced Installer displays a small UI to help you configure your setup:

Adding Project Output to Advanced Installer

To add the output of our project (C# Application) to Advanced Installer, we can proceed as follows:
- 1. Go to "Files and Folders" page
- 2. Click on "Add project output"
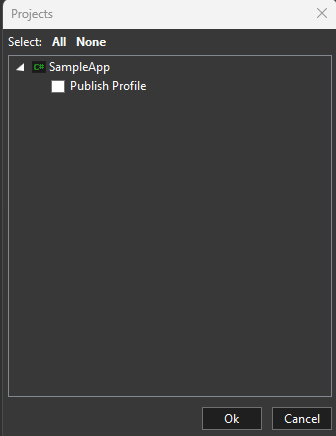
- 3. The project will be detected automatically, and you can select to add its files.

For easier management, choose to publish the application first by right clicking on the project and then click "Publish".
If you select the "Publish profile" option, it will automatically prompt you to publish. There, you can choose the "Folder" option and then publish the application.
After adding your project output, build the Advanced Installer project by right-clicking and selecting "Build".

Adding Prerequisites in Advanced Installer

To add prerequisites, follow the steps:
- 1. Click on the "Edit in Advanced Installer" button located in the left bottom.
- 2. Navigate to the "Prerequisites" page and add your desired prerequisite.

Prerequisites options that are available starting with the Professional edition and project type.
Advanced Installer offers a 30-day free trial with no credit card required. You can download it from this link: Advanced Installer - Free Trial.
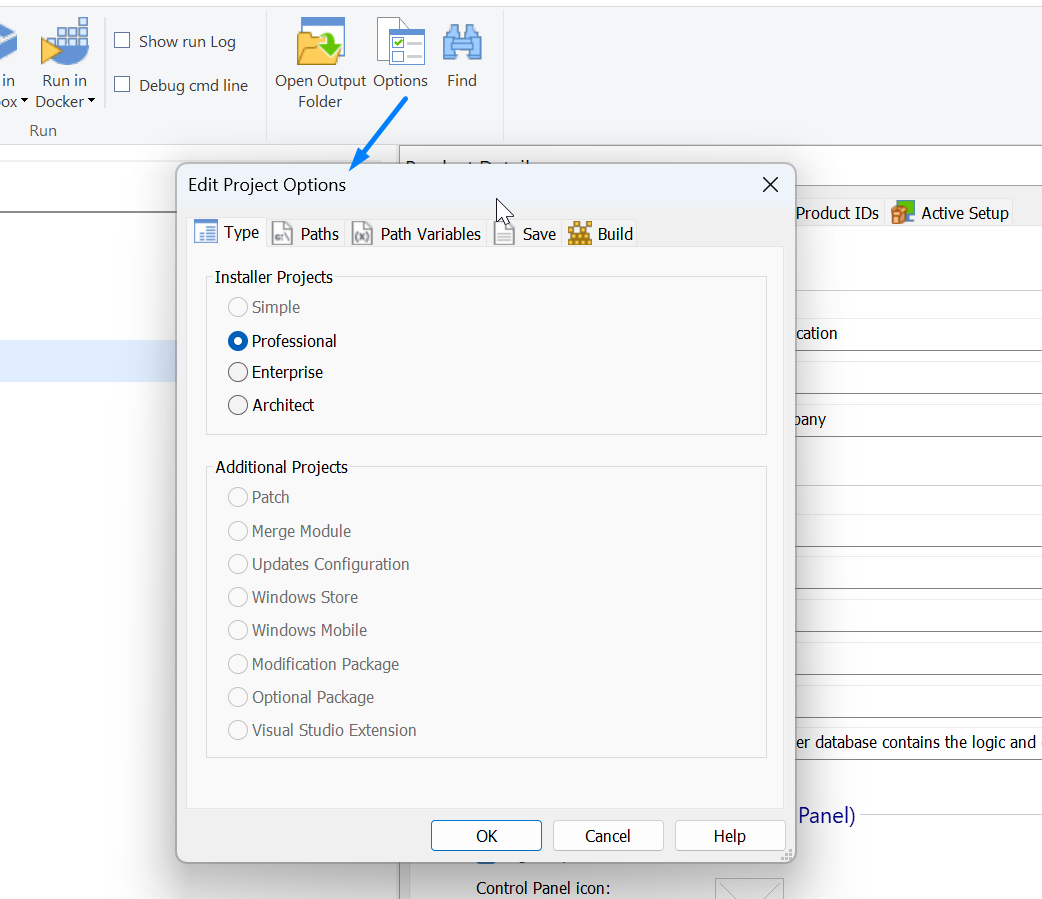
The Advanced Installer Project in Visual Studio is automatically set to the Simple edition by default.
To upgrade to the Professional edition, go to the "Project" menu in the toolbar, select "Installer Projects", and then choose "Professional" under the "Options" ribbon, as shown below:

Now simply go to the "Prerequisites" page and add your prerequisite there, according to your needs.
Conclusion

WiX Toolset is a powerful tool for installer package creation but it might take more time and effort to complete more complex packaging scenarios.
There are not many features available in the WiX Setup Editor, and most configurations require manual editing of the XML file.
As an alternative, you can learn how to create and manage installation packages using a GUI-based program like Advanced Installer.
By understanding both WiX and Advanced Installer, you can choose the best tool for your project's needs.
To see how simple it is to create an MSI using Advanced Installer, watch the video tutorial below: