How to use the USB eToken for Extended Validation Code Signing in Advanced Installer

The following article uses options that are available starting with the Professional edition and project type.
This article will guide you step by step to use an USB eToken for an EV Code Signing Certificate.
1. Export the Public key

The first step is to export the public key from the USB token.
To achieve this, open the management software associated with your USB eToken (eg. SafeNet Authentication Client) and select the export certificate option.

2. Select the Extended Validation Code Signing Certificate

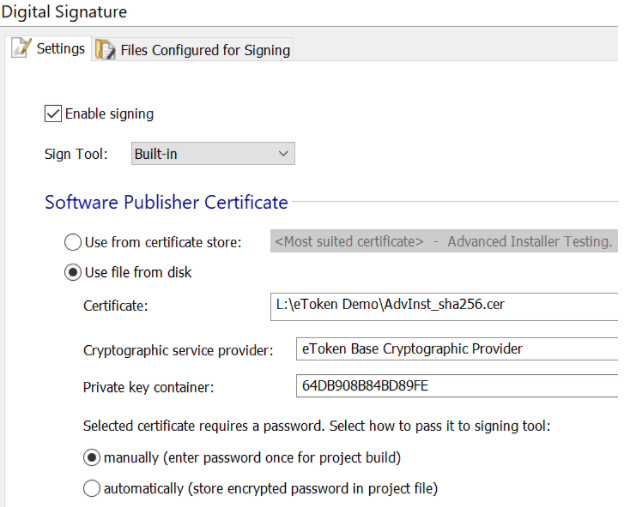
After you exported the public key of the EV Code Signing Certificate, you can select the .cer file in the Digital Signature page, in Use File from Disk option:

To be able to sign, the USB eToken must be connected to the machine where Advanced Installer is
installed.
If there are multiple EV Code Signing Certificates installed on the selected CSP, they will be automatically listed in the Private Key Container field:

Just choose the preferred one from the above list.
The build stops automatically with the below message if the PIN was entered
incorrectly 3 times in a row
Win32 Error [2148532331]: "The card cannot be
accessed because the wrong PIN was presented.
This is happening because
the eToken is blocked after 15 tries in a row with an incorrect password.
To avoid receiving multiple prompts during the singing operation (for each file
signing), make sure to enable the Enable single logon option from the
management software associated with your USB eToken (eg. SafeNet Authentication Client) .
This way, the Advanced Installer will be able to cache the password and be used during the
whole build process. With this option unchecked, each time a file is required to be signed,
a prompt for the password will be displayed.